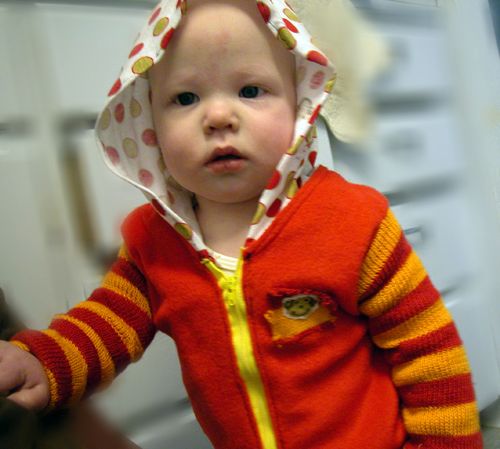
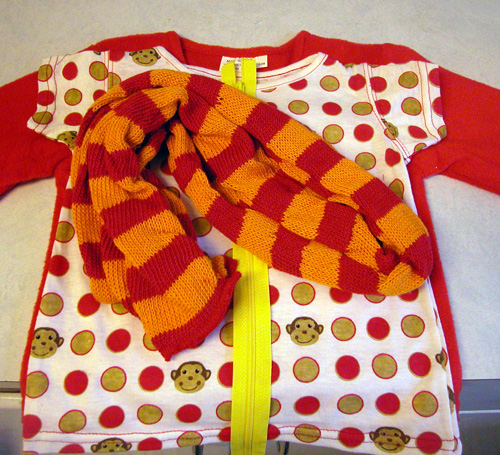
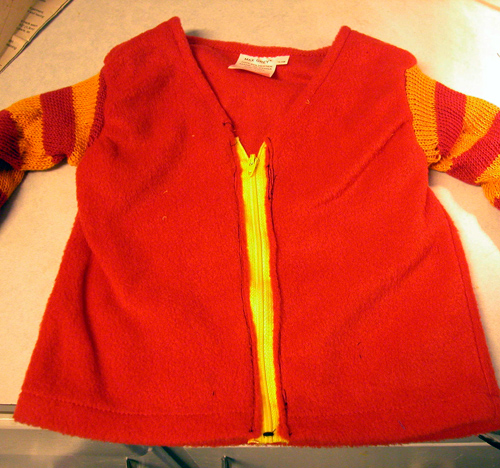
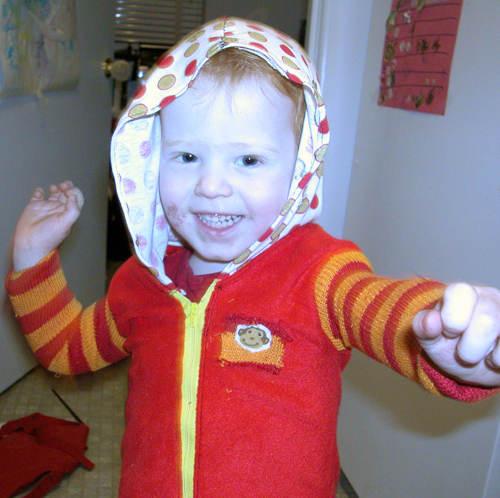
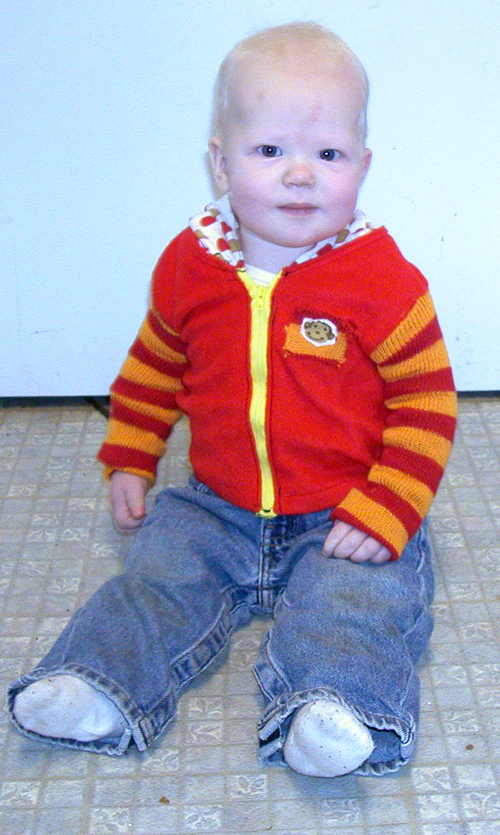
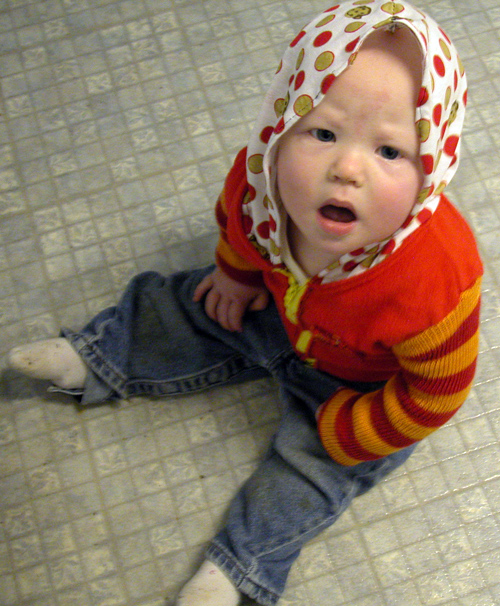
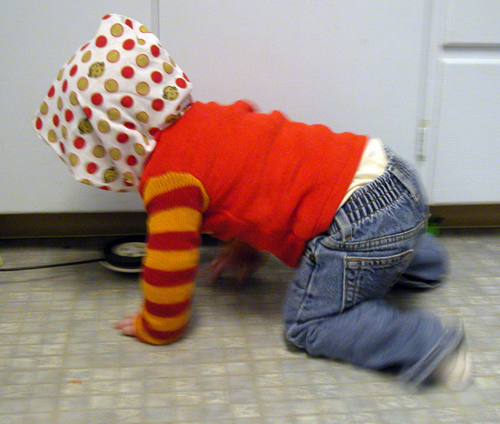
My dollar store has little fleece sweaters in toddlers’ sizes as a regular in-stock item, but they aren’t very cute by themselves. I reconstructed one into a zip-up hoodie, using a stripey scarf for sleeves, and a cute printed t-shirt for a hood.
I’m not the best seamstress, so this could have looked a lot better, but the idea is solid, I think! I’m sure a lot of you could do a better job – if you do, be sure to send me pictures!
Project Estimate:
- Toddler fleece sweater, $1
- Toddler t-shirt, $1
- Scarf (tube style), $1
- Zipper, $1
- Sewing machine/serger & thread, on hand
Total: $4
Attaching sleeves:
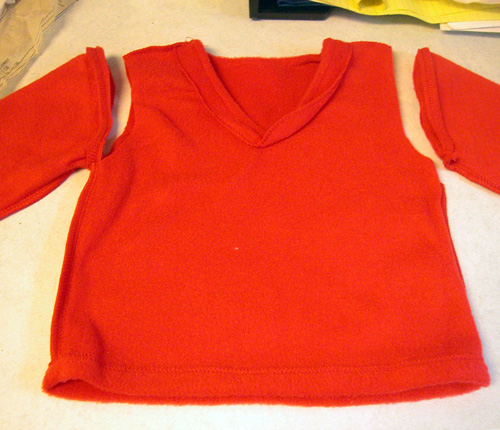
- Turn sweater inside-out. Cut sleeves off sweater, (be sure seams are attached to sleeve part instead of chest part of sweater).
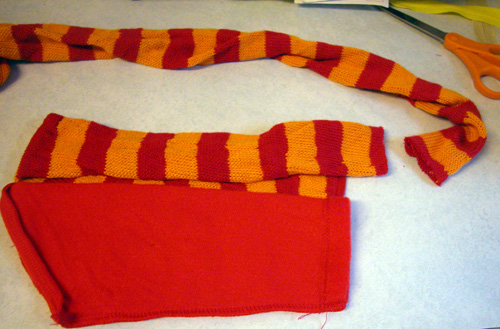
- Measure scarf length against sleeve. I doubled my scarf up to make the sleeves warmer.
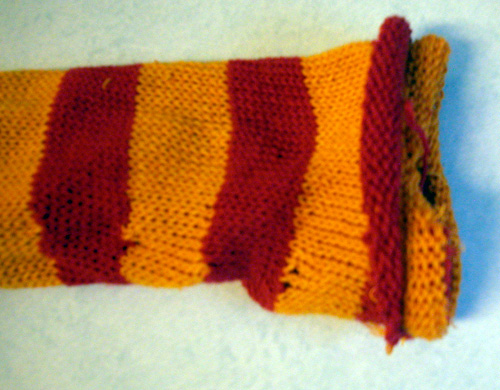
- Turn scarf piece inside out. Put your arm inside it, and roll right side back out over wrong side so piece is doubled up, as shown. (Sorry if that’s confusing! Not sure how to word it better – suggestions welcome!)
- Hem around raw edges with a zig-zag or stretch stitch to keep the raw edges from unraveling. (Construction note: It would probably be better to match the shape of the existing sleeve here – cut the top edge of the sleeve diagonally and then hem. It will match up to the sweater better that way – you’ll see in the next steps what I mean. I didn’t do that here in the prototype).
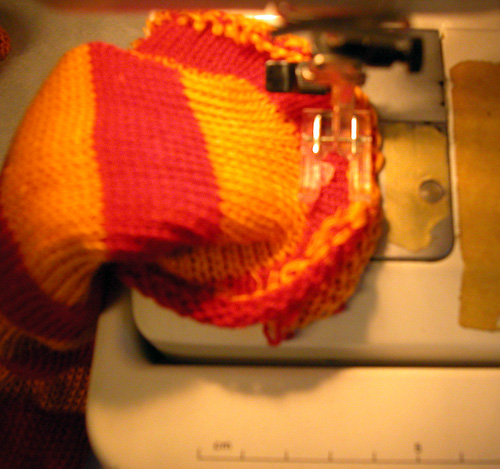
- Put sleeves inside arm holes of chest, and pin in place. Sew around arm hole edge to attach sleeves to chest.
 (See how the sleeves cause the area where they are attached to pucker? This is where the diagonal cutting of the sleeve edges would have made a nicer-looking sweater. You’ll do better than I did!)
If you don’t want to mess with a hood or zipper, this could be cute all by itself!
Stop! Zipper Time!
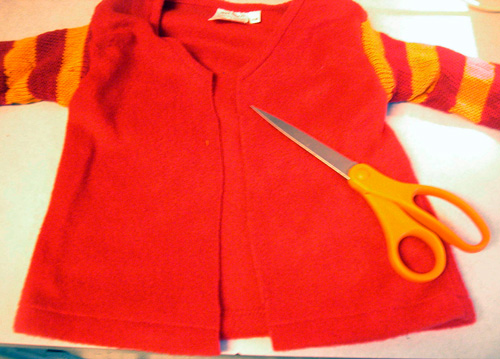
- Cut a straight line up the middle of the sweater.
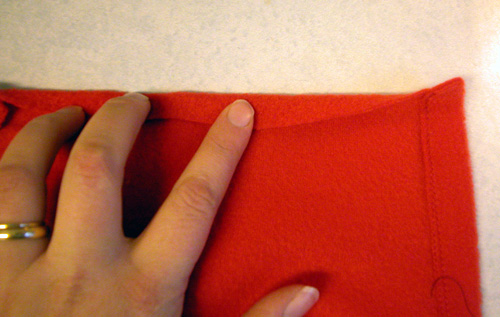
- Fold edge of center cut over (wrong side to wrong side) and pin zipper in place.
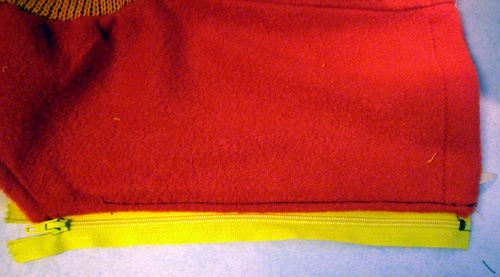
- Sew zipper along edge, and repeat for other side.
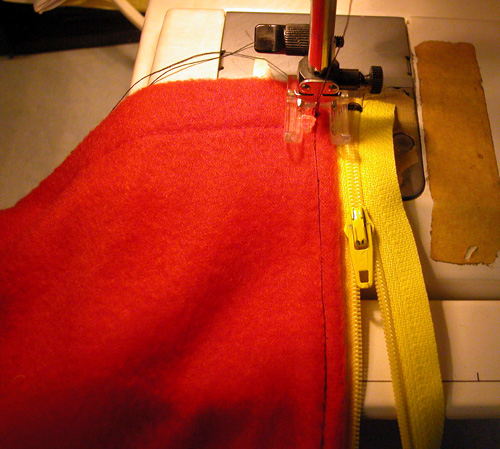
- Zip Tip: If you’re scared of sewing zippers, don’t worry – you’ll be fine! Remember to unzip the zipper so the zipper head is away from your sewing foot when it’s sewing. Adjust as necessary. You might also want to use a zipper foot on your sewing machine! (I don’t have one!)
I’m really embarrassed to show you how bad this sewing looks… my sewing machine is in dire need of a tuneup. However, like I said at the beginning of the tutorial, I still think the idea is solid! (How embarrassed am I? So embarrassed that I made this sweater last fall and I haven’t written up the tutorial until now!)
Another tip: use thread that matches your project. I uh, used black thread so you could see my work better. Yeah, that’s it!
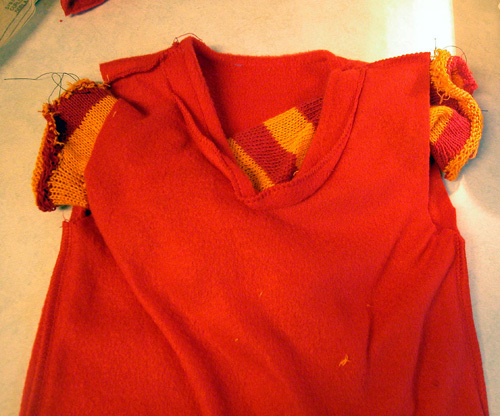
To make the hood:
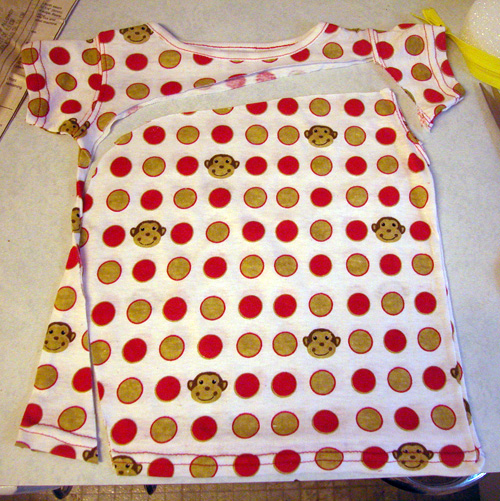
- Cut hood-shaped pieces out of t-shirt (use a hood you have on hand for a template, or just make a rectangular shape with a slight curve on the back side).
- Fold edges of front of hood under and hem.
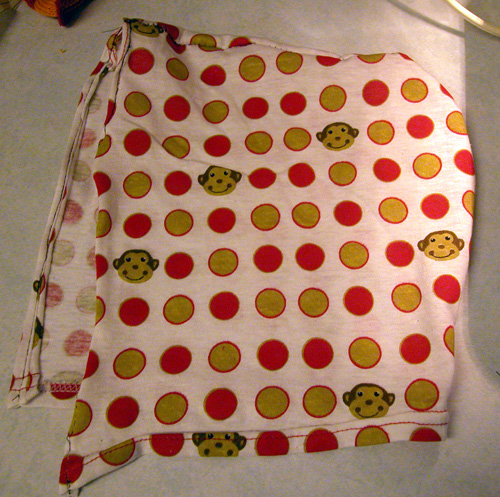
- Place pieces right sides together and sew along top and back of hood.
- Pin bottom of hood to sweater neck. If you are using a v-neck like the one in this tutorial, pin the bottom edge of the hood about halfway up the neck (not at the very bottom of the V like I did). Sorry, I guess I forgot to photograph this step.
- Sew hood to sweater.
Finishing touch:
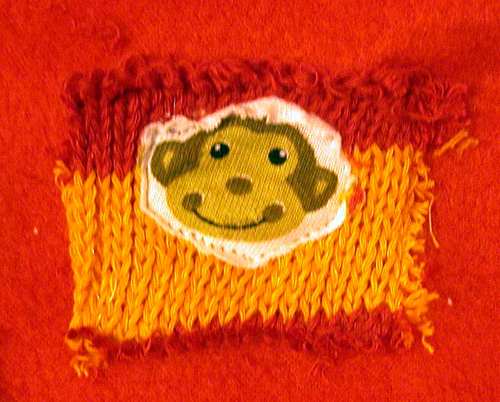
I took an extra monkey head from the leftover bit of t-shirt, and a tiny scrap of the scarf and made an emblem for the left chest section of my sweatshirt. I left the edges of the scarf square raw, but you could easily turn them under for a neater look.


23 Comments
Jessica
I think it is awesome! You did a great job!
Disney
That is a fantastic idea!! How clever of you!
Anne Weaver
Brilliant!!! I would never have thought about using a scarf to make the arms.
I linked to your tutorial on Craft Gossip Sewing:
http://sewing.craftgossip.com/tutorial-toddler-hoodie-refashion/2009/10/19/
–Anne
dot
I totally love this
!
Fawnda
I love this! So cute! I love the idea of using a scarf for the sleeves! Very creative.
Kathy V.
Your idea is really solid. What a good way to take dollar store items and mix it up into something much cuter.
Lindsey@A Kindred Spirit's Thoughts
Oh my goodness, what a wonderful photo tutorial and a brilliant idea! I wish we had a dollar store closeby. :-) It’s about 20 minutes away.
I linked this post up to my Creative Mamas Monday blog hop! If you get a chance, I would love to have you come by and share what you’re up to craft-wise on Mondays!
http://kindredspiritreviews.blogspot.com/2009/10/crochet-pumpkin-beanie-patterns.html
Becky
You sound just like me (not thinking my work is up to par). I love what you did. You should be proud!! Thanks for the lovely idea. Keep ‘um comin’
Mama Kat
Wow! Now that is talent!!
babyblooze liz
WOW! This is WAYYYY too crafty for me (can’t sew) but what an amazing idea. I love the colors you picked. Another WOW-Heather creation I say!
Elizabeth
thank you soooo much for all your great ideas!!!!! i absolutely love your site!!! this is a great idea and oh so cute!!!!!!
Care
(Tried to leave a comment earlier, but it didn’t work….)
I LOVE this! I can’t wait to try it out.
Ooooooh… Getting so many ideas!!…….
Kim Braswell
Love this site!
Rachel
Wow, this is SO COOL! I love how you combined the different colors and textures. So one of a kind. Thanks so much for sharing, I’ll be linking to this.
Melia
I love it!
Amanda
How clever!! I’m not a seamstress at all, I just stick with crafts LOL This is really adorable, great job!
lora
some of you guys have the grates ideals.i copy them i hope its ok ?I’M A GREAT GRAND MOTHER SO I LOVE ALL YOUR TALENTplease im not yelling im not great on the computer i have 12 great grand tthank you and i will give credit to you guys not me
luvdug
You are OTT! (over the top!)
Katie
Wow! great idea! and VERY cute!
charmane
i tweeted this on twitter…why no link to tweet on your site?
heather
@charmane: good question, I totally thought I had a “tweet this” button… I’ll check it out! :)