
Sugar skulls are a traditional part of the Day of the Dead (aka Dia de los Muertos) decorations and ritual. Usually they’re not made to be eaten, but I found these cool skull ice cube trays at the dollar store, and I thought it would be fun to make edible skull decorations. Making edible skulls is cheap, and so easy even a preschooler can do it. I made a batch of them, and after I was done, my 4 year-old used leftover sugar mixture to make a skull all by himself with no help from me. Check out the video (subscribe), or the written instructions below.

These sugar skulls by Crafty Chica
These differ from traditional skulls because they don’t use egg whites or meringue powder, and therefore are not as hard. Traditional sugar skulls (or “calaveras”) are hollow, decorated in colorful icing, and put out to commemorate the dead. These are firm, like sugar cubes, but you can bite into them. Use these as cupcake toppers, or as a creepy sugar cube to serve with your Halloween or Day of the Dead tea or coffee. Decorate them with royal icing to make them look more like traditional sugar skulls (or use Crafty Chica’s shortcut and use mini tubes of frosting from the grocery store).
This project works with any mold, so think beyond the skulls!

Project Materials:
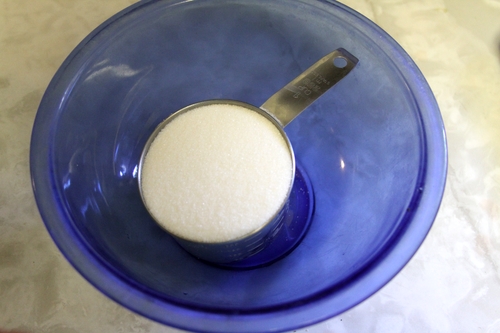
- 1 cup granulated white sugar, on hand
- 2 teaspoons water, on hand
- Silicone ice cube mold (skull shaped), $1
- Piece of cardboard or cookie sheet, on hand
Total: $1

Put 1 cup of granulated white sugar in a mixing bowl. Make an indentation in the middle of the sugar and add 2 teaspoons (yes, the itty bitty ones!) of water to it. Squish the mixture with your fingers for about one minute until completely incorporated. Make sure there are no lumps of dry sugar. When it’s mixed, it should feel like wet sand.

Fill the molds with sugar and pack tightly. Level top off with a flat spatula or scraper.

Put a cookie sheet or piece of cardboard on top of the mold, then turn over and unmold the skulls immediately.

Let the skulls dry 5 hours or overnight, or put them in a 200° F oven for 5-10 minutes to help them dry more quickly. When they’re dry, you can decorate them. Use royal icing, mini tubes of frosting from the grocery store, or colored candy melts to decorate the skulls to resemble the colorful Day of the Dead skulls.
Additional Resources:
- Sugar Molding from Wren’s Cottage
- Projects: Sugar Skulls from Diary of a Crafty Chica


37 Comments
Kathy V.
Your demonstrator did a great job of telling us what to do and demonstrating it. I’m impressed. You can tell him so from me. =)
J. Hill
I love this idea for cupcake toppers! I am going to keep my eyes open for all kinds of these ice cube trays now. Thanks!
Amy
These are so cute! We’re having a media night at a local haunted house (long story, my work is really weird) and I’m totally going to make these!
Jan
GREAT demonstration! I really would love to make these for cupcakes and cast resin! I so wish my town’s dollar store carried these molds. I’ve been there several times since they started putting Halloween stuff out, to no avail. Anyone out there willing to pick two up for me and send them to me in Canada? My dime of course! -Jan
Tauni
Very cool. My boys would LOVE these. Super cool and sort of spooky. This looks like the perfect activity for a lazy afternoon.
I loved the apothecary jar you posed the other day. I’ve made my own and can’t wait to incorporate them into my Halloween decor. I will let you know when I post about it.
Beth
Wow that is awesome! Thanks for sharing, can’t wait to make these!
Andi Fasimpaur
You can also add some flavoring to the recipe so that they’re not plain sugar if you’re actually planning on eating these. Was just admiring a brain icecube mold a little while ago, I may have to go back for it now.
heather
@Andi, yes, thanks for the great suggestion. If you use flavoring, add less water so the total liquid is still just 2 teaspoons.
Krysten
THIS IS FABULOUS! We want to do a Day of the Dead party this year – love this idea!
Thanks so much!
Krysten
Clickable Party
Jenn Erickson/Rook No. 17
Whoah, that is absolutely brilliant! I bought those trays at $Tree a few years ago to use for chocolatiering. I’m so excited about this absolutely fabulous idea! I’m going to share a link with my readers on my FB fan page.
heidi wendland
I made these tonight but added flavor extracts to them. They smell so good. I hope they tast good too.
Carrie
You could even add some food coloring to them as well…or decorate cupcakes with them.
Jo Anne
Flippin genius!!
Condo Blues
I stalked my Dollar Tree for three weeks looking for the skull ice cube trays. I snagged a couple the day they were putting them out on display.
I use them for ice cubes (original I know) for my small one eyed dog. Because when you have a one eyed dog, every day is Pirate Day An ice cube treat cools him down after a walk.
Alex
WAY COOL! I CANT WAIT TO MAKE THESE! although i don’t HAVE the ice cube trey…………. were can i find the treys? MMMMMMMMMMMMMMMMMMMMM those suger skulls look SO GOOD!
Alec
its killing me! THE SKULLS LOOK SO GOOD! does anyone know were i can find those treys? id love to make them. MAN! ITS KILLING ME! hmmmmmmmmmmmm i wonder if you can MELT a normal ice cube trey and MOLD the TREY into the skull trey! if anyone trys that please tell me. thanks
Erin
just tried to do this with splenda. not really working. if you use the recipe here it just turns very syrupy. I’m sure one could experiment to get the proportions just right, but I just don’t have that kind of patience.
heather
@Erin, thanks for reporting on your findings. Maybe just a drop of water at a time until it feels like damp sand?
Jackie
Hi Heather
I love these, and the video is neat! So easy a 4 year old kid can do it :) I will be trying it with my son next Halloween.
Definitely “thumbs up”!
Miss Kelly
I am a teen librarian and I use the ice cube trays and made melt and pour soap and plaster of paris molds that the teens decorated with markers and paint. Big hit.
Rosemary Kojis
This is Fantabulous!! Going to make an extra trip to my $ store tomorrow!!
So easy & fun! Thank~you!
Jez
Thanks for the idea!!! Small comment: Sugar skulls are meant to be eaten
jojo
Can you make them without the mold like with you’re hands?
elissa
quick question…if i use icing to decorate is there a way to get that to harden as well? hoping to do this as a craft and then send home with the kids… not sure how to do that if the frosting stays wet? ideas?
Thank you!!
heather
@Elissa, you want to use an icing that is designed to harden – Royal Icing should work. http://www.wilton.com/recipe/Royal-Icing
fresita
I have a couple of questions
I want to make sugar skulls for my students but I am still debating what to do. One of the recipes I saw uses moraine powder but I am not sure if that makes them really hard to bite into.
If I use the recipe on this website and I let them sight for 5 hrs or bake them, will they get hard enough to hold its shape but not too hard to bite into?
Would royal icing be the only type of icing we could use because it hardens? I dont think fronting would really work, right?
Hope my question makes sense