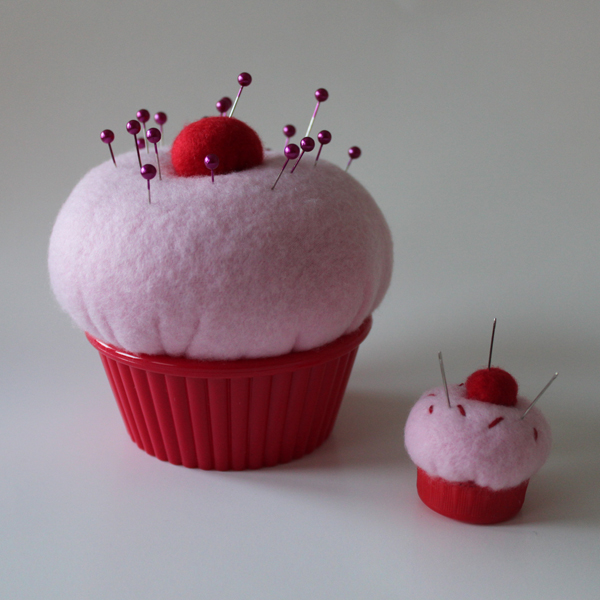
 It’s January! I can hardly believe it. January is not my favorite month of the year — where I live it is just plain dark, dreary and cold! So, at the beginning of the year I like to take a little time to freshen things up around my home. Today I will share how I made these cute pin cushions to sweeten up my sewing area — with just a few supplies you probably mostly have on hand!
Also, is it too soon to be thinking about Valentine’s Day? Because I certainly am! It is one of my favorite holidays — just for the cuteness factor — and a great excuse to make and give cute red and pink things for my sisters and friends! Wouldn’t one of these pin cushions be a perfect Valentine goodie for a friend who sews?
Project Estimate:
- plastic ramekins, 3/$1
- fleece scraps, on hand (don’t substitute felt — you’ll be disappointed!)
- polyester fiberfill, on hand
- needle and thread
- drill (optional)
Total: $0.33!
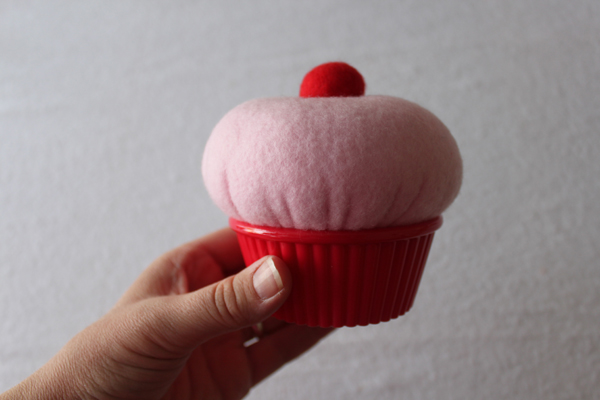
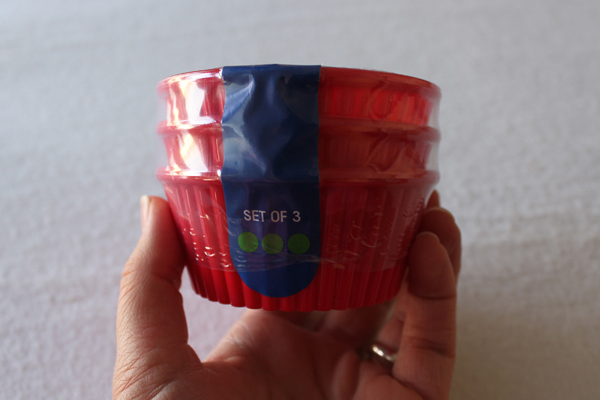 I found these adorable “ramekin sauce cups” at my local dollar store, and instantly knew what they were destined to be. They look just like cupcake papers!
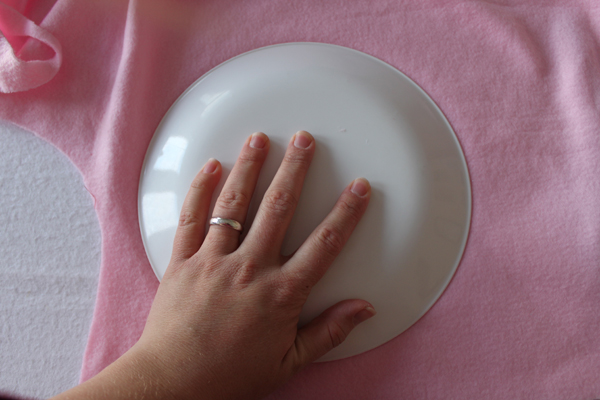 Start by cutting a circle from whatever color fleece you want your frosting to be. I chose pink, of course! My circle was 8 1/2″ in diameter. Here’s a trick — use a plate (or other round container) as your pattern. If you press it onto your fleece…
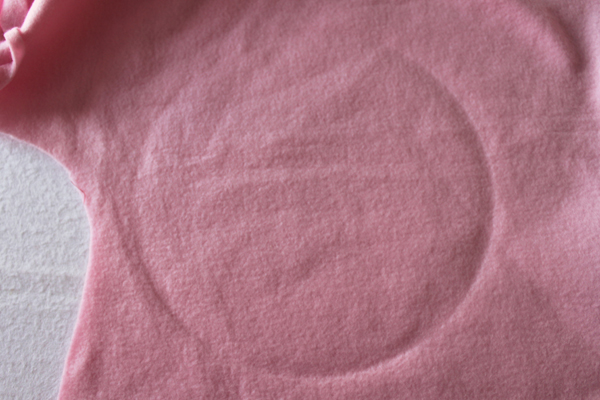 …you’ll have a perfect circle imprinted on the fleece, which you can very carefully cut around. Nothing to trace, nothing to pin!
 Take a needle and thread and knot the two ends of the thread together. Stab your needle up and down 1/4″ from the edge of your circle, all the way around. You can thread the fleece onto your needle as shown to make it go very quickly!
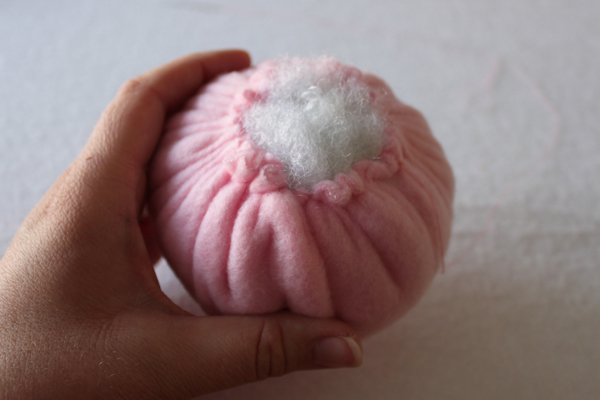 Stuff your cupcake top as stiffly as you can, and draw up the thread tight. Tie a firm knot, but don’t cut your thread.
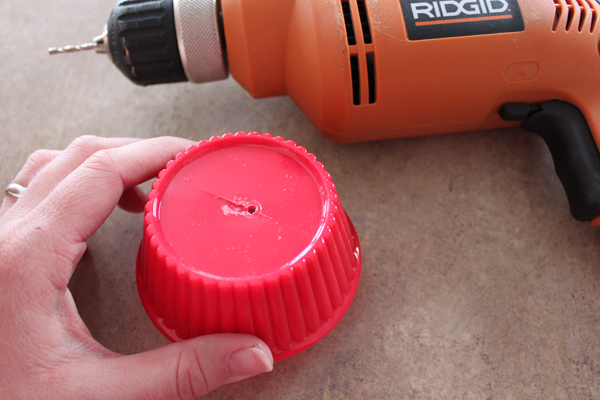 I drilled a hole in the bottom of my ramekin. I wanted two holes, but — I am not super skilled with power tools! I should have started with a smaller bit, then made the holes bigger with a larger bit. But, as it is, I used too large a bit and cracked my ramekin. No problem, though!
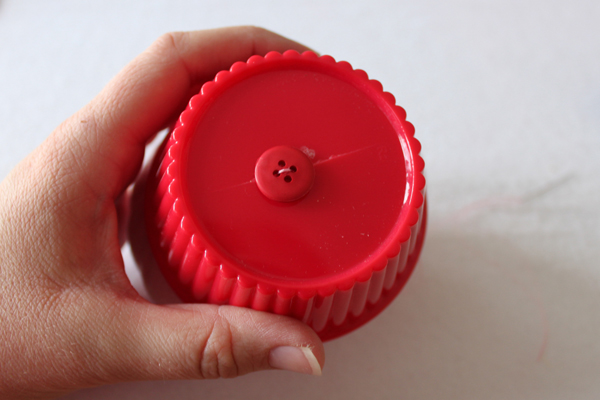 I used a small, flat button on the bottom to compensate. No big deal!
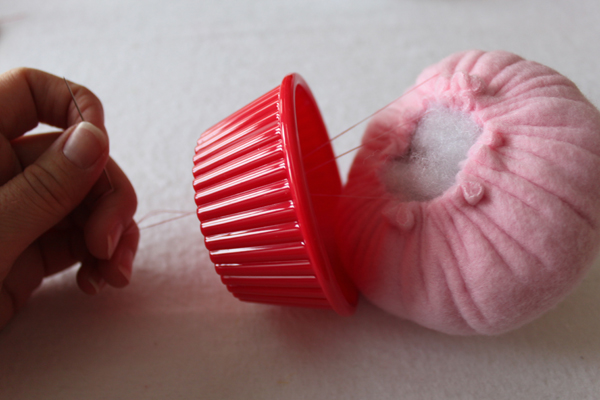 Pick up your same needle, and sew down through your ramekin, then back up into the edge of your cupcake top. You can leave your thread loose until you have three or four passes through, then pull your thread tight and tie a firm knot.
Use the same technique to create your cherry from some red fleece (I started with a circle was 2 1/2″ in diameter) and attach it to the top. You’re done! If you like you can embroider some sprinkles, too. I couldn’t decide whether I wanted them, so I left them off.
I am sure there are numerous other ways you could dress these guys up! How would you embellish them?
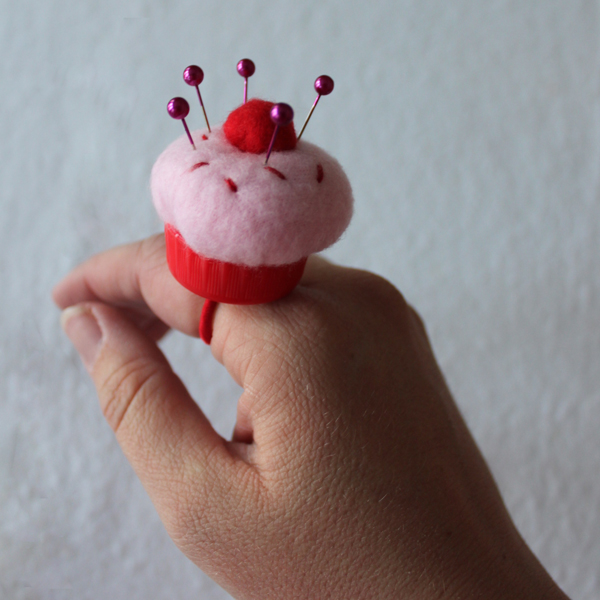
Being a lover of all things tiny, I couldn’t pass up the opportunity to make a mini version — which can easily be made into a ring! Head over to my blog if you’d like to see how I did it!
Caroline Sanchez (Care) has been sewing since her mom taught her the basics at around six years old. She has always been driven to CREATE, even from a very young age. She is mommy to two little boys and one little girl, and almost every spare moment she has is spent in her sewing room or working on her blog, Obsessively Stitching.


42 Comments
Yael
So cute!!! and so easy to make! thanks for the tute!!!
Diana
you might find a hot darning needle makes a quick job of making a neat hole in plastic. use pliers to hold the needle on an electric or gas burner.
Rhonda
Very adorable, Care! If you put multi-color pins in it and pushed them all the way in they would look like sprinkles!!
(And I know how you feel about January! I live in West Michigan and because of the lake it’s pretty much always overcast; we count ourselves lucky for every ray of sunshine in the winter!)
More Than A Mom
Great job. Never thought about using a drill (or button) but what a great idea!
heather
These are so cute, Care! And thanks for the the hot darning needle tip, Diana!
Monica
OMGOSH! These are super duper cute! Thank you for sharing!!
Care
Hot darning needle! Thanks, Diana — I will have to give it a try! :-)
Jenny @ DIY Newlyweds
This is adorable!
Julie Bagamary
Very cute and practical too!
Brandi Scardina
I LOVE THIS! so cute! im a craft and cupcake lover so i cant wait to try this one :)
Tabitha
I love this so much! Cupcakes are always adorable and yours is no exception. Thank you so much for sharing!
Amy G.
So so cute! However I think I’m too lazy for the drilling part – I’d probably just hot-glue the muffin top onto the ramekin.
kristy
That is just adorable!
Carla
Super cute!!! Thanks for sharing ;O)
Aimee W.
I absolutely HAVE to make these! I went to my Dollar Tree today and couldn’t find any ramekins! Did you visit a Dollar Tree or was it another named dollar store?
Care
Hi Aimee,
It was Dollar Tree! I hope you can find them! :o)
Care.
Rachel
And the cuteness just keeps coming! I love this, I’ll be linking.
Doris Sturm
These are absolutely adorable….they look yummy too ;-)
Gloria
Will be heading to DollarTree tomorrow! Already have two friends in mind to make these for, can’t wait to get started. These are just too darn cute!
Amy
This is so cute. I love miniature things to. Perfect for when you are sewing and need to grab or put in pin away quickly!
Katie
I featured this tutorial on my blog here: http://punkprojects.blogspot.com/2011/01/make-it-monday_10.html
xo, Katie
Esbe Chic
I had to share on my site too :)
http://www.esbechic.com/1/post/2011/01/cupcake-pin-cushions.html
K.O.S. Murray
Just love the ring cupcake. I too see some things that get my creative juices flowing. Thanks for sharing.
Holly Day
Oh wow! I love this cupcake craft! Not long ago, I fell in love with a page that was featuring a bunch of pin cushions but none of them were cupcake shaped.
Since I was in reality looking fur cupcake shaped pin cushions, I was a bit upset. I’m going to add your page to my bookmarks so that I can get back when I’ll have the needed materials. Think I’ll make some to give my family as well!
Marquita
This is flipping adorable and I will DEFINITELY be making one! However, may I suggest a little tip I’ve used a bunch? Instead of using a drill to make the hole, work in a well ventilated area, turn on your hot glue gun, and when it’s hottt, gently work it into the plastic of the ramekin. It won’t crack, and it leaves a small, perfect hole that you can make up to about 1/2″ in diameter, depending on how deep you push in the gun. I’ve done it to gold, plastic Christmas ornaments to make “champagne bubbles” for a fountain I made not too long ago. It takes roughly the same amount of time as drilling (not very long at all) and there’s no worry about cracking the plastic :)
cupcake christy
anyone know where to find the ramekins?
Care
cupcake christy,
I found them at my local DT, but that was quite a while ago.
Best of luck!
Care.
Natalie
I’m still using a tomato pincushion. This looks like a better and much better looking alternative. I’m excited to get one made!
Darby
I finally found the time to go cross-border shopping (much love from Canada!) and haaaad to scout out a Dollar Tree to get these ramekins! Can’t wait to make these cuties :)
Lindy@Itsy Bitsy Paper
I just featured these adorable pin cushions on Fun Friday Finds. They are too cute!
http://www.itsybitsypaperblog.com
Lisa
Going to make this for sure.. what’s the hot darning needle tip.. dying to know :)
rhonda
Lisa, you heat up a metal darning needle (using a candle flame, gas stove, cig lighter, etc.) then while it is hot you press it through the plastic. It makes a perfect hole without the need for a drill! :)
cathy d
These are adorable!! I may try some:)
AlineCarolle
Just want to say: I made it!
Last week I ran into a box of ramekins and I bought them right away so I could make this pincushion =D.
My ramekin is fuschia, my ‘cake’ is dark fuschia and the ‘cherry on the top’ is bright pink. Then I stitched soms ‘sprinkels’ on it, a mix of purple and aquablue thread.
That’s it!
JUANITA
FANTASTIK!!
Deb
Great idea!