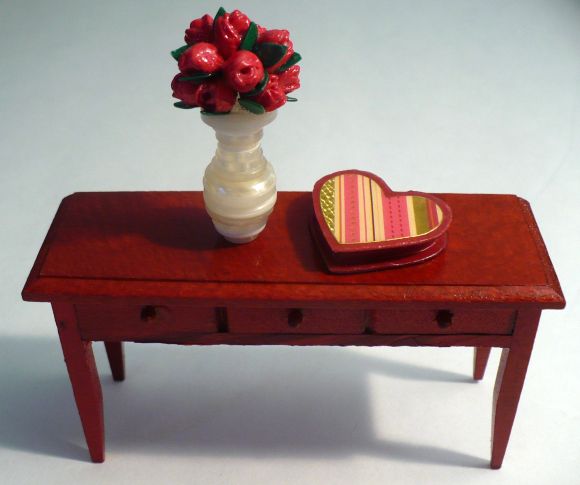
I’ve been shifting my crafty gears into Valentine mode this past week. Continuing with my all-things-tiny obsession, I decided that just making a miniature heart-shaped candy box wasn’t enough. When I came across the ric rac rosette necklace tutorial at Craftify It, I knew that a dozen itty-bitty roses in a wee vase would be perfect! After much deliberation over how to construct a vase, I had a revelation: stacked buttons! And what crafter doesn’t have a ridiculous stash of those laying around? I couldn’t be happier with how it came out. It makes me giggle just to look at it!
Project estimate:
- Buttons, on hand
- Ric rac, on hand or $1
- Green paper, on hand
- Craft paint (optional), on hand
- Glue, on hand
- Mod Podge, on hand
Total: Free and up
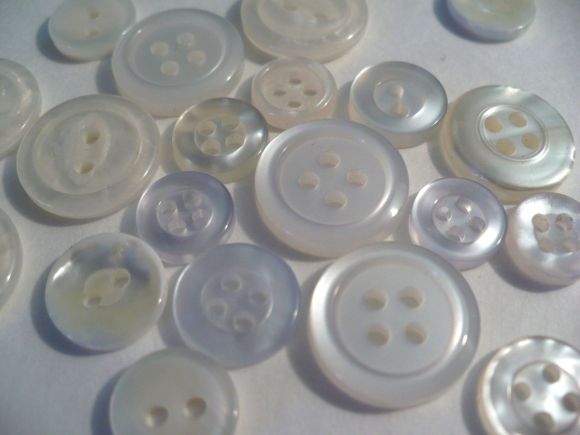
To make the vase, you will need buttons in varying sizes. I used 14 buttons, but you can use more or less to get the size and shape of vase you want.
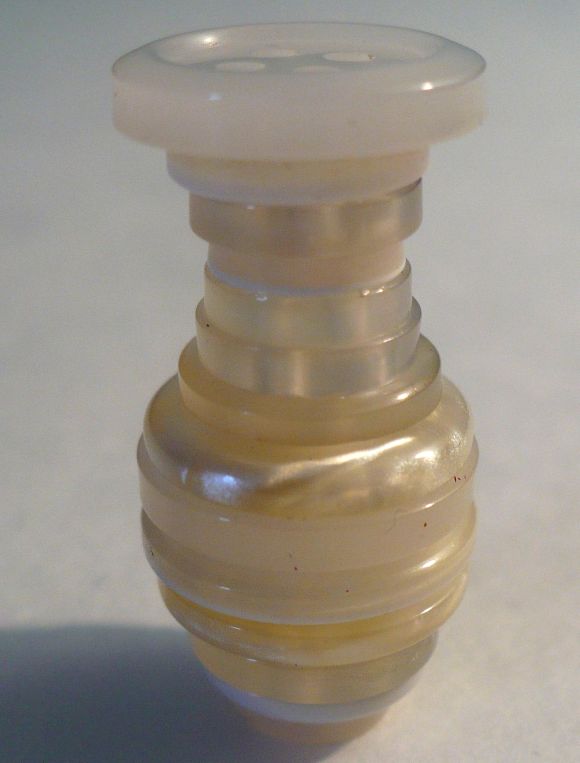
Stack the buttons and glue them together, working from small buttons to large buttons, then back to small and up to large again. This will create the classic shape of a vase.

To make the roses, I used the ric rac rosette tutorial from Craftify It. I wanted red roses, but the only red ric rac I had was too wide and made roses that were too large for my vase. I did have skinnier ric rac in white, so instead of buying new ric rac, I made white roses and painted them red with craft paint.
Cut the ric rac into sections about 2 inches long to make tiny roses. Before you roll them, coat the ric rac in Mod Podge, then hold the rolled rose until it dries to make the roses hold their shape. If you are painting your roses, roll them first and then apply the paint after the Mod Podge dries.
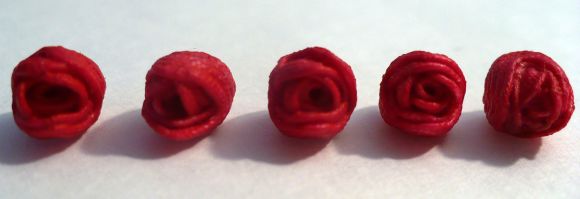
Keep working until you have a dozen roses. (Aren’t they adorable??)
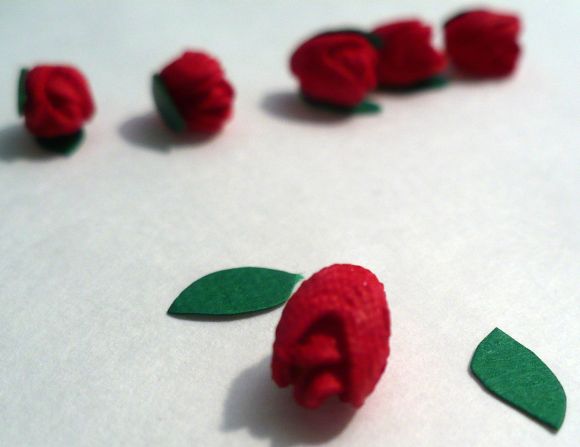
Cut leaf shapes out of green paper. Glue one or two leaves to each rose.
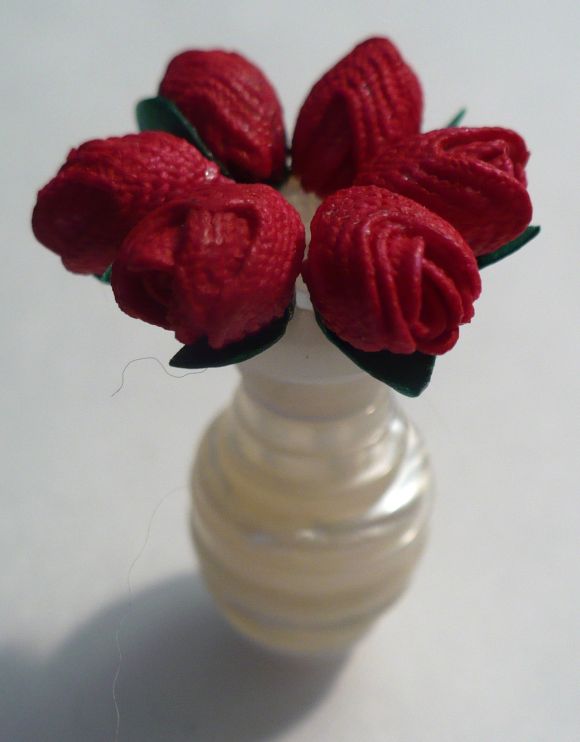
Glue six roses in a circle around the edge of the top button. After the glue is dry, make a second circle on top of the first with five roses; place the final rose in the top of the bouquet.
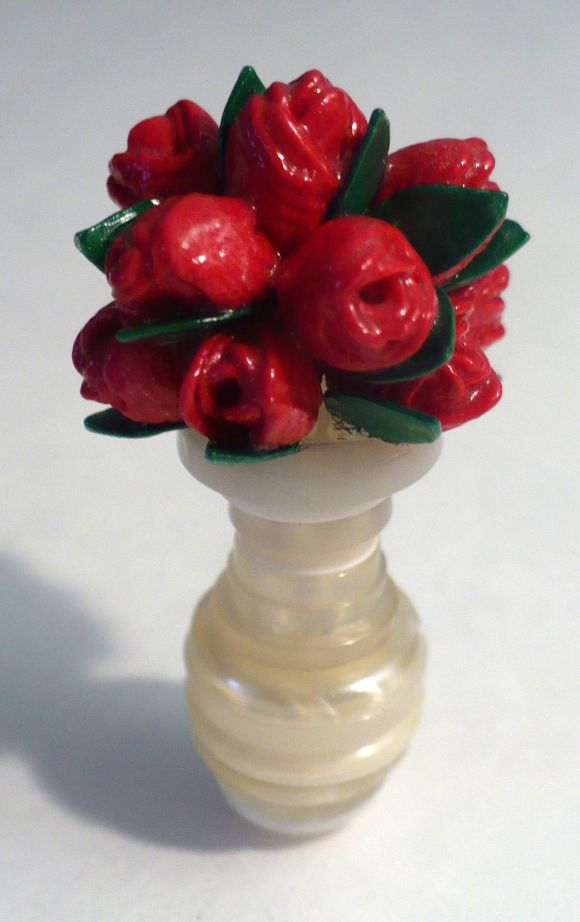
Paint the roses and leaves with several coats of Mod Podge to make them more durable. I’ve dropped mine on hardwood floors about a dozen times and it’s none the worse for wear, so they should hold up well when played with!
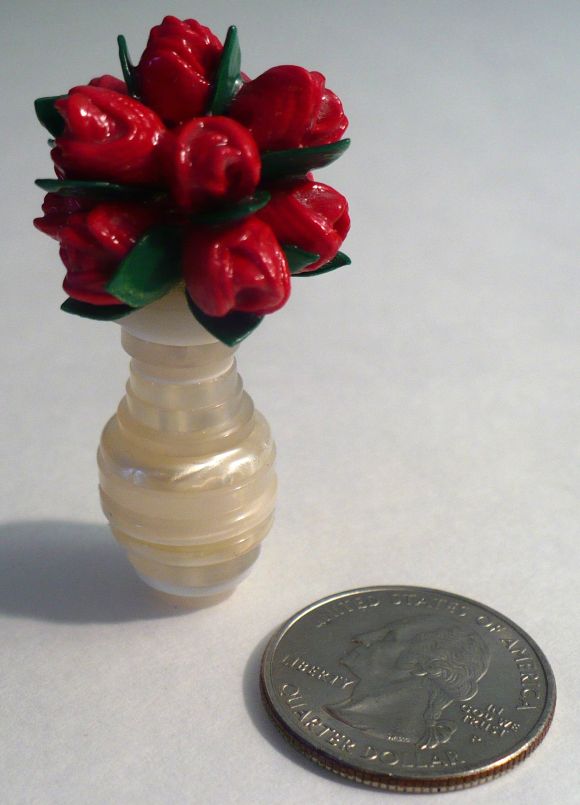
I still can’t believe how tiny the whole thing is!
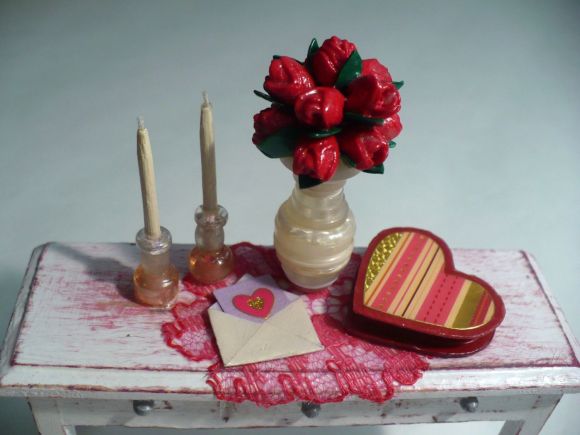
Also seen here: [how to make a miniature heart-shaped candy box][how to make a miniature Valentine’s Day card][how to make miniature candlesticks and taper candles]


17 Comments
Eva
Waw! This is so cute! Thanks for this tutorial. Really amazing.
sarahwww
Absolutely adorable!!
Care
looooooooooooooooove!!!
J. Hill
Adorable! But now I have the “Painting the Roses RED, we’re painting the roses red” song from Alice in Wonderland stuck in my head! :P
Rachel
So many adorable tiny things this week. It makes me miss having a dollhouse! Thanks so much, I’ll be linking.
Anne
Awesome. And am I the only one who heard Disney’s Alice in Wonderland song “We’re painting the roses red” running in their head?
MsJoyceG
Cute “as a button” Ha ha giggle. I
m not “into” minitures .. but this is very very cute. TFS
April
So cute! Bah-I am loving these miniature tutorials. I’m currently making a dollhouse for my niece so it’s perfect timing!
Mod Podge Amy
This is so stinkin cute! Rhonda has talent!
Karen
Your other miniature tutorials are very cute, but this little vase of roses takes the cake!! Wow! Keep ’em coming. :>)
Country Girl in the City
Oh, these are sooooo cute!!! Now I really want to make some…… Thanks for sharing!!
Hilary K.
Did you sing “we’re painting the roses red” like in Alice in Wonderland?? I love them but when you painted them red that was all I could think about! :D
Jenny B
How adorable! I’ve been wanting to do a project with those ric-rac rosettes, and I love what you came up with! I can never get my stacked buttons to come out quite that nicely – I think that’s a good excuse to expand my button selection – right?? Great job :)
Dee
So clever! I love how you used the buttons for the vase!
Pamela Collins
wow!