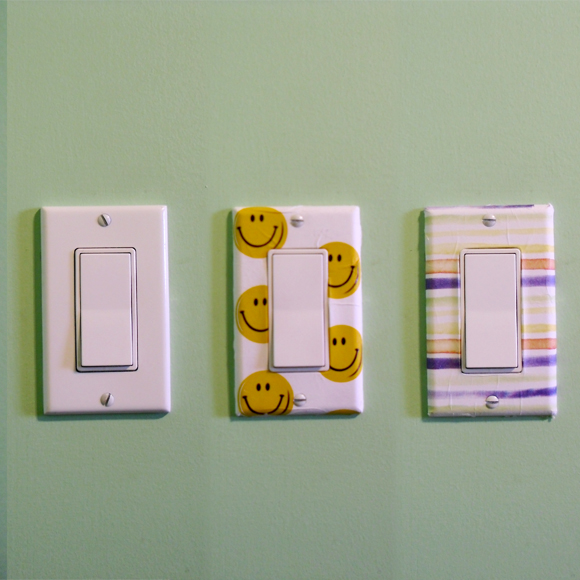
Bring some much needed attention to your otherwise dull light switch covers by covering them with funky patterns, for super cheap! Most covers are utilitarian by design: a simple piece of molded plastic used to conceal the switch/plugs and electric wiring. Boooring.
This project uses sheets of patterned wrapping tissue applied to standard plastic light switch covers to bring a little excitement into any room. You can substitute paper napkins in place of the tissue wrap, the technique is the same.
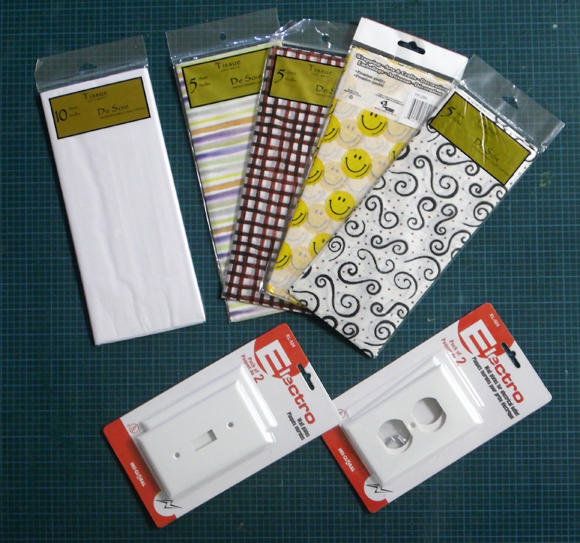
Project Estimate
light switch/plug cover (2pk) ($1.00)
white tissue paper (10 sheets) ($1.00)
patterned tissue paper (10 sheets) ($1.00)
sponge / brush ($1.00)
Total: $4.00 – $8.00
The holidays are a great time to find unique things for projects that can be used later in the year, such as the tissue paper I found in the wrapping paper section of the Dollar Store. If you want a year-round look, stay away from anything too festive (santa, christmas trees, reindeer, etc.)
Each cover only uses a small portion of tissue (1/8th of a sheet per cover!), so you can use the remainder to wrap presents or make even more switch covers!
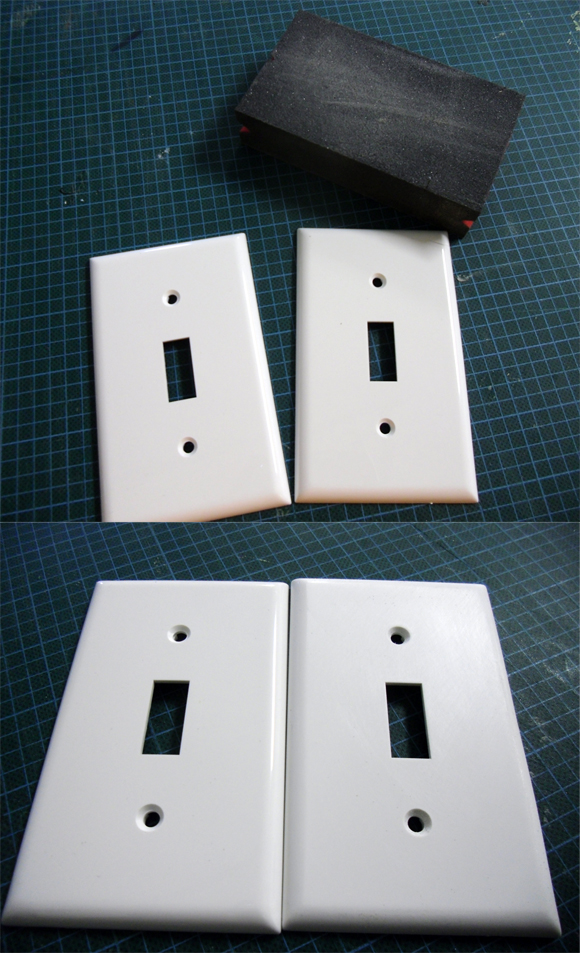
Using a medium-fine grit sandpaper (150-175grit), lightly sand the shiny surface of the cover, make sure to sand over the edges, too. The light switch cover needs to be roughed up to allow the paper covering to stick when glued, without sanding the paper transfer is likely to fall off.
.
It’s a good idea to lay out your materials in advance, as you may have wet fingers when applying the paper.
Sheets:
Cut each sheet slightly larger than the cover.
One sheet of pattern per cover.
Glue Mix:
2 parts white glue (about 30ml [1oz])
1 part warm water (about 15ml [0.5oz])
yield: 6 covers
Once the glue solution has been mixed, dip the sponge into the solution and apply a thin coat to face and sides of the light switch cover. To let your patterns really pop it may be advisable to apply a base layer of white tissue prior to applying the patterned sheet, similar to priming a surface before painting.
Also, because tissue is so thin I would recommend only applying one sheet of patterned paper to each cover. Applying a second pattern over top of the first, even if it’s the same design, has the possibility of creating a distorted double-image look.
.
Application:
Lay a sheet of dry white tissue on top of wet light switch cover surface, then use the sponge and apply more glue solution on top the white sheet. Next, apply one sheet of dry patterned tissue wrap, dab with more glue solution. I was able to do about 2 covers at a time without the glue drying out too much between applications.
Once patterned sheets have been applied, carefully fold excess tissue sheets over edges and back of the switch cover.
With the tissue still wet, it’s time to expose the centre opening. Using a sharp knife carefully pierce the centre opening of each cover and gently fold back/smooth the tissue until the tissue forms a tight skin around the light switch cover. For now, leave the screw openings as they are small and can easily be created when tissue has dried. The excess tissue found around edges and back of switch cover can be removed by gently tearing the tissue at the cover edge (as shown in picture). With the tissue wet this should be easy, just go slow to ensure the tear doesn’t run onto the cover face. Apply more glue solution as required to stick down any errant tissue.
Prop covers from the underside, allowing the sides and edges exposed to dry, leave to dry for a few hours at room temperature.
It’s time to install them around your house or apartment. Maybe smiley face ones in kids rooms, and some nice pastel pattern in the bedroom. This cheap and simple modification is sure to bring a little extra fun into any room. And if your tastes change these covers can be stripped down to the base plastic with a new pattern applied, or they are inexpensive enough that you can just make new ones.
Mike made his own toys as a kid, a few decades later not much has changed. A strong believer in DIY, getting messy and of course the Dollar Store, he can be found collecting stuff for his next project around the rainy streets of Vancouver, BC. He has had projects featured on Make, Hack-a-Day, Gozmodo, Betty Crocker, Lifehacker, and Craftzine. Aside from making Man Crafts he also creates wacky things over at Instructables.com.
Disclosure: this article may contain affiliate links or other forms of sponsored content. Opinions are 100% the author's. Full disclosure policy.
4 Comments
heather
Good idea! I wonder how it would work with heavier paper?
I used spray adhesive – available in most craft/hobby shops – with scrapbook paper, topped by Krylon matte finish, so the paper wouldn’t stain. Matte finish is sold with the spray paints at Mal-Wart, about three bucks a can. Works great with posters, too. Those switchplates held up for over two years. They’re probably still going strong, but we moved and I forgot to take my plates with me !
Jayma
I have used this idea, but instead, with scraps of fabric that coordinate with the comforter and curtains! A very fun, cute and CHEAP way to dress up a room.
 Using a medium-fine grit sandpaper (150-175grit), lightly sand the shiny surface of the cover, make sure to sand over the edges, too. The light switch cover needs to be roughed up to allow the paper covering to stick when glued, without sanding the paper transfer is likely to fall off.
 It’s a good idea to lay out your materials in advance, as you may have wet fingers when applying the paper.
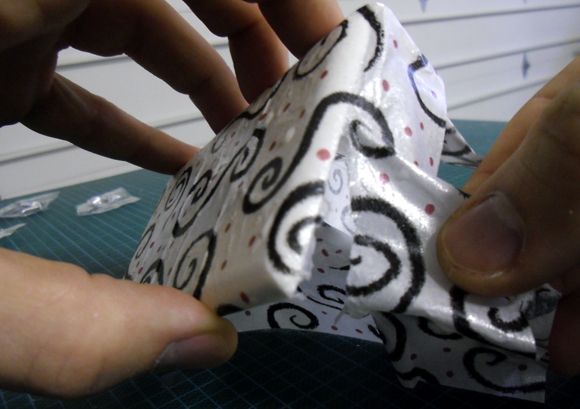 With the tissue still wet, it’s time to expose the centre opening. Using a sharp knife carefully pierce the centre opening of each cover and gently fold back/smooth the tissue until the tissue forms a tight skin around the light switch cover. For now, leave the screw openings as they are small and can easily be created when tissue has dried. The excess tissue found around edges and back of switch cover can be removed by gently tearing the tissue at the cover edge (as shown in picture). With the tissue wet this should be easy, just go slow to ensure the tear doesn’t run onto the cover face. Apply more glue solution as required to stick down any errant tissue.
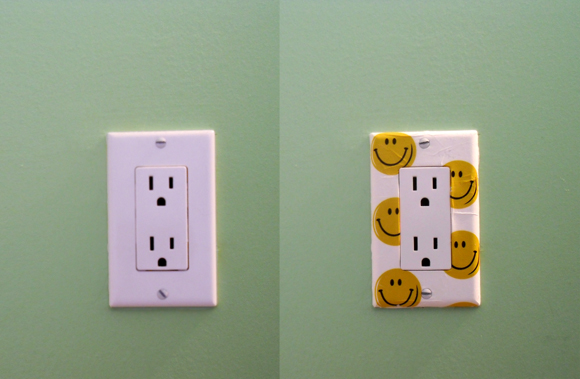 It’s time to install them around your house or apartment. Maybe smiley face ones in kids rooms, and some nice pastel pattern in the bedroom. This cheap and simple modification is sure to bring a little extra fun into any room. And if your tastes change these covers can be stripped down to the base plastic with a new pattern applied, or they are inexpensive enough that you can just make new ones.


4 Comments
heather
Good idea! I wonder how it would work with heavier paper?
Tara @ Feels Like Home
You can do the same thing with any similar-weight paper. I used paper napkins with fun prints. They’re all over my house. :)
DorrieBelle
I used spray adhesive – available in most craft/hobby shops – with scrapbook paper, topped by Krylon matte finish, so the paper wouldn’t stain. Matte finish is sold with the spray paints at Mal-Wart, about three bucks a can. Works great with posters, too. Those switchplates held up for over two years. They’re probably still going strong, but we moved and I forgot to take my plates with me !
Jayma
I have used this idea, but instead, with scraps of fabric that coordinate with the comforter and curtains! A very fun, cute and CHEAP way to dress up a room.