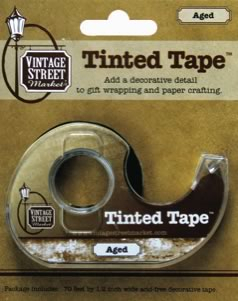
I recently received a box in the mail from a scrapbook supply company called Vintage Street Market. It was an exciting box to open because they make some very interesting products, including one thing that immediately got my gears turning that’s called Tinted Tape. It is scotch tape that is printed with different designs, including a style that mimics the yellowed look of aged tape. Seeing this tape made me want to find some old photographs to tape down! However I don’t have any vintage snapshots laying around, so I decided to use a free photo editing website called Picnik to create my own retro-looking photos. (That’s right, no fancy software required!) Read on to see how it’s done.
Project estimate:
- Digital image, on hand
- Picnik online photo editor, free
- Vintage Street Market “Aged” Tinted Tape, $4.95
- Paper, on hand
Total: $4.95
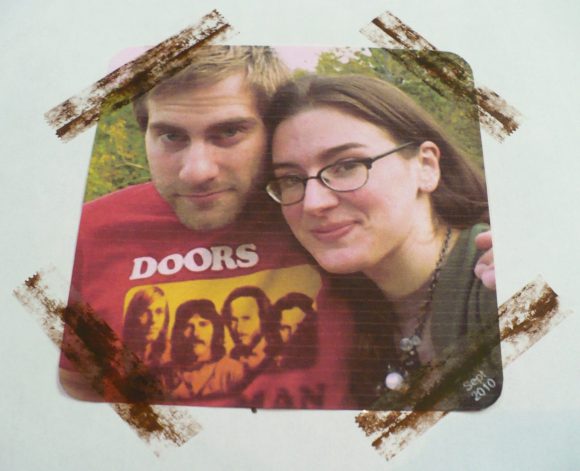
First, choose a photograph to use. (It should be a digital image, so if you’re using a physical copy of a photo you will need to scan it into your computer.) I used this shot of my husband and I taken on our honeymoon.

Go to the Picnik website and upload your photo to the editor. To upload, click on the “Upload Photo” button and select your image. Once uploaded, your image will appear in the photo editing dashboard.
From the menu near the top of the screen, click on the “Crop” button. From the drop-down menu, choose the option to crop the photo to a square shape. Drag the box on the screen around the portion of the photo you’d like to use, then click “OK” to save.
Click on the “Create” tab at the top of the page, then select the “Effects” option. Scroll down the menu in the left-hand side until you find an effect called “1960’s.” Click on this effect and the colors in your photo will change slightly, giving it the look of an old photograph. Adjust the intensity of the effect with the slider bar if desired, then click on “Apply” to save the changes.
Optionally, you can also use the text tool to add a date stamp to the corner of the photo. Once you’re done editing the photo, choose the “Save & Share” tab to download the finished photo to your computer.
Print and cut out your image. (I resized mine to 4 inches before printing to make it closer to the size of a standard photo.)
Now the photo is ready to be taped down with the Vintage Street Market aged-look tape. Some ideas include scrapbook layouts or personalized Christmas cards, or you could even tape the photo to a 5″ x 7″ piece of paper and put it in a frame. Use the Tinted Tape on the corners of the picture to complete the vintage look.
Thanks for the inspiration, Vintage Street Market!
disclosure: Vintage Street Market sent me some of their products to try free of charge; all opinions are 100% mine.


5 Comments
heather
That tape is really cool! Great job on your project.
Theresa
So, this tape is acid free, archival quality? ’cause that would be cool to use in vintage scrapbooks.
heather
Yep, Theresa, the tape is acid free! http://store.vintagestreetmarket.com/collections/tinted-tape/products/aged-tinted-tape
mikeasaurus
the tape and the filters to your photo look awesome, nice job!
Rachel
What a great look! And I love that it’s scrapbook friendly. Thanks for sharing, I’ll be linking.