
Here at Dollar Store Crafts, we’re huge fans of reality shows that stretch the participants’ creativity, so we threw down a challenge… to ourselves (and YOU if you want to participate!). Our challenge, inspired by Project Accessory’s first episode challenge, was to create three accessories that would dress up a plain white t-shirt and jeans. Our supplies had to come from thrift store, and our budget was $10. The three accessories had to be: a necklace, a belt, and an accessory of our choice.
Heather’s Project {Dollar Store} Accessories
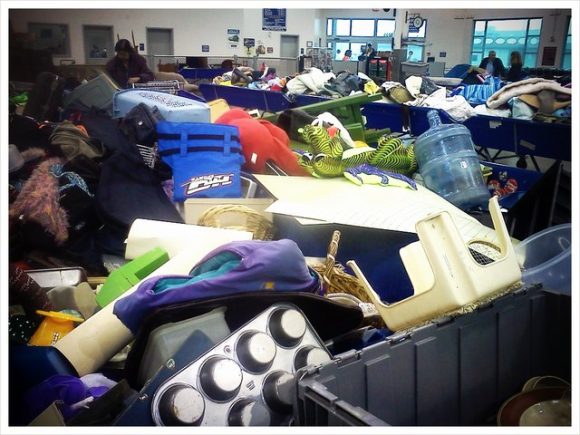
I went to the Goodwill Outlet, where things are sold by the pound! You have to dig through bins of mixed merchandise (a lot of it, dirty and scary!) to find the gems. And there are always gems! During my shopping trip, I gravitated toward handbags. I don’t know if it was because I had “accessories” on the brain, or if it was just one of those days where those were the items that spoke to me.
The raw materials:

I ended up spending $16.79 (with some other items that aren’t pictured), but at $1.59 a pound, I figured out I could use 6.25 lbs of the stuff I bought. The items above weighed 5 lbs, so I spent $7.95 on this project (and I only used a couple of the things in the photo in my final projects). The handbag on the right inspired my palette: soft fawn brown and grey (the lining is grey), as well as the cream colors of the bags in the center. I was looking for materials that had interesting textures or were made of leather.
I also used a few things from my stash: chain and jump rings, ribbon, a leather flower, and my secret ingredient this week was my cup of Sharpie permanent markers, as well as some new Stained by Sharpie markers that are made for using on fabric.
Accessory #1: Ribbon-Wrap Flower Belt

The belt was the hardest accessory for me to design, since I’ve never made a belt before. Sure, it’s just a long piece of something with some kind of closure, but I was trying to give it an element of design that would cause a person to choose it from a rack of belts. I used a strap from the snakeskin (?) purse, wrapped it with two kinds of ribbon, and sewed a seam down the middle of the whole thing to secure the ribbon. For the closure, I used a white leather flower I already had in my stash, and a ribbon loop. You just loop the ribbon over the flower to secure it around the body.

Here’s a close-up view of the ribbon wrapping. I think it is a pretty neat effect, and its crisp, almost plaid look appeals to my preppy side. The color palette of the belt is soft and romantic, and the flower adds to the romantic feel. (If I was on the actual show, I’m sure the judges would complain that I used a ready-made flower as a focal point on my belt, but this is real life, people! I didn’t have two days to work on my projects.)
Accessory #2: Leather Peacock Pouch Pendant

I designed two different necklaces, but this is the one I decided to share for the challenge because it is brighter, more eye-catching, and more unique. The Peacock Pouch Pendant is made out of part of the cream-colored leather purse, and is decorated with a hand-drawn peacock. The peacock’s body is an applique of the suede side of the leather that I colored in with Sharpie. I sewed a pocket on the back of the necklace so you can carry your credit card and ID in it (or business cards, if you are at a trade show).
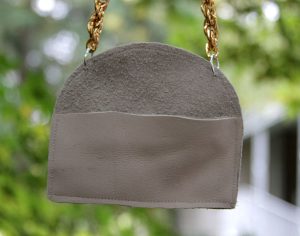
Inspiration for the peacock was from a paper cut peacock by artist Rebecca Peragine.
Accessory #3: Leather Leaf Earrings
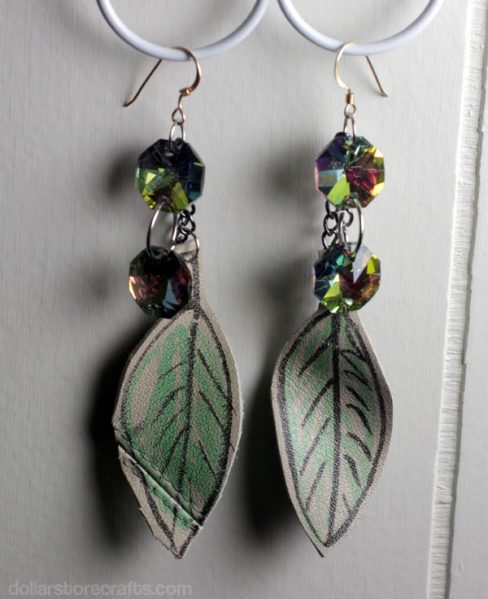
I doodled a bunch of leaves on the scraps of leather I had left from the pendant, and cut them out with scissors. I punched holes in the leather with my small 1/16″ punch (just a regular paper punch), and then attached the leaves to chain with jump rings. I added two faceted crystal-like beads to the earrings to add a little extra. You can’t see it in the photo, but I also added a dangly piece of chain to the back of each earring to add some extra interest. I hung the earrings from some old earring wires I removed from an unused pair of earrings in my jewelry box (by which, I mean the basket of random jewelry junk I have in my bathroom).
Rhonda’s Project {Dollar Store} Accessories
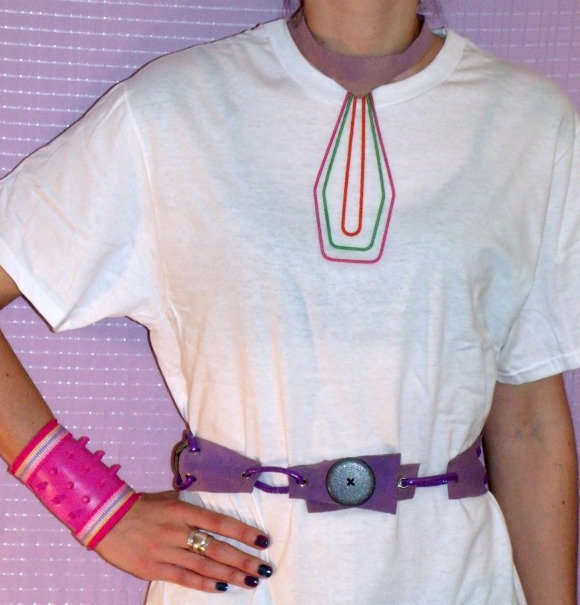
I don’t know what came over me this week! I went all day-glo-punk-rock-80s with my accessories. (Maybe I should have taken a Sharpie to my t-shirt and turned it into a Wham! shirt…. Nah, nevermind, haha!) My shirt is actually too big and unchanged because it’s my hubby’s! He was in dire need of new white shirts to wear under his work shirt, so I used photographing this challenge as an excuse to buy him a new package. (Win-win!) When you look at my finished pieces, would you guess that the materials include an unusual kitchen utensil, some phone cord, and a dog collar?
The raw materials:
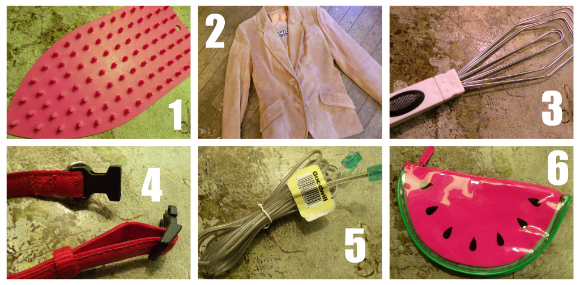
I made a trip to Goodwill for my items. I ended up with:
- A nubby, bright pink silicone thingy. Cost: $1.50
- An old suede jacket! It was super-cheap because there are a few tears in the lining and some weird scuffs or stains on the back. Cost: $4.99
- Like a transformers toy for the kitchen, this is both a spatula and a pair of tongs. Probably originally a bonus gift with some other crazy kitchen gadget paid in three easy installments, but only if you call in the next 10 minutes, Cost: $1.00
- A dog collar, purchased because it has nice, solid hardware on it. Cost: $0.80
- A length of phone cord. Cost: $0.50
- A watermelon zippered bag from Clinique, undoubtedly a promo item at some point in the past. Cost: $0.80
Total: $9.59
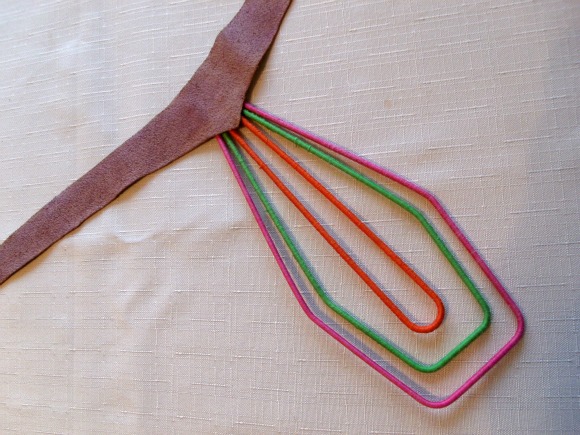
Accessory #1: Geometric Statement Necklace
It’s a spatula! It’s a pair of tongs! It’s… a pendant? I bet the infomercial people never saw that one coming!
I loved the shape of the wire part of the tongs/spatula and wrapped each of the three sections of wire in a different color of thread. This project would have been a zillion times quicker if I had used embroidery floss or yarn, but when I was looking for something in colors to coordinate with the rest of my supplies, the thread was the only thing in my stash that jumped out at me. I pulled out my macrame skills and tied a zillion tiny knots until the whole thing was covered in thread.
The rest of the necklace is made from part of the suede jacket, painted with a was of acrylic paint and water. The thread-wrapped wire is attached to the suede with some heavy-duty glue. I took the clasp off of the dog collar and used it as a closure for the necklace.
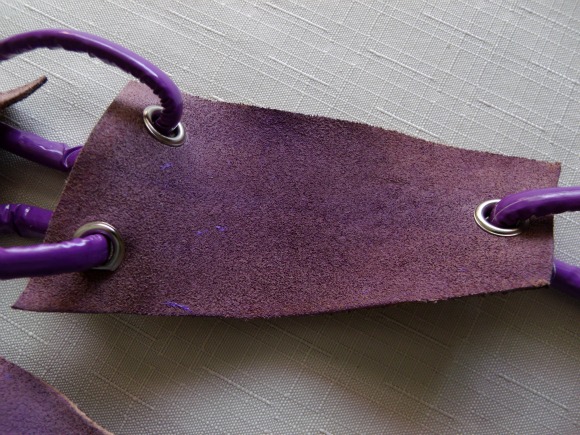
Accessory #2: Trapezoid Links Belt
I cut a bunch of trapezoid shapes out of one of the sleeves of the suede jacket. I gave it a wash with purple acrylic paint and water, then made holes on the ends and added eyelets that I had in my stash. Next I wrapped sections of the phone cord in purple duct tape from my stash and used it to make links between the trapezoids. It closes with peel-and-stick velcro; I spray painted a big plastic button and sewed it on for embellishment.
Accessory #3: Spiked Cuff
The first thing I grabbed on my shopping trip was a weird, pink silicone thingy. I have no idea what this was originally for, but it reminded me of the rubbery, spiked bracelets I used to wear in my goth raver kid phase in the late 90s, only brighter. I knew I wanted to turn it into a wide, spiky cuff.
I cut out a section of the silicone three spikes wide and as long as I could make it. I knew that any glue I had wouldn’t stick to it, so I had to sew to attach other things to it. First I sewed on sections from a thin, striped nylon belt that I got at Dollar Tree (and originally planned to use as purse straps). Then I ripped the zipper out of the watermelon pouch and sewed it along the outside edges of the cuff. It closes with a couple of hook-and-eye closures.
Show us your accessories!
Did you play along too? Link up to show us your creations! (Playing catch-up? Don’t worry, this linky will stay open!)
Note: Please only link up projects that are directly related to this challenge! Submissions should fit the criteria of our challenge.




15 Comments
Heather
Can you tell me the address of this Goodwill… If this is the one in Austin, I live here and my friend took me once a long time ago. I was wanting to take my sister but I am just horrible with remembering locations.
Crissy's Crafts
sorry Rhonda! I linked up accessories using recycle items!! You can delete the links numbers 3, 4 and 5! Didn’t know that we have to use things from a thrift store. Sorry!!!!
rhonda
It’s alright Crissy! :) I’m really, really hoping that we get a chance to do a recycled challenge for Project {Dollar Store} Accessory. You would totally kick that challenge’s butt, you’re the queen of the soda can!
heather
@Heather No, mine was in Oregon! You can google “Goodwill Outlet Austin” though, and get the address!
Off The Cuff Cooking
I think the pink silicone thingy was meant to be a “trivet” for a hot clothes-iron. It is “iron shaped” in that photo, so that is my best guess! And definitely a new tweak on a utilitarian item!
Heather's Mom
Great job girls on your Project Accessory Challenge! I especially love both of the belts. I love the whole idea of trying to recreate the challenges. Are you going to make shoes this week? Or re-create?
heather
@mom, we’re going to decorate shoes, i think!
Vivienne @ The V Spot
I used to go to the “bins” behind the Goodwill in Vancouver WA and buy clothing by the pound. I got so that I could “feel” good fabric and I’d as often as not pull up some designer piece. I would buy it by the pound (no matter what size) take it home, clean it, mend it if necessary and list it at our local consignment shop. Helped me to get by as a single mom, back in the day. I would love to do it again down here in LA. I would soooo try my hand at some of these re-purposed projects. Great job!
Michelle L.
Good grief! You guys are so talented…well, I knew that, but DANG, I lovelovelove everything in this post! Next season, you’re both trying out, right? I can’t wait to see your shoes.
Heather, can you believe I had never heard of a Goodwill Outlet Store? Needless to say, I had to find mine instantly – went today and spent a blissful afternoon rummaging in the junk. Found all kinds of goodies. THANK YOU!
Kathryn
Very cool and creative pieces.
Jennifer
Heather, loved your accessories. I need to find a Goodwill Outlet, wonder if they have one here.
Lori nadeau
What more info on more craft that’s where need to more