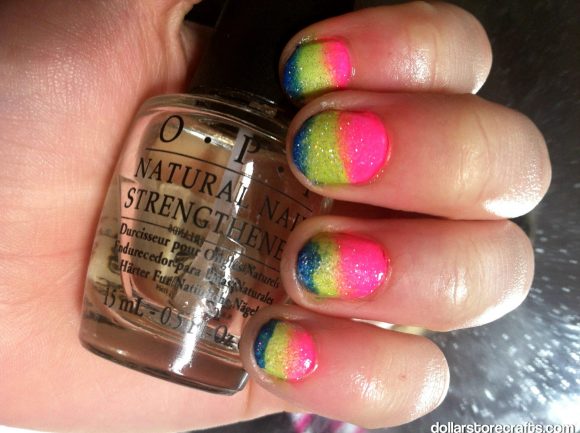
I always thought the gradient nail effect, with all the confusing steps and blending, would be hard to achieve. My outlook on the design changed when I came across this technique. It’s easy to get a blended ombre nail polish effect with just a few common supplies you probably already have on hand. And if you don’t have them, your dollar store does! Read on for instructions on how to easily create ombre nails.
Project Materials:
- White nail polish, on hand or $1
- 3 different colored nail polishes for the ombre effect, on hand or $1 each
- Top/base coat, on hand or $1 and up
- Makeup sponge, on hand or $1
- Cotton swab, on hand
- Nail polish remover, on hand or $1
- Glitter polish, on hand or $1
Total: FREE and up

*Apply your base coat. This will give the nail polish something to stick to, allowing the design to last longer and preventing chipping.*
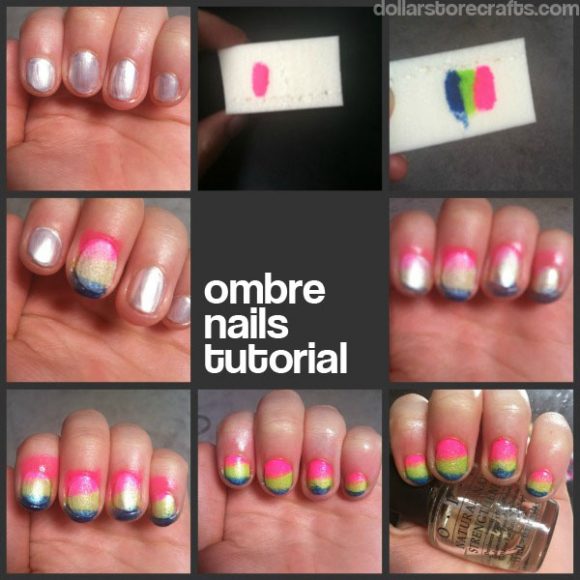
- Apply 2 coats of white polish to your nails. I used a shimmery white to give the gradient a sheen, but any white will work.
- Use a makeup sponge to create the design. Paint even stripes of the colors on the side of a makeup sponge. You can choose 3 (or how ever many you like) polishes to make the design. Since you will be doing this in coats, don’t make the stripes too thick in consistency, you don’t want them to run.
- Gently press the sponge on your dry nail. Once the polish is on the sponge in the order you would like, gently pat it onto your nail. Don’t worry about getting it on your skin, we will clean it up after all of the coats are on.
- Let each coat dry and continue until you reach the color you want. You will need to reapply the polish to the sponge after every coat, I used 3 coats, but it all depends on how opaque your nail polish is.
- Clean up around your nails. Dip a cotton swab into nail polish remover and gently clean up any polish that is on your skin.
- Add some glitter! This step is optional, but I find it helps the colors to fade together better if you add a thin layer of silver glitter on top of your gradient.
- Apply your topcoat. Seal in your fabulous design with a fast dry top coat!
 Megan blogs about makeup, nails, learning how to look great on a budget and keeping up with the latest styles at her site razberriez.com. She is the fingernail fashion contributor for Dollar Store Crafts.


1 Comment
Fire
Just a tip for those of you who don’t like using nail polish remover to clean up around your nails – wait for the nail to dry COMPLETELY (typically 20-30 min) then wash your hair. Your hair works as a “scrubber” with the shampoo, and since polish isn’t meant to stick to the skin it will come off easy. It’s much less damaging than nail polish remover. And don’t worry, you won’t have bits of polish in your hair, it will all rinse out with the shampoo!