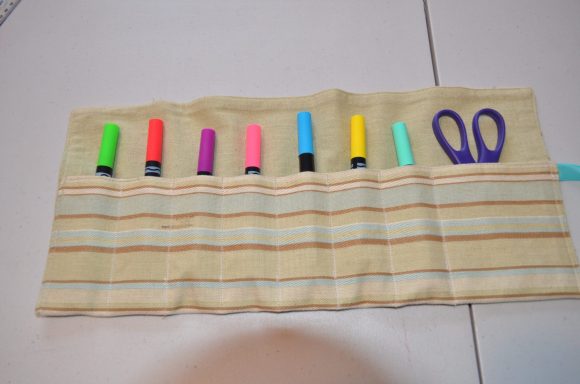
I have to say this is probably one of the coolest Dollar Store Crafts I have ever made. This is just to awesome not to share. It is so versatile. You can use it as hanging storage or as a roll up storage bag. Who would have thought something as simple as a placemat could be so fun!
Project estimate:
- Placemat, $1
- Straight pins, on hand
- Sewing machine or needle and thread, on hand
- Fabric pencil, on hand or $1 and up
- Matching ribbon (optional), on hand or $1
- Velcro strip (optional), on hand or $1
Total: $1 and up
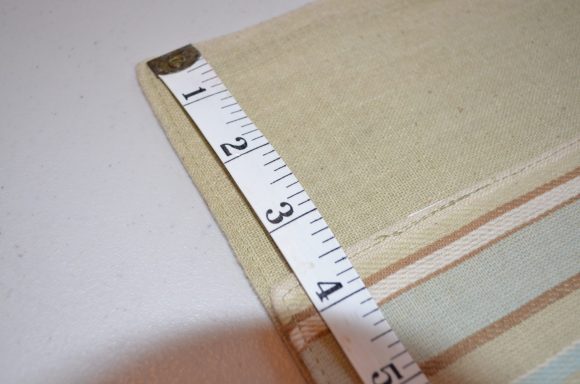
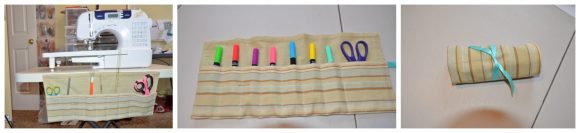
First choose which side you would like facing outward, This is also the side you will see when you fold the bottom up. Then fold bottom up pinning 3 1/2″ from the top. You may choose a different size depending on your project.
With your sewing machine stitch each side closed. I used a 1/4 inch seam on each side.
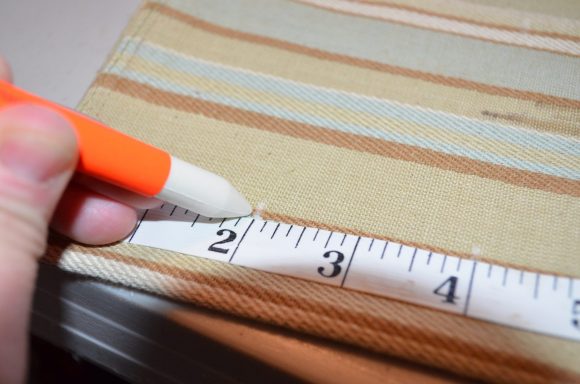
After securing the sides measure and mark every 2 inches from the side. You may leave the last pocket a little larger for bigger items. After you have marked the top and bottom you may then draw a line connecting them to make an even line which you will follow to sew the pockets.
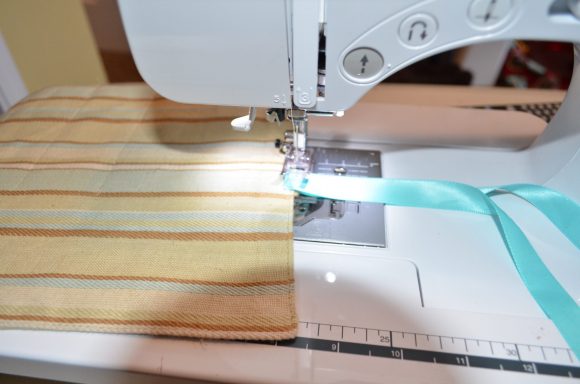
Once your pockets are created you can then decide if you’d like to make a hanging storage or a roll up storage. If you decided to make a roll up storage you can now attach a piece of ribbon to one end by folding it in two and sewing the folded edge to the side of your place mat. If you are going to hang your project you can attach velcro to the back or you may simply nail directly to your wall.


7 Comments
JoAnn Carrie
This was so easy to make. I made 2. I gave one to a classmate in my woodcarving class. We put our woodcarving tools in them.
Gjeometry
Nice! Very practical. I love things that can be made from pre-existing things. I also recreated placemats into something else: small totebags / purses. Check it out here, if you like: http://wp.me/p2XTOJ-42
Carissa
What a great idea. I can’t wait to try this
Veronica
Oh that is just too brilliant! Great idea! I am off to buy a couple of placemats tomorrow!!
Jessica
I love this idea for keeping my crochet hooks in, the ones you can buy in the store are too expensive, making the pockets closer together I bet I could fit them all, or at least double up my hooks! Thanks so much for this tutorial, and the whole website, I’m still going through it and will be bookmarking to reference back to often!!
Heather R.
Had an idea, while reading this and plotting…if you’re going to make this a roll-up, you *could* just take your doubled-length of ribbon, tuck the folded end into one of the outer seams, and then when you sew those edges up, your ribbon would already be incorporated into the end of the roll, no extra stitching required! Just throw the machine into reverse at the part of the seam where your ribbon is pinned in, to give it extra hold, and viola! (Sorry, I’m always looking for shortcuts, LOL!) Your tute inspired me to hit the thrift store today- scored three nice linen/cotton placemats at 30 cents apiece- finally, my crochet hooks and rugmaker’s tools will have a home other than an empty dog-treat bin! LOL Thanks so much.