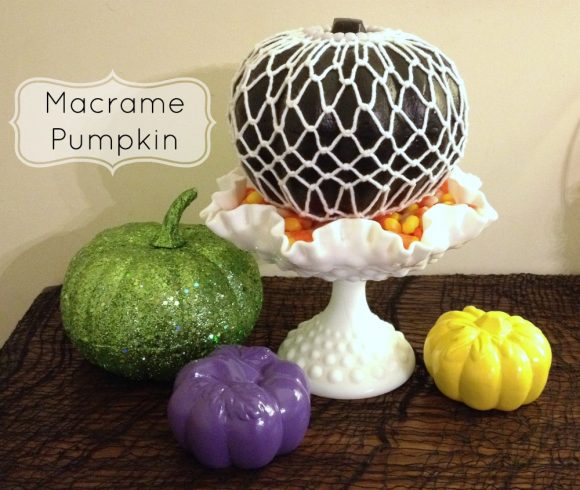
It all started a couple of weeks ago when I posted a picture on Instagram of a dollar store pumpkin I had painted black. It turns out Carissa had also bought a dollar store foam pumpkin and painted it black. One thing led to another and the next thing we knew, a challenge was laid out: who could make a cooler black pumpkin?
Then I knew I had to come up with something amazing. But what? I decided to go back to my crafty roots and do one of the things I first loved as a kid: Macrame! I love how a few basic knots are enough to turn plain objects into works of art. I thought that wrapping the pumpkin in macrame might be reminiscent of spider webs, so I grabbed a ball of white yarn and started tying.
Project estimate:
- Foam pumpkin, $1
- Paint, on hand or $1 and up
- Yarn, on hand or $1 and up*
- Pony beads, on hand or $1
- Glue, on hand
Total: $1 and up
*A note on yarn selection: The yarn you choose will have a big effect on how your finished project looks. I chose to use cotton yarn because it isn’t as fuzzy as most other yarns. This gives the project a clean, modern look. It is also easier to untie than some other yarns in the event of a mistake!
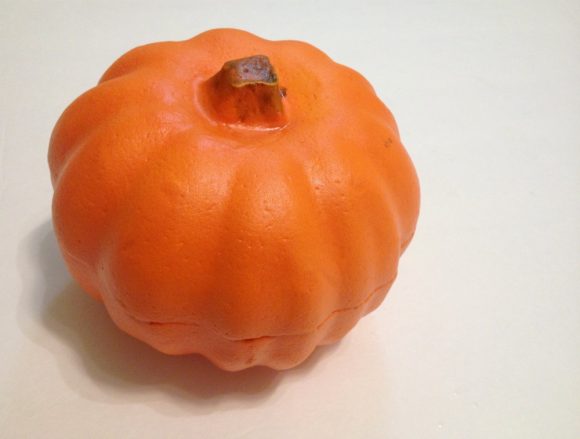
Start with a basic foam pumpkin. I used a carvable pumpkin from Dollar Tree.

Paint the pumpkin with craft paint. I used black paint for mine, but you can change it up and do this in any colors you want! The paint I used is formulated for outdoor use, so if I decide to put it out on my porch I don’t have to worry about the paint fading or peeling in the elements. This, or course, it totally optional; any craft paint will do!
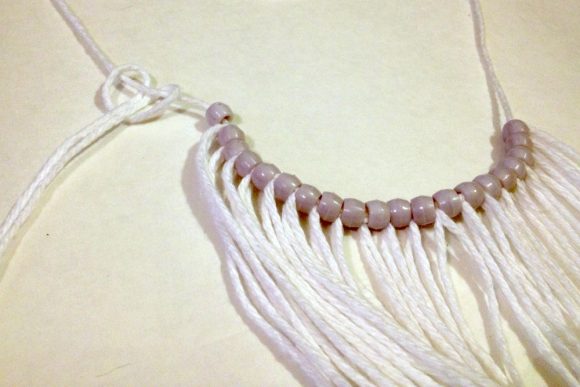
Use a piece of string to measure the distance from the pumpkin stem to the bottom of the pumpkin; measure and cut a piece of string that is about 5 times that length. Cut a bunch more pieces the same length; the number you will need depends on the size of your pumpkin. I used 22 strings to get around my pumpkin. Make sure you work in even numbers, and cut one of the strings a few inches longer than the rest.
Working around the longer string, loop each of the rest of the strings around it to form a series of knots. Loop the strings at the center point and pull the ends through the loop to make a knot as shown. Place a pony bead between each knot to create spacers. You will use the same number of beads as you have strings (so I used 22).

Once all of the strings are knotted around the longer string, tie the ends of the longer string together to form a loop. Make sure this loop is large enough to fit around the stem of your pumpkin. Use a couple small dabs of glue to hold the ring in place in top of the pumpkin.
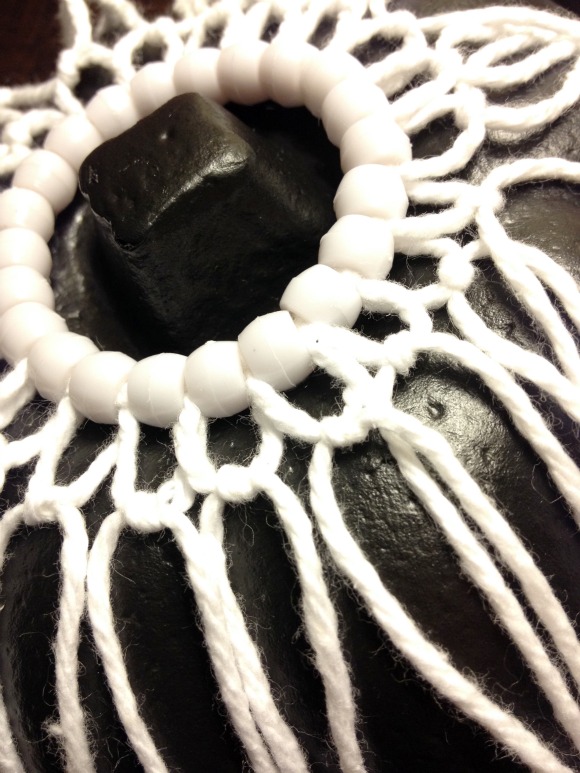
Now comes the knotting! You will notice that your strings are in pairs; take a string from one pair and a string from an adjacent pair and tie a square knot. Continue around the pumpkin until you have tied a square knot using each set of strings. The knots should look like the photo above. (Learn how to tie a square knot here.)

Make another round of macrame in the same fashion; use one string from each pair knotted in the previous round so that the knots are in a staggered pattern. Repeat until you have knotted all the way around the pumpkin to the bottom.
When you reach the bottom of the pumpkin, trim the excess ends of the strings and use a little bit of glue to hold them in place on the bottom of the pumpkin, as shown.
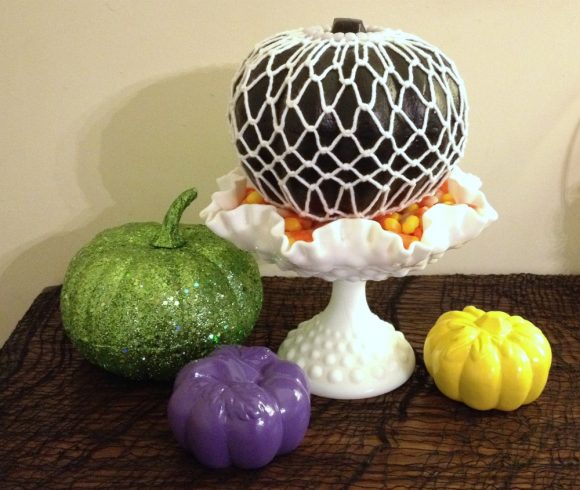
After the glue dries, it is ready to display! I put mine on top of a milk glass candy dish full of candy corn to give it a bit of a whimsical twist.

Looking for more pumpkin crafts?


4 Comments
Kat
Not sure if that candy is safe to eat now
rhonda
@Kat – around our house we only ever use it decoratively anyway, everyone here thinks it’s icky – but you do make a good point, once it’s been in contact with the glue and paint it is definitely not suitable for eating.