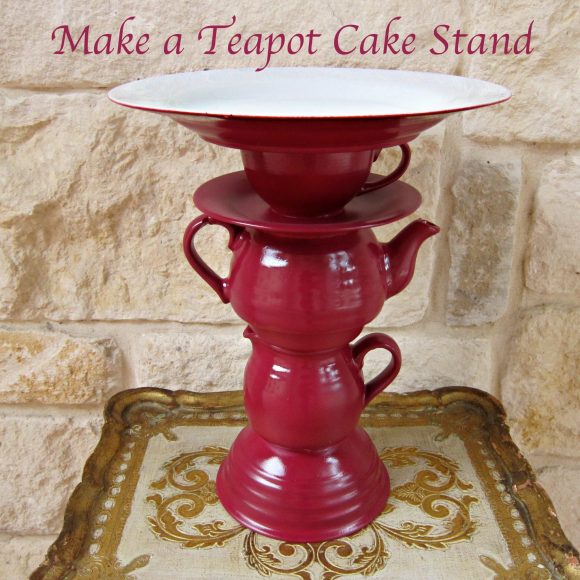
Last year, I fell in love with a lamp that was available at Anthropologie. I didn’t need a lamp, though, so I started thinking of ways to recreate the look in a form that was more useful. I came up with a fun bird bath, instead. One reader suggested that I adapt the idea to make a cake stand, and I thought that was a perfect idea! Here’s how I made my teapot cake stand, which would be a really fun centerpiece for a tea or party. Everyone will ask where you got it, and you can say, “I made it myself!”
I found all my items at the thrift store, but you could also find almost everything at the dollar store, too. You probably even have some of these pieces sitting around your house!
Project estimate:
- Bowl. on hand or $1 and up
- Tea pot, on hand or $1 and up
- Various cups, containers, and saucers, on hand or $1 and up
- Large plate, on hand or $1 and up
- E-6000 glue, on hand
- Primer or adhesion promoter, on hand
- Spray paint, on hand
Total: Free and up
Begin by collecting the items you need. I recommend using a wide bowl for the bottom. I usually start with more saucers and tea cups than I need, so I have options to choose from.
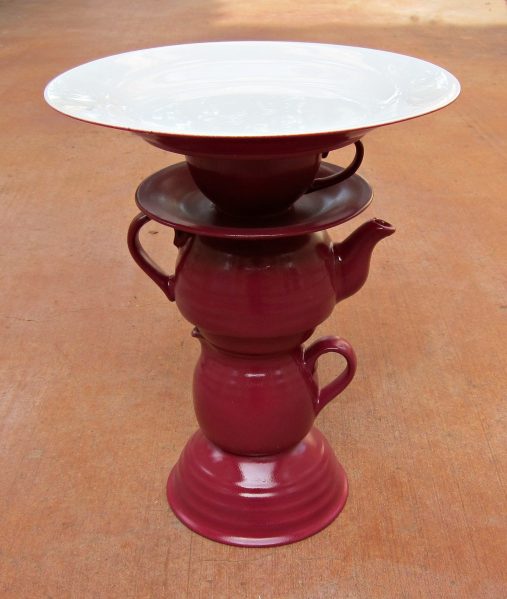
Begin stacking the items until you find a set that is visually appealing to you. The most important thing is to have a wide, sturdy base, so the entire thing does not topple over.
Use E-6000 to glue the pieces together. Start from the base, and glue the bottom two pieces together. Let it set for a few minutes, then proceed to the next piece. You may want to use a level to make sure that your tower doesn’t start to lean. You don’t want the top plate to be crooked…then your cake might slide off!
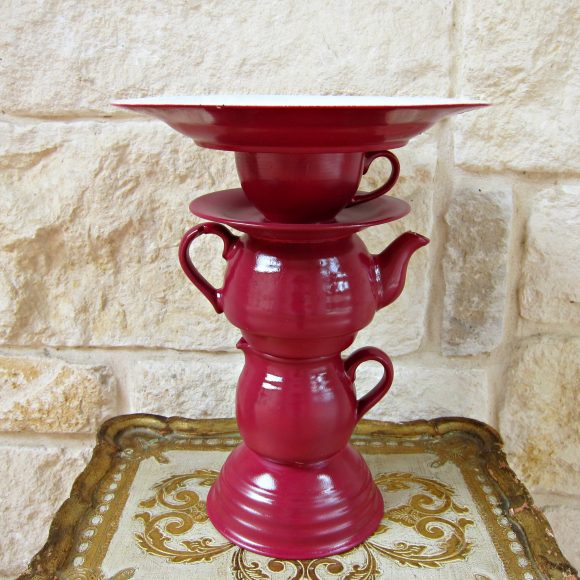
Once the cake stand has been assembled, it’s time to paint! I took a short cut and used spray paint. You could also use multi-surface paints or glass paint to achieve a different finish.
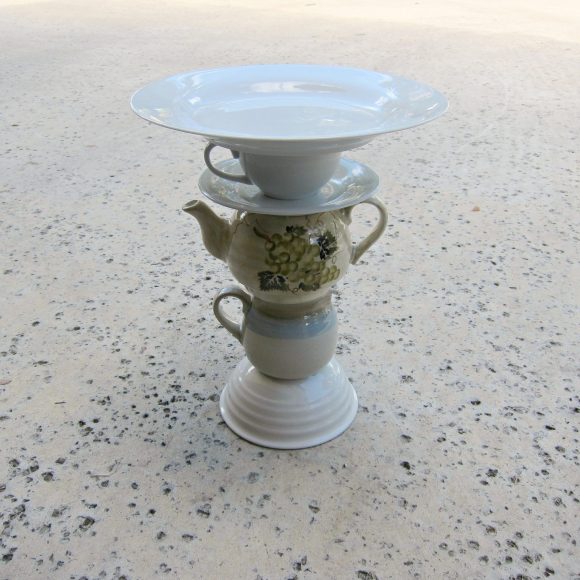
Food will be on the top plate, so you want to keep that food safe and spray paint free. I turn my projects upside down on a box so I can spray paint everything but the top of the top plate. (You may have noticed that the photo below is a different project…that one is much too tall for a cake stand! Adjust the number of items you use to make your stand an appropriate size.)

Since my ceramic surfaces were slick, I used a spray on adhesion promoter (like primer). After that had dried, I then spray painted the cake stand. If you wanted to take it up a notch, you could use stencils to add pretty designs to the piece.
Isn’t this a fun way to turn unused pieces into something that will be useful and loved? My cake stand gets LOTS of attention, and it’s just such a fun piece to have at a get together. Have fun crafting and creating!


13 Comments
Conni
Hello I see you listed the Teapot as $1.00 and up. Where did you find a Teapot for Cheap? There aren’t any at Dollar Tree. Thank you I LOVE THIS IDEA. My son is getting married and I’m making a Mad Hatter Cake for his Wedding and this would be wonderful on their Sweet Table.
THANK YOU!!
Conni
morena
Conni, I find them at thrift stores and garage sales. This one was missing the top (which I didn’t need) so it was cheaper. But I always find them at thrift stores for around $2-3, less if the top is missing! The Mad Hatter cake sounds like a fun idea!!
Conni
After I posted I thought about Thrift stores lol this is an awesome craft and I’m dying to do it. Thank you
Steph @ The Silly Pearl
So cute! Would love to do this for my girls’ birthday in a few months as we’re having a tea party. Thanks for the idea, Morena!
Conni
Sorry to be a pest but how tall is this and how big around is the bowl on the bottom you started with about 6″?
Thanks Again!
Conni
morena
I don’t mind, Conni! The bowl is 6 inches wide and the cake stand is 14 inches tall. Keep me posted on how it turns out!
morena
Thanks, Steph!
Linda aka Crafty Gardener
Lovely idea to use for a tea party. I’ve made them for awhile now and use them outside in my garden.
Brenda
I have seen something on this idea but they were bird baths . Same idea using different dishes ,bowls cups ,colors ,but thank you for the idea going to yard sales an different places to go . Thank you again Brenda V
Mindy
Would love to see you do some tea-dyed projects. :)