
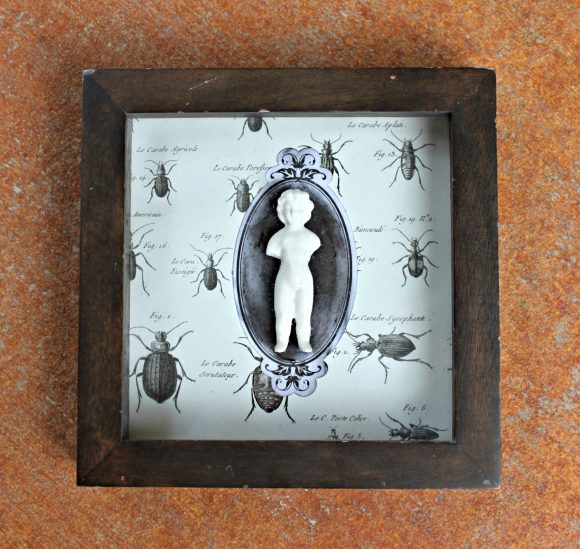
Halloween decor is popping up every where! I snagged several small items from Dollar Tree and used them to create a spooky wall art gallery in my home. Instead of pricey shadow boxes, I used $1 picture frames to make my own collage boxes. Keep reading to learn how I made this entire creepy wall display for under $10!

Project Estimate:
(Per shadow box)
- Frames (2), $1 each
- Scrapbook paper, on hand
- Halloween item, $1
Total: $3 per shadow box

Step one: Remove the glass and backing from the frames. Glue two frames together.

Step two: Place scrapbook paper on the backing for one of the frames, and hot glue the spooky item (ie. the skeleton hand or the spider) onto the paper.

Step three: Replace the backing on the frame.
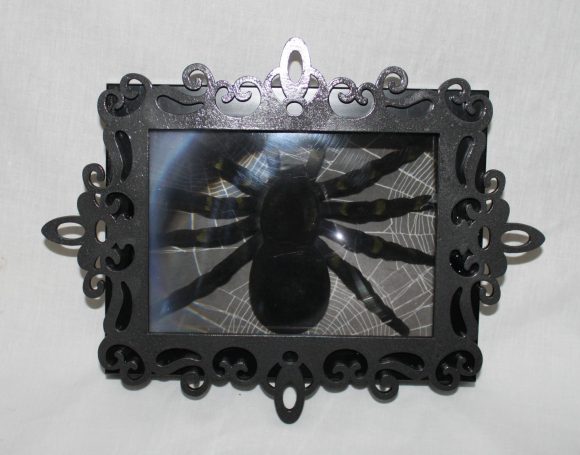
If you plan to leave the glass on the top frame, add it before you glue the frames together. With the large spider spooky wall art, I added a magnifying sheet in place of the glass. I found the magnifying sheet in the school/office supply section at Dollar Tree, and trimmed it to fit the frame.

My kids are fascinated by this spooky wall art gallery. They like to look at it and talk about it. As the seasons change, I can easily swap out the paper backing and insert something seasonal: fall leaves, mini gourds, Christmas ornaments, etc. These DIY shadowboxes would be a fun way to display kid’s artwork, too!


