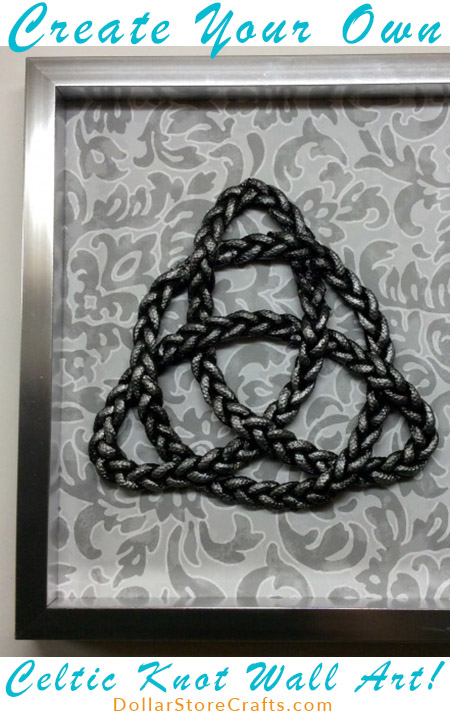
A Celtic knot is a great addition not only to your St. Patrick’s Day decorating, but also to your year-round home decor! The eye-catching, complex designs of Celtic knots are almost mesmerizing, but creating this knot art is a lot easier than you might think.
Project estimate:
- Rope, $1 and up
- Foam core board, on hand or $1
- Paint, on hand or $1 and up
- Celtic knot printout, free
- Picture frame, on hand or $1 and up
- Scrapbook paper, on hand or about $0.25 and up
- Hot glue, on hand
Total: $1 and up
Decide how big you want your finished craft to be. I chose 8″ x 10″. Cut your foam board and background paper to fit your frame.

Find a Celtic knot on the Internet that you like. To find the knots, Google “Celtic knots” and when they load, under “Tools” select “Size” and “Medium” and enter. I would start with something easy. I chose the Trinity knot with the circle which is actually in two separate pieces. Save the image to your computer and print it. You may have to adjust your settings to get the size correct for your frame.
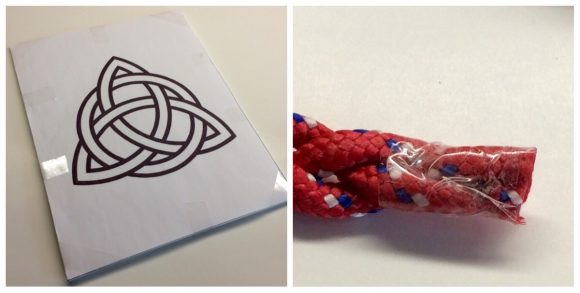
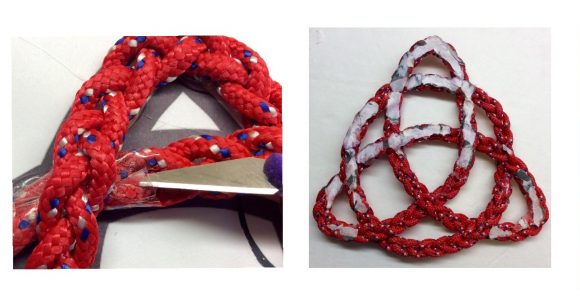
In this case I used smaller rope and braided it for my design. I cut my rope into three lengths double the size of the knot and circle and taped the ends together to braid them. When you get to the end of the braid, tape the ropes together and trim them straight across. If you want to use a thicker rope, skip this step.
Put the printed knot on top of the foam board and center it. Tape it On the foam board. This is just to make the gluing process easier, they will not remain taped together.
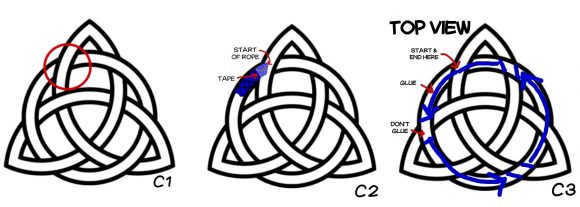
I found it easiest to begin with the circle. Start the circle in a location that will be overlapped by another part of the knot. (See images C1 & C2) This will hide the ends.
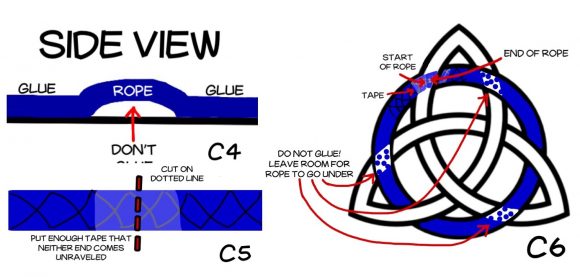
In image C3 I have shown you where you will glue the rope to the paper. Where you don’t glue, another rope will go under it. Leave a little slack in your rope in these areas, as shown in image C4.
Continue gluing your circle as shown in image C3 until you come to the end if the circle. Tape and cut your braid so it doesn’t come apart (image C5) and glue it to the start of your circle. Your rope should look like image C6. If you have tape showing, don’t worry, we’re going to take care of that after we have all out rope glued together.
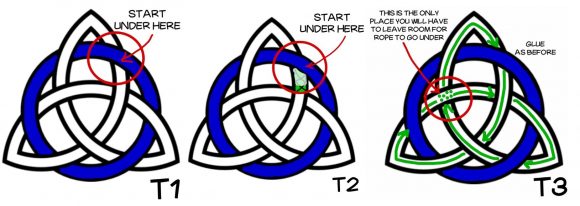
Now for the rest of the knot! As with the circle, start the in a location that will be overlapped by a part of the circle. (See image T1) Glue the rope down along the arrows as seen in image T2. There is only one place in this step that you will be leaving a space for a rope to go under. It is marked in image T3.
When you reach the end, finish it like you did the circle. Tape, cut and glue the end next to the beginning of your rope. At this point, glue any spots where the ropes overlap. Take a nap, you deserve one!
Carefully remove the knot from the paper. If you can see any glue as you are looking down on to your knot, carefully remove it with a sharp cutter, like an X-acto knife.
Remove any visible tape from the knot with with a sharp cutter, like an X-acto knife.
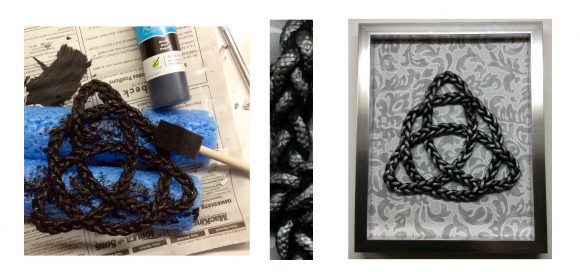
Paint the knot with 2 coats of your darker paint. After the dark paint has dried, dry brush the knot with the lighter paint to add depth.
Put the background paper and foam board into the frame. Center the knot in the frame and mark it in a few spots lightly with a pencil. Remove the knot, quickly glue it where it touched the paper and replace it in the frame. Erase any pencil marks and display your Celtic Knot with pride!


