I’m sure we all have stacks of t-shirts that are out of date or don’t fit. Instead of leaving them in a pile in the closet, why not craft with them? I’m going to show you a very simple technique for t-shirt cutting and looping that can be applied in different ways. It looks complicated, but it’s not!

Project Estimate:
- T-shirt – on hand
- Scissors – on hand
Total: Free
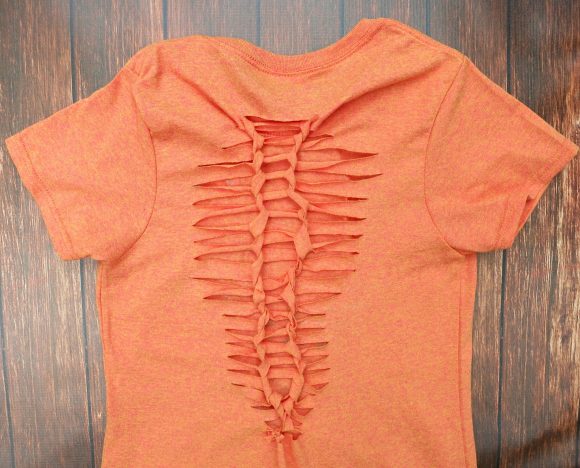
First, choose what part of the t-shirt you want to work on, and fold it in half. For this example, I am cutting the back of the shirt. You can see how I painted the front of this retro orange t-shirt in this tutorial.

Cut slits in the t-shirt on the fold. For this design, I cut long slits of varying lengths. Keep all the pieces intact EXCEPT for the very last one. Cut that one in half.
Start at the top of the line of cuts. Lift up the top piece, and pull the one below it through the loop. Release the top piece and hold on to the second piece. Now pull the third piece through the second one. Continue in this manner, always pulling the bottom piece through the top one and releasing the top one.
Once you reach the end of the loop sequence, use the bottom row, which has been cut in half, to tie the last loop in place.
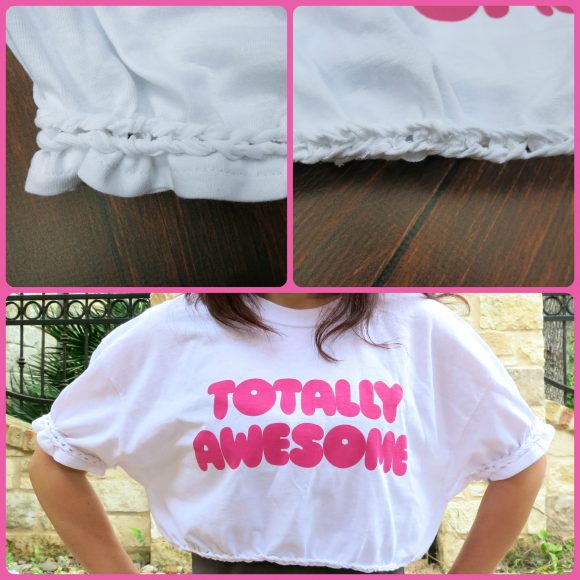
This technique is so versatile and looks different depending on how wide and long the cut rows are. For the white t-shirt, I cut very short (one inch) slits on the sleeves and at the bottom of the shirt to create a pretty braided look. You could also do this on the sides of the shirts to make them a little tighter. Have fun cutting t-shirts and creating!


