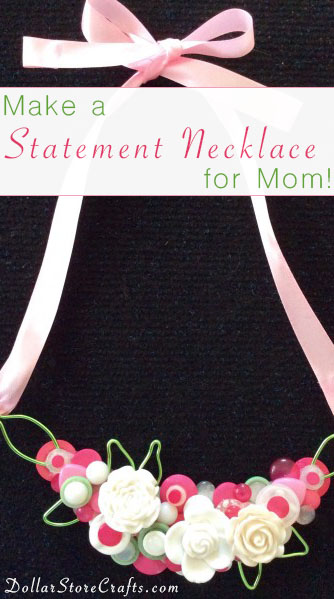
Mother’s Day s on the horizon! Have you started thinking about what to make for mom yet this year? Jewelry is a classic Mother’s Day gift option, and handmade jewelry is sure to make mom happy. This bib-style necklace is a great project if you have a stash of buttons on hand; even if you have to go out and buy buttons, it shouldn’t cost you more than a few bucks!
Project estimate:
- Felt, on hand or $1
- Buttons, on hand or $1 and up
- Hot glue, on hand
- Colored wire, on hand or $1
- Ribbon, on hand or $1 and up
Total: Free and up!
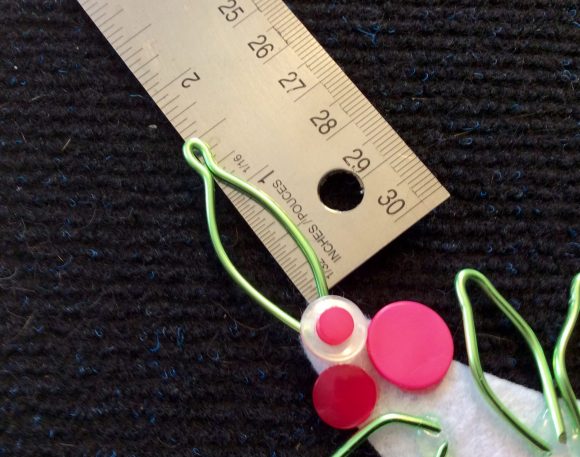
This coated wire is very pliable and easy to bend and cut. Make two pieces in the shape shown above. These need to have a smaller end so that the ribbon will stay in place. The rest of the pieces are leaves and you can make them any shape you like. Do use an odd number as this will make your necklace look nicer.
To make the felt backing, I folded a piece of felt over and cut a “smile” shape. Hold it up to your neckline and look in the mirror to establish if it is large enough or too large.
Attach the side hooks and add the buttons.
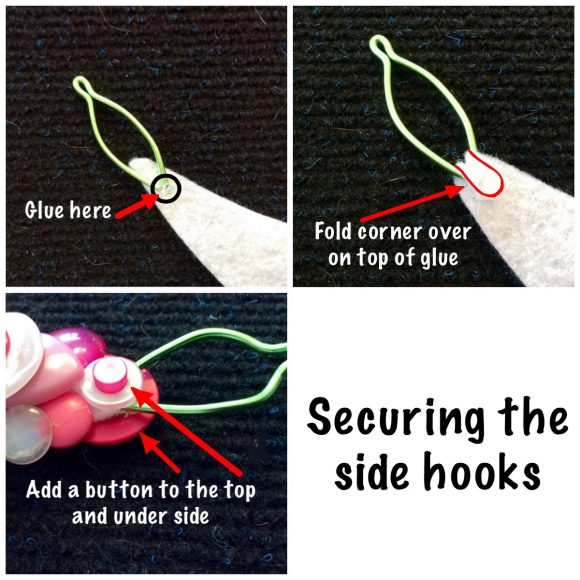
To add the side hooks, one at a time, place them on the corner of your felt, apply hot glue and fold the corner over as seen as seen in the image. Find two buttons that are the same and hot glue them over the top of the felt, hiding where the side hooks are attached.
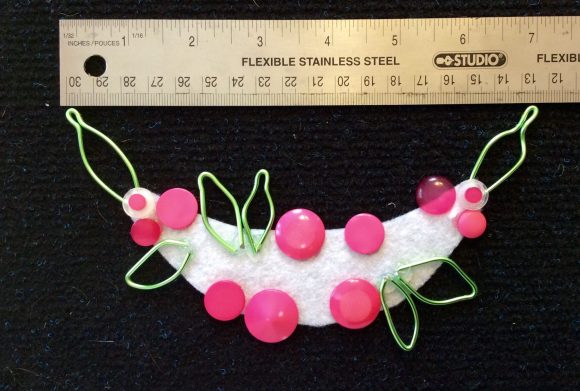
Place your leaves where you want them, and hot glue them into place.
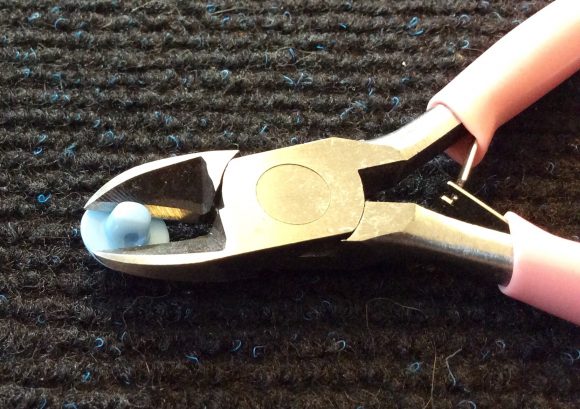
I used a lot of shank buttons. Shank buttons are the ones that have the hole on the bottom of the button. I used my wire cutters to cut that part off, making it flat as shown in the image. I then hot glued it into the middle of an ordinary button.
I began using buttons all around the edge of the felt and then work Dan towards the center. The center buttons will be mostly covered so I didn’t have to worry about gluing shank buttons in the center. The rose buttons came in an assortment from a local dollar store. When I got the first layer down, I then added my prettier buttons. Also, for a little extra durability, I added one more button behind each of my side hooks.
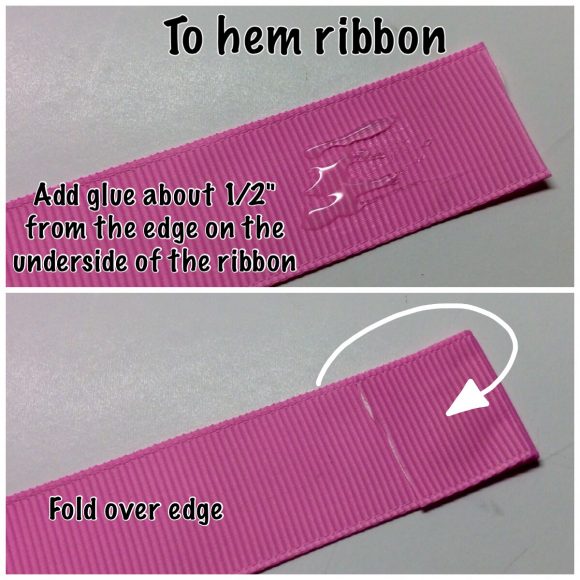
Add the ribbon. Cut two pieces of satin ribbon about 15 inches long each. Most satin ribbon has a pretty side and a not-so-pretty side. Make sure that the pretty side is out. Thread them each through the side hooks and hem them using hot glue. Also hem the ends of the ribbon with hot glue as well.
Tips:
- For safety’s sake, when you cut the shank off the button, cover it with your other hand.
- If you want to use regular buttons, please do, they will work the same way and look awesome. There are many different kinds, shapes and colours of buttons.
- Place several buttons where you want them and then, when you are sure that is where they are going, hot glue them in place.


