Felicity from Crafty Modern is back with us again today, this time to share a clever Halloween costume idea! Those of you who are gardeners will love the whimsical style; our readers in warmer climates will appreciate that it doesn’t require bulky clothing!
How to Make a Halloween Garden Hat
by Felicity, Crafty Modern
This project is super fun and easy and there’s actually multiple projects that can be pulled from it. My daughter and I had a blast getting creative with this.
First the history for a hat based costume. We live somewhere where Halloween can actually still be pretty warm, so wearing big fuzzy dog costumes (as my son chose to do when he as nine and sweated and groaned the whole trick-or-treating experience) isn’t that appealing. That’s reason number one. My daughter can wear this with a little makeup (lots of glitter), a sweet floral dress and viola, garden costume. My second motivation was for an adult costume, something that would stand out but be easy to where to a cocktail party. Put this hat with a little dress and some heels, you’ll stand out and look silly-sparkly-fab.
Project estimate:
- Foam cone, $1
- Foam cube (at least 4″), $1
- 2-pack round foam, $1
- Flower foam ring, $1
- Foam core board, $1
- Silk flowers, about $4
- Birds, $1
- Glitter, on hand or $1
- Headband, $1
- Paintbrushes, on hand
- Paper clips, on hand
- Old butter knife, on hand
Total: about $11 and up
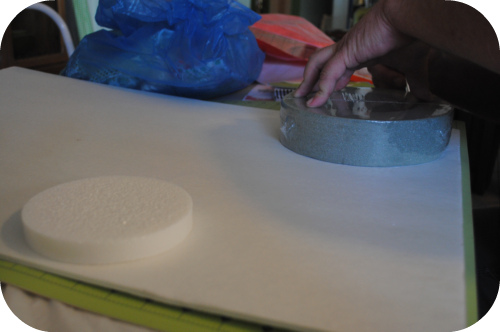
First cut a piece of foam core board the same size as your green flower foam circle. Cut into the foam core two slits in the middle about 2 inches or so apart and wide enough to fit the headband through and your ribbon. Glue your green flower foam circle to your foam core circle, use lots of glue and let this dry full.
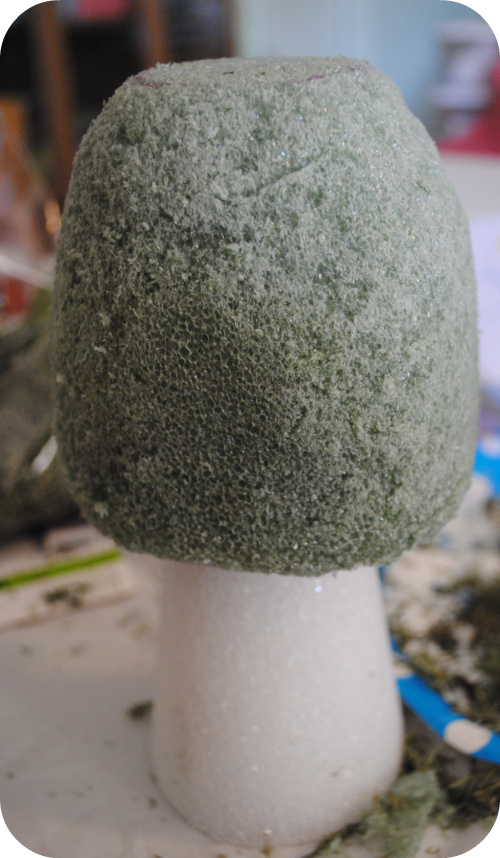
While that’s drying start work on your mushroom. Take an old knife and carve your foam square into a mushroom cap shape, however you want it to look. Then flip over and carve a hole large enough to slip your cap over the first 3 to 4 inches of the cone, fit it on so it is fairly secure.
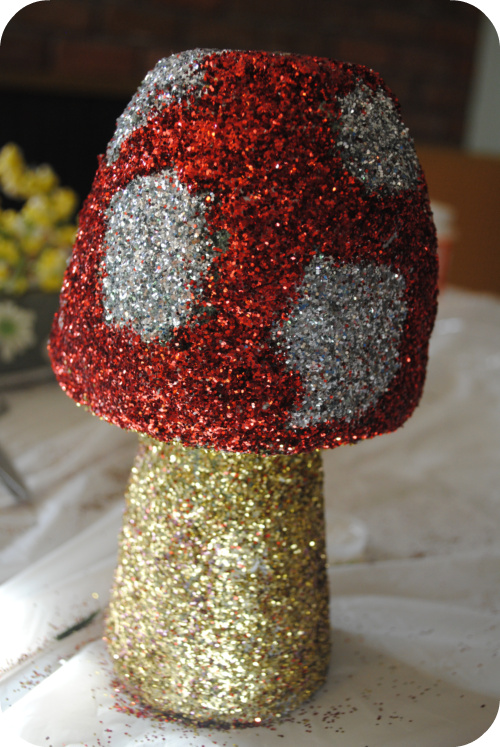
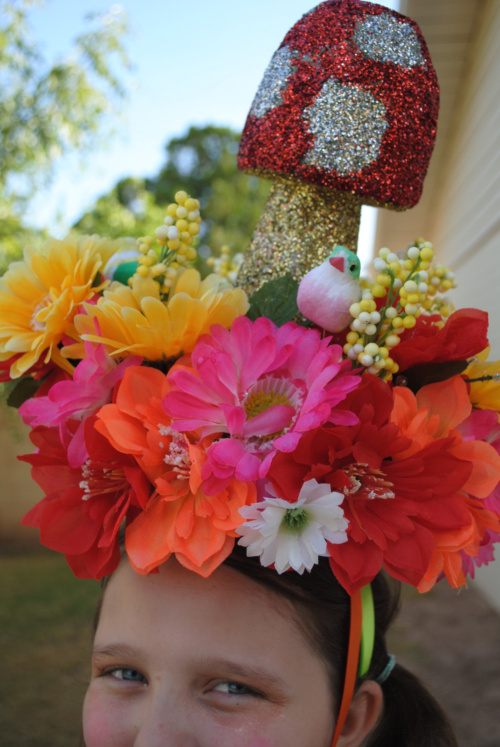
Do the polka dots of the mushroom cap first, painting circles of glue and applying glitter. Let dry and then apply apply glue and glitter the remainder of the cap. Glitter underneath the cap and the stem (I did these the same color).
For the base of your mushroom, cut a foam core circle 1″ in diameter larger than the small hard foam circle. Now glue the hard foam circle to the foam core circle (right in the middle). Glitter your hard foam circle and the remaining showing foam core. Put the headband and the ribbon through your cut holes.
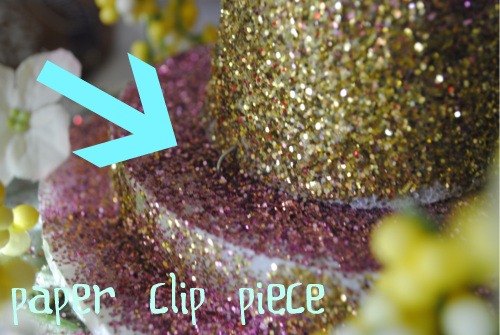
Glue the foam core with the affixed Styrofoam circle on to the top of the green flower foam. Finally affix your mushroom to the round hard foam base by using a paper clip cut in to two 2 1/2″ to 3″ lengths and stuck about 1/2″ apart in the middle, then carefully push your mushroom down on the clips. Paint a bit of glue around the base, add a little more glitter. Also, to be extra secure, I cut another paper clip and used the round ends to push part into the mushroom and part into the base.
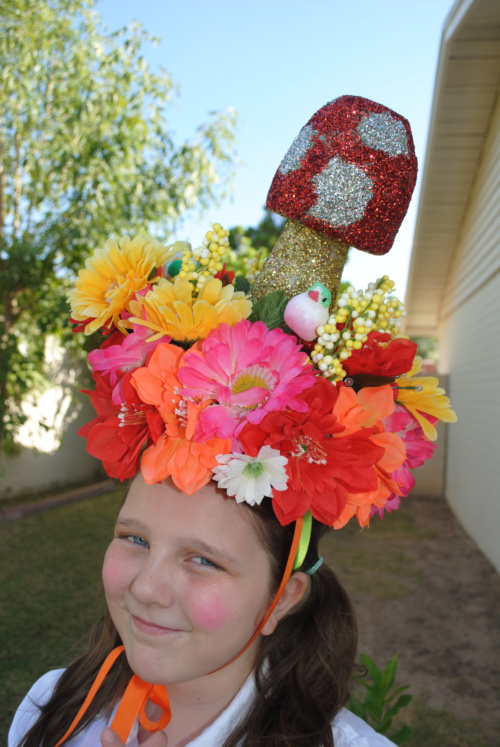
Final step, decorate your green flower foam with all your flowers and lastly place your birds.
Note about multiple projects: This hat would make a fantastic table centerpiece minus the headband and ribbon (what about replacing the mushroom with a sparkly pumpkin or make the mushroom in black and orange and gold). You could also just make the glitter mushrooms and use them for parties or other craft projects.





4 Comments
Peaches
THIS IS AMAZING.
Someone needs to invite me to a party where I can wear this awesome hat!!