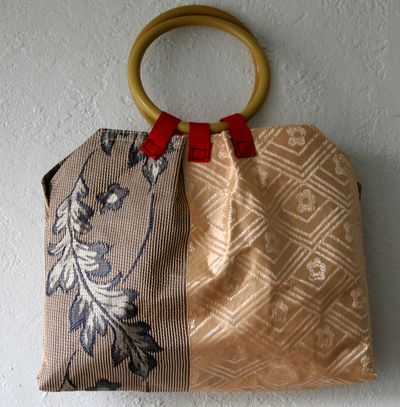
I found this cute octagonal placemat at the dollar store and I immediately envisioned it as a pleated clutch. Then I found a dollar store purse with hoop handles so I picked it up to cannibalize for its hoops (maybe I’ll repurpose the cheapo fabric part too, but that’s another project). I’ve had the placemat in my dollar store crafting stash for a couple months and decided that yesterday was the day I would transform it into the clutch it had always wanted to be. Because the placemat has finished edges, there is only a minimal amount of sewing necessary, and adding the hoops attached with ribbon is really the only slightly tricky thing (but it’s really not). If you are a beginning seamster, this project is totally appropriate for you!

My placemat is a sort of brocade-looking thing, and the clipped corners really add to the purse-like quality (in my mind, at least). So, only a little tweaking necessary to take it from placemat to purse! I’m sure this technique would be great with a wide variety of placemats, though, so I can’t wait to see what you come up with. (If you make one, you totally have to let me know, okay??)
I love that I can spend a buck on a hoop-handled purse at the dollar store and not have to spend five or more dollars at the craft store for those hoop parts!
Project Materials:
- Placemat, $1
- Purse with hoop handles, $1
- Grosgrain ribbon, $1
- Sewing machine, thread, on hand
- Clear thread, optional, on hand
- Heavy duty needle, optional (but very good for sewing through thick material)
To Make:
Pleating:
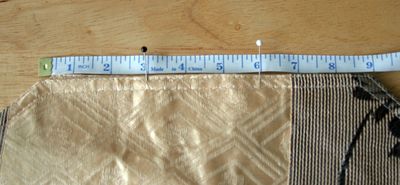
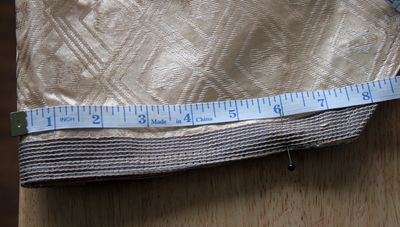
- Measure and mark equidistant points on the short edges of your placemat. I measured 3″ in from each end of mine and marked the points with pins. I then measured another half-inch or so in from those pins and marked them with a second set of pins. (For some reason I didn’t take photos of the second set of pins, or my camera ate them. I remember taking them, but mommy memory is so faulty, you know?)
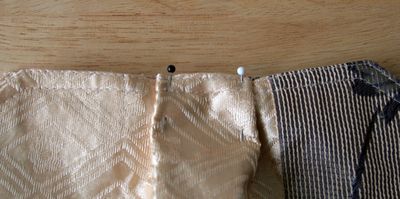
- Fold outside pins under inner pins into a pleat on each side. Remove marking pins and just pin the pleat.
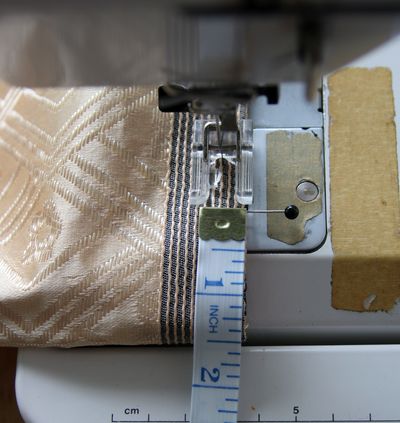
- Sew over the pleat, reinforcing at the point where fabric overlaps. I used clear thread in the top of my sewing machine so it wouldn’t show. I also used a heavy-duty needle in my machine (I have “leather” needles) because I was sewing thick fabric with multiple thicknesses, and I broke my regular needle
- Remember to pleat both short ends of the placemat.
Adding handles:
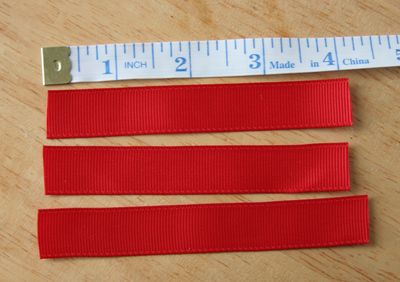
- For each side, measure three pieces of ribbon approximately 4″. You can use a match or lighter to seal the edges of the ribbon so they won’t unravel. This sounds a lot more intimidating than it is! Just barely touch the end near an open flame.
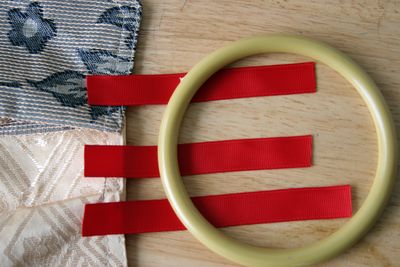
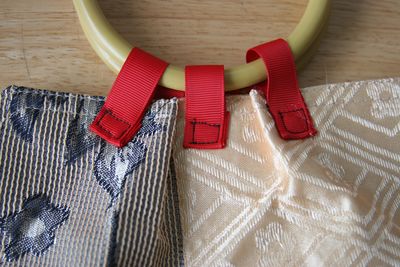
- Line the three ribbons up near the pleat on the wrong side (the side that will become the inside) of your purse. This will be the inside of the pleat. (Observant readers will note my finished purse is shown with the “wrong side” pleat outward in the photo. That’s because I liked how the ribbon tabs looked on the wrong side more than they did on the right side. The extra red was just prettier that way. This purse will work turned either way.)
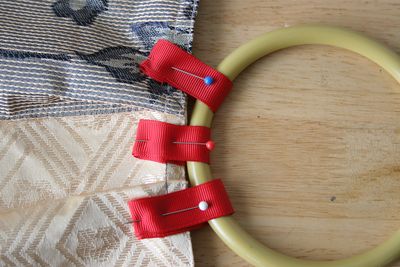
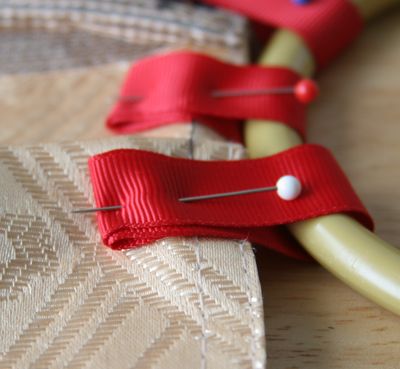
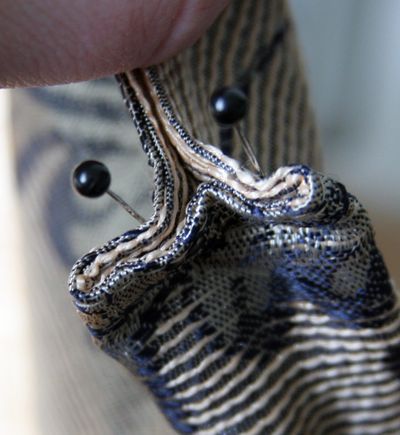
- Fold the ribbon over the hoop and pin. I folded my raw edges under and pinned a 4x thickness of ribbon onto the fabric because I wanted extra reinforcement.Here’s a close-up of the folded-under edge of the ribbon.
- Repeat handle attachment for second end of the placemat.
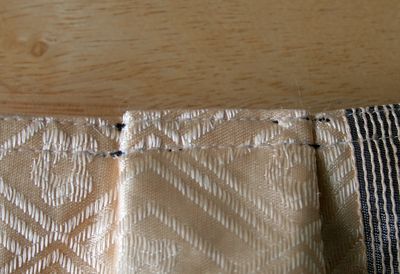
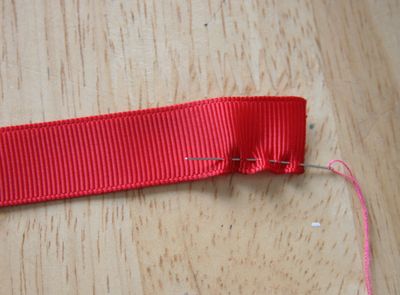
- Sew ribbons to placemat. I sewed a box on the reinforced bit of ribbon just to make sure it was well attached. Excuse the black thread that was used for demonstrative purposes! You will want to match thread if possible (or use the clear thread).
Sewing the sides together:
Because the placemat already has finished edges, you can sew this together and not turn the whole thing inside-out when you’re done. Or you can turn it inside-out (as shown in final picture). It will work either way.
- Fold placemat in half, matching handles up. Measure 1-1/2″ down from edge of purse and mark with a pin.
- Measure 1-1/2″ from fold and mark with a second pin (more if you want a roomier purse). You will sew between the pins, reinforcing at each edge.
- Take unsewn gap at fold and pinch into a T-formation and pin, as shown. Sew each side of T together to form gusset.
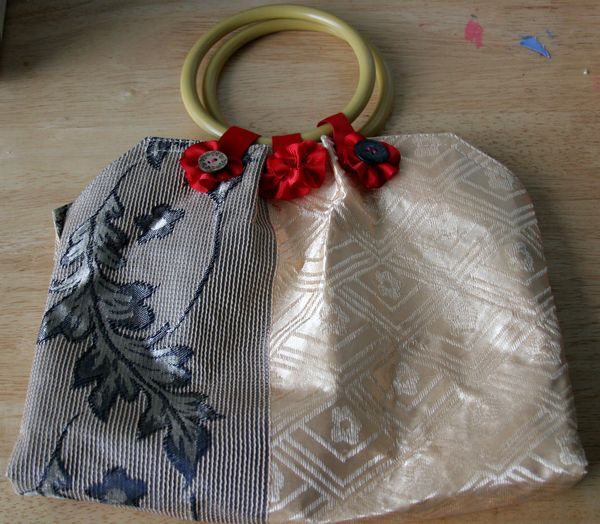
Your purse is done! Add embellishments if desired, like these ribbon rosettes.

Here’s a second placement of the rosettes.
To make ribbon rosettes:
- Finish edges of ribbon with match or lighter.
- Take a 6″ length of ribbon and sew a running stitch through one long end of the ribbon.
- Curl into a rosette and sew ends together or coil into a more full rosette.
- Attach a button to center of rosette if desired.
- Sew onto purse or add pinbacks to rosettes to allow versatility of placement.


12 Comments
JuxtaPoser
Not my style, but it looks great, and the tutorial is clear and easy to follow. Thanks! I will probably make some for the girls I babysit to play dress-up.
Catherine
Love it! I will be on the lookout for that sort of placemat now.
saba
great idea!!!!!!simple and easy too..
Shannon
I love this, and I bought the materials to make it….However the store did not have the purse with the round hoops. Do you have any ideas for alternate handles or something else that would be a round handle (because I like the round handles)? Thanks so much and thanks again for posting this, Heather :O)
heather
@Shannon: you could look for a purse w/round handles at the thrift store, or check the craft store (they are usually $5+ there though!)
Shannon
Heather, thanks! I ended up getting some handles from the craft store and I love this bag! I am making one for all of the ladies on my Christmas list. I am making my own handles from some pretty cheap materials and the tutorial if anyone is interested http://kudzukween.blogspot.com/2010/07/make-your-own-beaded-wire-purse-handles.html
Kay
What a cute bag. I love making things from placemats. Visit my blog, grannasdesigns.blogspot.com and check out the American Girl jacket that I made from 2 placemats that I found at the thrift store for 25c.