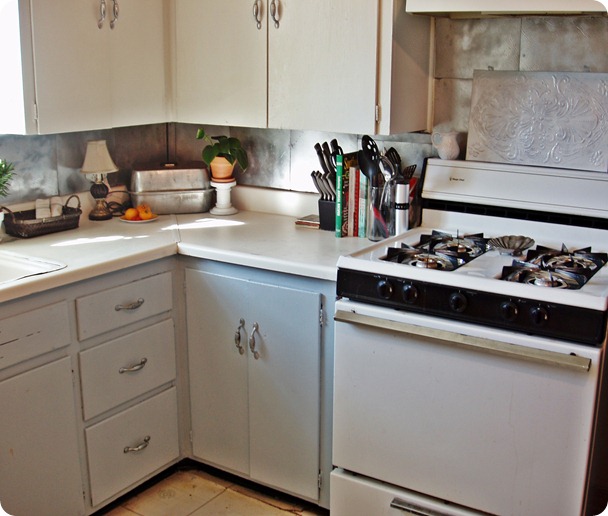
I was a guest judge for the dollar store challenge last week at The CSI Project, a weekly challenge blog. There were a lot of great projects represented in the competition (I saw some of you there! Some of you I have already featured here at DSC), but the one I chose was a huge project done on a dollar store budget. Like I said at CSI, I picked this project as my number one project because it made such a huge impact in the kitchen, and was an innovative way to use dollar store stuff to achieve a new look in the kitchen for little money. Part of the core mission of Dollar Store Crafting is to encourage you to make it work, even if your budget for a project is little or nothing.
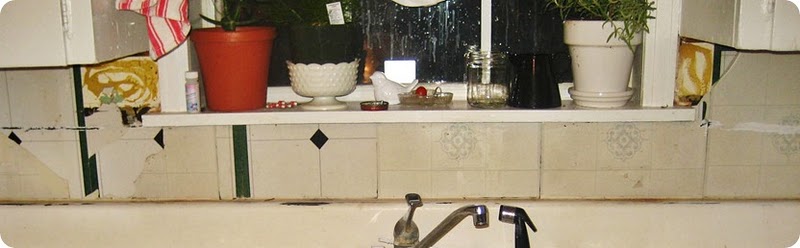
backsplash before
Tiffany at Easie Peasie improved her kitchen by removing crumbling and mismatched vinyl-stick on tiles that had been put up on the wall as a backsplash. Since the backsplash at her rental house had already been made of stick-on tiles, Tiffany decided to replace them with matching (and custom painted) tiles from the dollar store. Tiffany said: “This project proves that just because you are renting, and may not have a huge budget for renovations, you can be creative and find a cute way to make it pretty with what you have.” [click here for the dollar store kitchen backsplash]
dimensional stencil technique from Make the Best of Things
Tiffany mentioned that she thought it might be cute to do a stenciled pattern on the tiles, which could look like pressed tin. You could also do the dimensional stencil from Creative Jewish Mom on the tiles, to create more texture on the tiles. I recently saw a cool dimensional applique effect at Make the Best of Things made with hot glue and tissue paper that would be amazing for a backsplash.
Project Estimate:
- 20 stick-on vinyl tiles, $20
- Primer, $5
- Spray paint, $5 (or on hand, like in Tiffany’s case)
Total: $25 and up


5 Comments
Tiffany
Oh Miss Heather!
Thank you so much for choosing my little project as a winner! And for featuring me on your blog/website! I cannot express my gratitude enough!
This is such a beautiful write-up!
Much thanks and love!
Tiffany @ Easie Peasie
Bromeliad
That is wild. Love the ingenuity.
Wretha
Looks great, my mind is spinning with possibilities, my biggest question, how durable is this? You have this in the kitchen, near the sink and over the stove, I believe the tiles themselves would hold up, but what about the paint treatment you did to them? Is it washable? Scrubbable? Did you do anything to seal the painted surface?
Chances are, if I did this, I would probably use them as is, I would be less than happy if I went to the trouble and expense of painting them, especially if stenciling was done and it didn’t last, was washed off…
Thanks!
Wretha
Kelsey @ Tattered and Inked
This turned out so beautiful! So glad it made it to the top!
Heather- thanks so much for taking the time to visit and comment on my blog, I adore your site and am so honored that you stopped by! Glad you liked my mirror :)
Ann
Heather, thanks so much for linking my hot glue dimensional project to this creative blog post! I think she did well, too, and there are lots of possibilities for making her kitchen even nicer. Thanks for your kind words on my blog post!