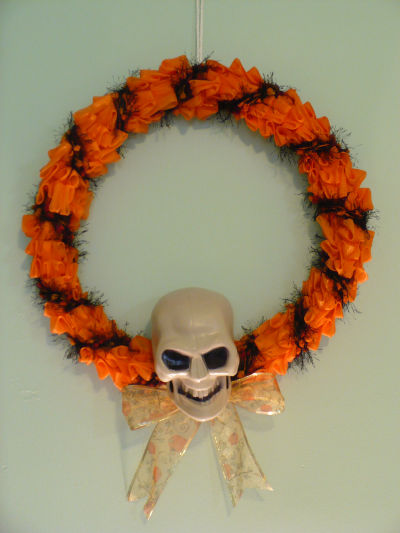
Whether we want to admit it or not, fall is nearly upon us. That means it’s time to start thinking about Halloween crafts! I had Halloween on the brain at Dollar Tree the other day, and after finding an 18 inch straw wreath form, I decided that a festive Halloween wreath was in order.
Unfortunately, my local store doesn’t have much Halloween merchandise out yet, so I spent some time looking around the rest of the store for anything in Halloween colors, especially orange. There weren’t many orange items in the store, but one thing in particular did jump out at me – bright orange ruffled bath scrubbers, the strip-style type that you use to scrub your back. I grabbed a handful of them, brought them home, and got busy gluing.
It also gave me a chance to use one of my favorite things to find at the dollar store. Yarn! A while back Dollar Tree had novelty yarn. I got so excited that I went back about a half a dozen times to buy more, constituting what will likely be a lifetime supply. You can also use twine or different types of string to achieve different looks.
Project estimate:
- 18 inch straw wreath form, $1
- Four orange bath band scrubbers, $4
- Novelty yarn, $1 and up
- Large plastic skull, $1
- Wire-edged ribbon, on hand or $1
- Twist tie, on hand
- Glue, on hand
Total: $7 and up
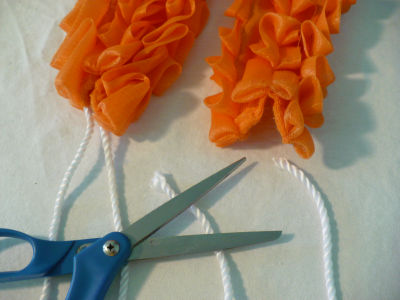
1. Cut the string handles off the ends of the bath bands. Save one of the strings and set it aside.
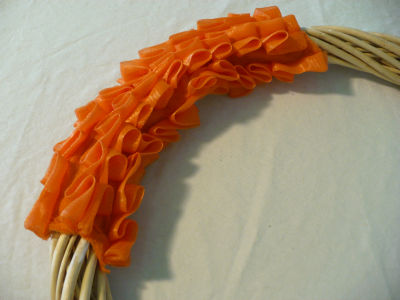
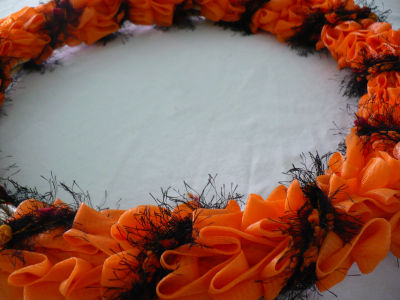
2. Apply a layer of glue to a section of the wreath form and carefully place one of the bath scrubbers onto the wreath.
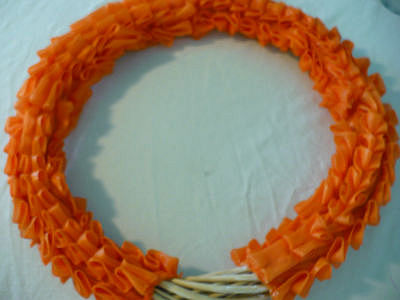
3. Continue working around the wreath adding bath scrubbers, working one section at a time. The ruffles on the bath scrubbers lay facing in one direction; make sure all four of the scrubbers are placed with the ruffles facing in the same direction.

4. Glue the end of the yarn to the wreath form to secure it in place. (The yarn I used for this wreath is Lion Brand Fancy Fur in a color combination called jungle print.) Let the glue dry.
5. Wrap the yarn around the wreath, making sure that each wrap is evenly spaced from the last. Continue wrapping around the wreath following the same path until you are happy with the thickness of the yarn wrapping. (I used about half of a skein.) Glue the end of the yarn into place to secure it.

6. Glue a plastic skull into the gap between bath scrubbers at the bottom of the wreath.
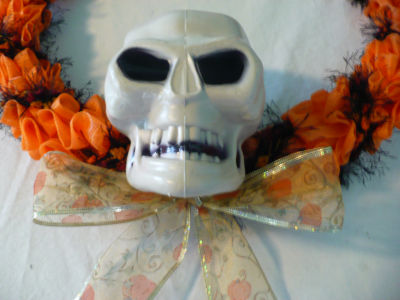
7. Tie a bow using wire-edged ribbon. Use the twist tie from a bread bag or garbage bag to secure the bow to the wreath form under the skull.
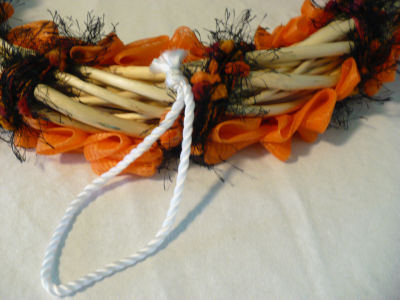
8. Flip the wreath over. Find the string you set aside in step one and tie the ends together to form a loop. Glue the loop to the back of the wreath at the top for hanging.
This project can easily be adapted for wreaths in many different themes by using different colored bath scrubbers, yarn, and embellishments. Use yellow bath scrubbers, red or brown yarn, and a pumpkin or gourd for a harvest wreath; light blue bath scrubbers, silver yarn, and a snowman for a winter wreath; pink scrubbers, variegated pastel yarn, and a bunny make an Easter wreath. Take the idea and run with it, in any direction you like!


18 Comments
That Kind Of Girl
Adorable! I can’t believe those are dollar-store bath scrubbers! Genius adaptation of an unusual item.
Tsoniki Crazy Bull
I made a dollar store wreath – but this one is SO much cooler!!!
heather
This is seriously a genius use of those bath scrubbers!
Beth
Love that!
Heather H
Bought the stuff today to do it, but I got a black glitter covered skull ;)
Jenna
Wow! This is so great. Awesome idea. I may have to try i
Anne
This is really cool
Rachel
That is so, so creative! Bath scrubbers!?!? I love the way your mind works! I’ll be linking.
Kim Vahle
So cool. you could do them in pastels for easter. red & green for Christmas. I see lost of wreaths in my future.
Tina Dalasinski
Very awesome I will have to make me some.
Theresa
This is extremely creative!! I’m not a skull person so would use a little ghost or pumpkin, something cutesie. I LOVE the whole concept, would have never thougth of it…am glad you did!!
Ginny
Absolutely LOVE this idea! I went out right away for the supplies to make this project. So far I’ve made two wreaths, the orange bath scrubbers are actually hard to find! I posted pictures of my creations on my facebook page under the “crafts” album, check them out at facebook.com/shortyblackwell Thanks for sharing your idea! I had fun with this one!
Carol
Thanks for the great tutorial for the Halloween wreath! I just made one and linked folks over here for your tutorial. http://flossylady.blogspot.com/2011/10/october-has-arrived.html