Kids love playhouses and forts, and custom playhouse table covers can be spendy. Sewing your own can be confusing and time-consuming. And how can you make one if you don’t sew? Simple, with our instructions for how to make a no-sew felt playhouse! This tutorial will teach you how to make a felt playhouse that is designed to slip over a card table you already have on hand. I’d like to welcome Cheryl from Sew Can Do who came up with this brilliant idea! Thanks for sharing your awesome tutorial with us today, Cheryl! Take it away!
Make a No-Sew Felt Playhouse
by Cheryl, Sew Can Do
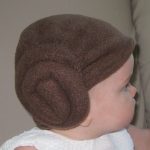
Hi Everyone! I’m Cheryl from Sew Can Do. I’m thrilled to be guesting on such an amazing blog today! I’m a homeschooling mom of 3 kids, 8yrs, 4yrs and 1yr, who likes making fun & unusual crafts on the cheap. I only started crafting 2 years ago, which is proof you don’t have to have been born a crafter to make stuff yourself. My blog is all about creative, crafty ideas that won’t break the bank. I also have an Etsy shop, The Green Hedgehog, where I sell some of my creations like my Hairdo Hats:
Here are a few favorite Sew Can Do thrifty tutorials:
Now let’s get started! Today I’m going to share my new tutorial for a No-Sew Felt Playhouse:
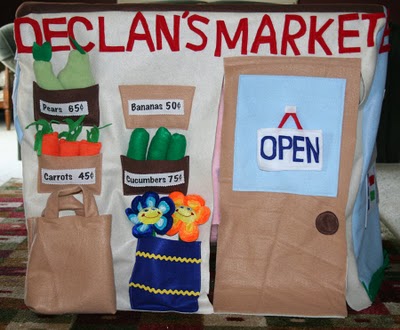
You’ve probably seen the usual felt playhouse that fits over a card table. Kids & adults both love them, but they aren’t the easiest thing to make. Being so big, they involve a lot of sewing and time. I made this Shop-Around style one for my own kiddies earlier this year and while we love it, it did take a lot of work:
So I came up with a method so anyone could make one in one day and for way cheap. If you can use scissors and glue, YOU can make a felt playhouse.
You’ll need:
- Table your playhouse will cover, on hand
- Felt by the yard (available at fabric store for just a few dollars/yd), about $3.50 a yard
- Felt by the sheet for embellishments, on hand or $.25 a sheet
- White Glue (available at the dollar store or just about anywhere), on hand
- Scissors, on hand
- Yardstick, on hand or$1
- Tape Measure, on hand
- Fabric marking pen or chalk, on hand
Total: $7 and up
First you’ll need to measure your table to figure out your felt size for the roof & walls. To make it easy I used one long piece to cover the top & 2 sides and then two other pieces for the remaining sides.
For your long piece measure from the bottom of one side up over the top & back down to the bottom of the other side to get the length, then measure across one side to get the width and add 8 inches to the width (this is for the no-sew attachment). For the two smaller sides measure from bottom to top of table for length and add 4 inches, then measure width and add 8 inches.
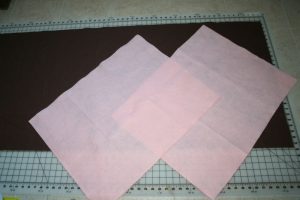
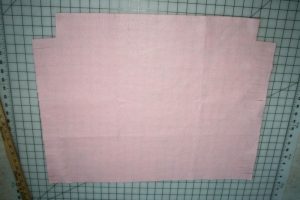
Cut pieces so you end up with 3 pieces that look like this:
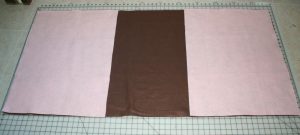
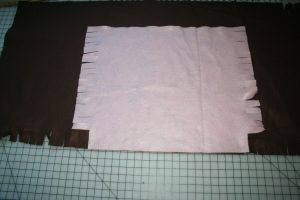
Now you’ll need to cut the fringe that will knot the sides together (just like no-sew fleece blankets). Place your smaller side pieces on top of the longer rectangular piece like this:
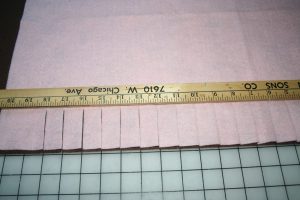
Place a yardstick 3.5 inches from the raw edges of one of the long sides and begin cutting strips one inch apart, stopping at the roof section between the stacked side pieces:
The yardstick will help keep all the strips exactly the same size which is important for tying later.
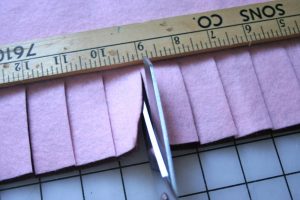
Now you’ll want to cut the strips that will tie the top to the side walls. Cut 4 inch squares out of those corners:
Line the side piece up with the roof section of the long rectangle and cut 1 inch strips as done previously.
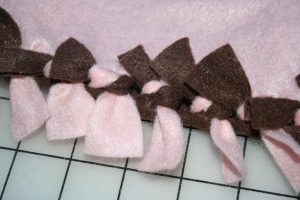
Repeat with remaining sides. Now beginning at the roof & side section, start double knotting the strips together like so:
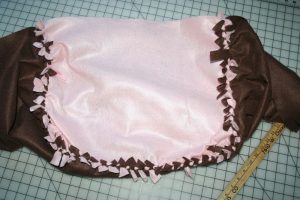
Continue knotting the sides together so that a finished side will look like this:
Repeat to finish the other side. Now it’s ready to decorate. Cut windows & a door (using the yard stick & marking pen or chalk to mark the lines and decide on placement before you cut) and then let your imagination run wild with added design elements that you simply glue on.
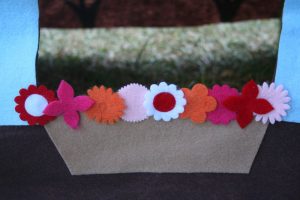
I kept this one simple to stick to the 1-day timeframe, by adding shutters & window boxes:
A tree & birdhouse:
And some colorful flowers cut with my Cuttlebug (but could also be done by hand):
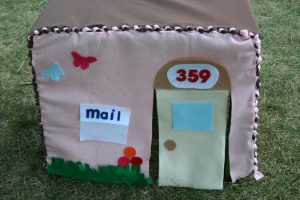
On the front I added some grass, butterflies, mailbox pocket & house number:
Now it’s ready for some little residents! The possibilities are endless and with all the time saved not having to sew it together, you can add all kinds of fun details. For some more felt playhouse design ideas, just click here.
Thanks so much to Heather for having me here at Dollar Store Crafts!








13 Comments
J. Hill
This is ALL KINDS of brilliant!!!! Thanks for the great tutorial!
Jeni
There is so much about this that I LOVE! It’s easy. You can make it in one day. You can store it EASILY! You can take it to Grandma’s house:) Love, love, love it!!!!
Michelle L.
Fantastic project! I love Cheryl’s blog, nice to see her visiting Dollar Store Crafts. This is so very cool for a non-sewist like me.
breanna
this is incredible!!!
Sophia
This is great! If my kids didn’t already have teepees I made them a few years ago, I’d be making these for Christmas gifts. I’m wondering if a niece or nephew would like one … :)
heather
Thanks for posting this awesome project, Cheryl!! You rock! this is such a great idea!
laurie dyer
oh my goodness! This is perfect, I’ve been wanting something like this for our long low tables at our church nursery. But it seemed like a pain . . . but this will be simple to do, plus my kids can help with the tying!
thanks!
laurie
Amanda
Just way beyond words CUTE!
A Magical Childhood
BRILLIANT. I love this so much. :) Thanks for the fabulous tutorial!
Glenyce
I love this. I would actually have a chance of finishing this project!
Kristin
This is so awesome! Thank you so much! Great idea for a not so expensive christmas gift for my two girls. The cost of Christmas really adds up when you’re shopping.