
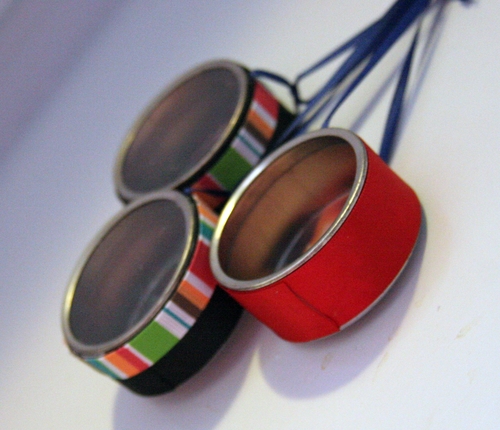
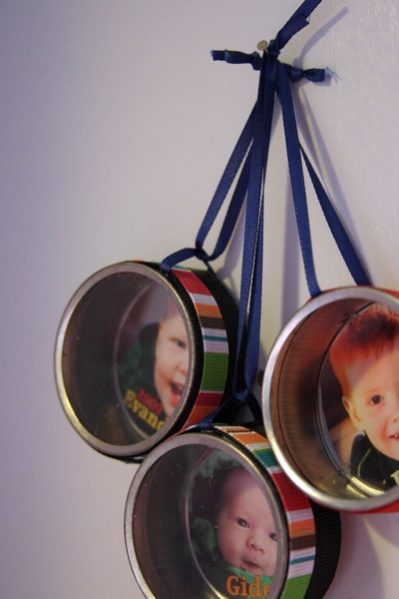
I love those round silver tins in the wedding section at the dollar store (don’t you?). So many great things you can make with them! Each of these photo tin Christmas ornaments costs about 35 cents and is simple enough for anyone to make, so you have no excuse NOT to make them! And if you don’t have kids, don’t worry! You can use any photos or mementos to make unique ornaments. Old timey photos, collages, or even scrapbooking embellishments all combine to make ornaments that fit perfectly in your decorating scheme.
Project Materials:
- 3 pack of tins, $1
- Photos, color copies, or printouts of photos from your computer, on hand
- Ribbon (3/4″ and 1/8″), on hand or $1
- Glue (craft glue and/or hot glue), on hand
Total: $1 for 3 ornaments
One of my family’s Christmas traditions is to add a new ornament to the tree for each person, every year. Growing up, my mom gave us each our own box where we kept our ornaments, and each year we got to put our own ornaments up on the family Christmas tree. When the kids grew up and had their own homes, my mom gave us the boxes of ornaments we had each collected over the years. Some of my favorite ornaments over the years were the ones with photos on them. It’s fun to see how I changed over the years!
When we become adults, as you all know, Christmas gifts matter less and less. It’s hard to get adults on your Christmas gift list something they actually want for the holidays. The old joke is “What do you get the person who has everything?” Well, these days, in the USA, most of us are fortunate enough to have nearly everything we could want, and certainly everything we need. I like to give the grandparents (who don’t want anything for Christmas!) little photo mementos of my kids. Put a string on them, and they’re ornaments! That makes them useful (and keeps them from being clutter).
Prepare Your Photos:
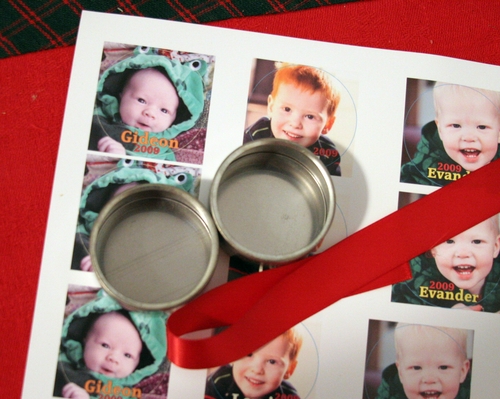
Either collect printed photos, color copy photos to use for this project, or use your desktop publishing software to create a sheet of images to use. The printed squares shown in this picture are 2″ square, and I put a very thin 2″ circle around the area I wanted to cut. I also added my sons’ names and the year.
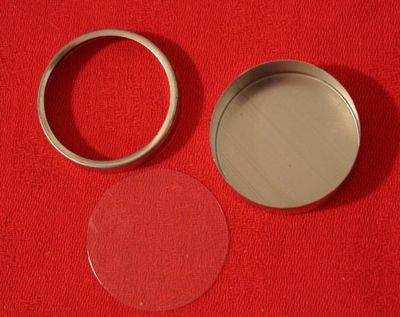
If you can’t print the photos with the circles on them, don’t worry. You can just use the plastic insert in the tin as a template and trace around it to make an outline on the photo.
Prepare the Tins:
Open up the tins. Note, the metal tins from the dollar store are fragile, so open them as gently as you can. They can bend and get misshapen if you exert too much pressure on them! In many cases, the plastic insert has come loose from the front of the frame. Don’t worry, we’ll fix that later.
Make the Ornament:
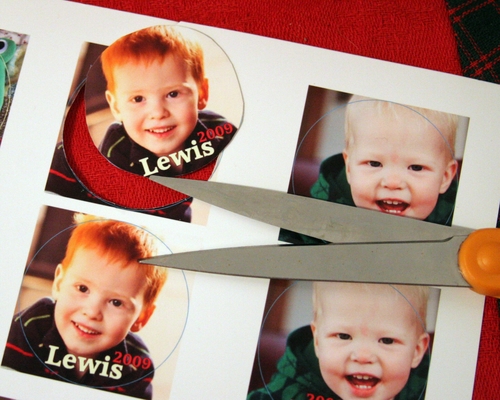
Cut out the photos you want to use. Don’t worry if your cutting job is less-than-perfect. It won’t show in the final product.
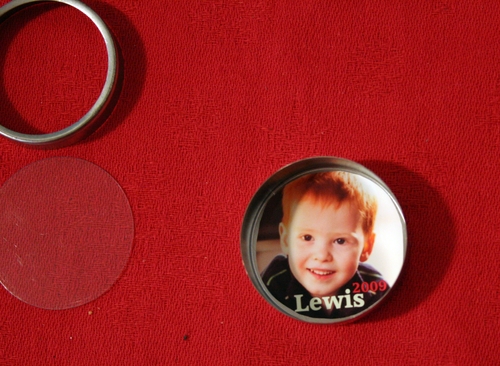
Glue the photo inside the tin. You can use craft glue or hot glue for this step.
Optionally, add any other embellishments you want, like a loose sprinkle of glitter (for a snowglobe effect). Allow everything to dry completely before moving on to the next step. (The waiting part is one good reason why I would use hot glue!! I’m impatient!)
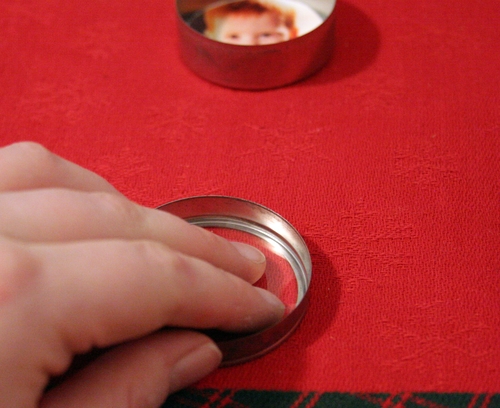
Fix the plastic insert. Pop it into the front frame (it should snap into place). Because these tins are inexpensive, the window has a tendency to fall out. Once we’re done making the ornament, you won’t be able to fix that, so what you want to do now is fix the plastic insert into place with hot glue. Just put a very thin line of hot glue above the plastic insert, all the way around the frame. Don’t use craft glue for this step.
This fix will keep the plastic insert in place, BUT it will still be semi-fragile. If you care about the window staying in place, don’t let your toddlers or preschoolers handle the ornaments! (Ask me how I know!)
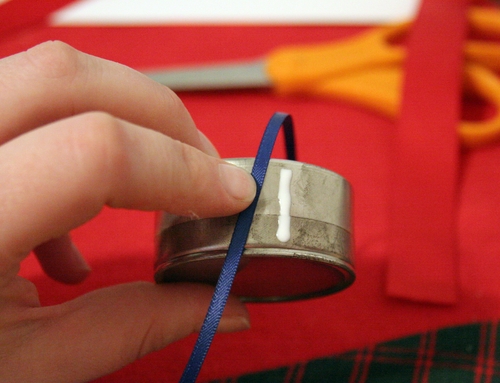
Once everything is dry, put the tin together carefully (remember, if you force it, it could warp). Cut 1/8″ ribbon about 10″ long. Put a line of glue across the tin as shown, and put the ribbon on the line. This will be your ornament hanger.
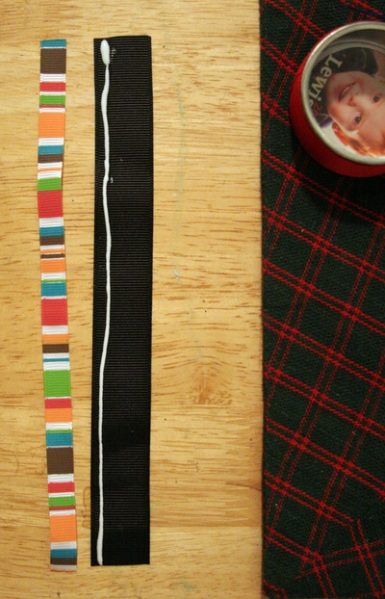
Next, cut a piece of 3/4″ ribbon long enough to go all the way around the tin. (I’m not sure right now how long the ribbon is – about 8″ I think. Just measure before you cut it.)
If you want to add a second piece of narrow ribbon for interest, glue it to the wider ribbon now.
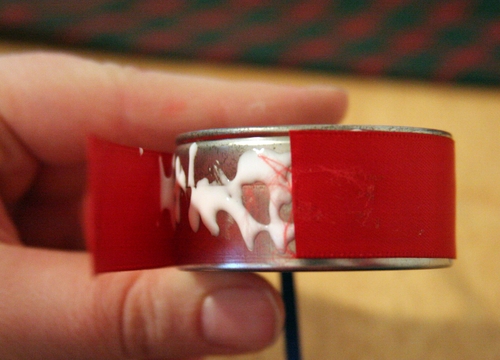
Cover the edges of the tin with glue, and attach your wide ribbon all the way around. Be sure to glue the cut edge of the ribbon down as well. Tip: hold a lit match near the cut edge of the ribbon if you want to seal the frayed edges. Do this BEFORE you glue!
Knot the small ribbon right down near the ornament, and then tie it together at the end.
You’re done!

For 24 more Great Ornament Ideas, visit: Under the Table and Dreaming: 24 great ornament tutorials




13 Comments
mer
thats adorable
Kathy V.
Grandmas love these…(-:
LisaB
These are so cute. I’ve looked and looked for those tins. What store are these found in? Is it a Dollar Tree store?
heather
@LisaB: Yes, they usually have them in the wedding section of the Dollar Tree. Good luck!
Cindy Ware
I absolutely LOVE these little photo tin ornaments!! I plan on making some. Love your crafts!
Lora
Thanks so much for this post! I was looking for those to make an Advent calendar this year! Thanks so much!!!
niki
I can’t find these at dollar tree. I found some at michaels, but they were really small (about 2 inches diameter). Are these small like that or bigger?
heather
@niki, yes, these (purchased at dollar tree) are 2″
Amanda
I looked for these at Dollar tree and I know they used to sell them but I don’t think they do anymore. I searched their online site as well. *sad*
I need an idea for craft club quick since I was supposed to do these . . . EEK!
heather
Hmm! I always see them at my DT… maybe check another nearby DT store? Pretty sure they are usually in stock. If you need another idea, how about getting the heart-shaped containers from the wedding section and putting a photo inside & leaving the front lid off… you could still do this same basic idea, but heart-shaped.
Ludicrous Mama
If you covered the lids with scrapbook paper, these would make a nice advent calendar if you glued them to a board or cardboard. You could even make them in a tree shape! (3 on bottom for the ‘trunk’, then 6,5,4,3,2,1 going up = 24)