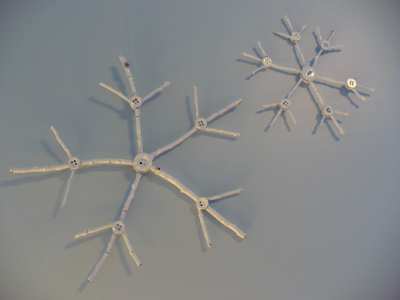
The other day, I woke up and there was a little bit of white stuff accumulating on my lawn. Yes, winter is definitely on its way! Inspired by the weather, and a twig craft challenge issued by Funky Junk Interiors, I grabbed my giant jar of buttons and got to work. The results came out even better than I’d pictured them in my head, and they are so simple to make! I left mine plain, but you could dress them up with a little bling as well – cover them in glitter, or glue a rhinestone to each button.
Project estimate:
- Twigs, free
- Buttons, on hand or $1
- Glue, on hand
- Wax paper, on hand or $1
- White spray paint, on hand or $1 and up
- Fishing line, on hand or about $2
Total: Free and up
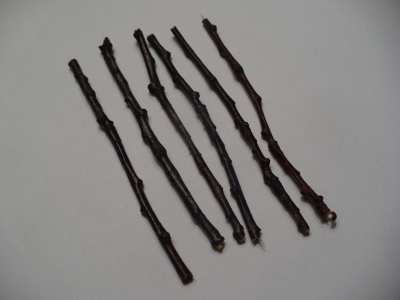
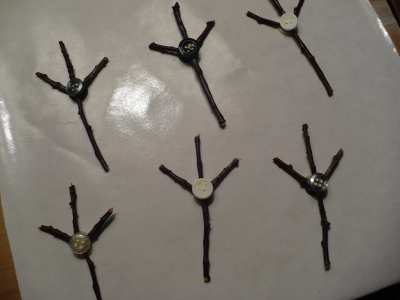
1. Decide how many “arms” your snowflake will have – I made one with 5 arms and one with 6 arms. For each arm, break off a piece of twig, making sure they are all about the same length. (Your finished snowflake will be about twice as wide as the length of the arm pieces.)
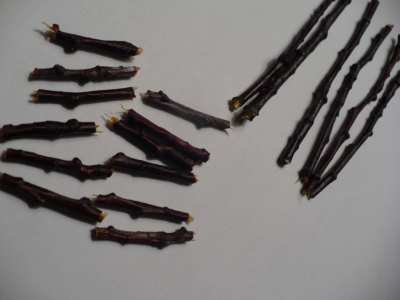
2. For each arm piece, you will need two smaller cross pieces. Again, make sure all of the cross pieces are about the same length.

3. For the gluing portion of this project, work on top of wax paper or plastic-coated freezer paper. If you have any stray drips of glue through or around the buttons, it should peel easily off of the slick surface without leaving a pesky residue of torn paper.
Put a drop of glue on the back of a button. (I used wood glue, but many different types of glue will work.) Place the button glue-side-up on the wax paper. Lay an arm piece on top of the button, then carefully line up two cross pieces at the point on the arm where it crosses the button. All three pieces should be in contact with the button and drop of glue.
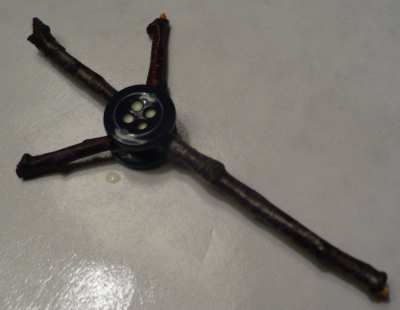
4. Put a drop of glue on the back of another button and place it on top of the meeting point of the twigs, creating a twig-and-button sandwich.
5. Repeat steps 3 and 4 until all of your snowflake arms are assembled. Allow the glue to dry completely before moving on.
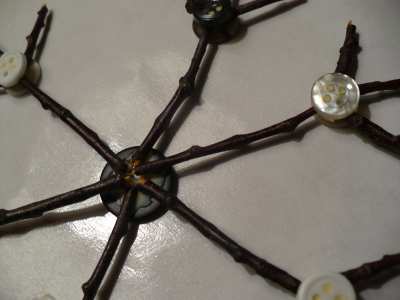
6. Put a drop of glue on the back of a larger button. Place the end of each arm into the glue on the button.

7. Glue another large button over the exposed ends of the arms.
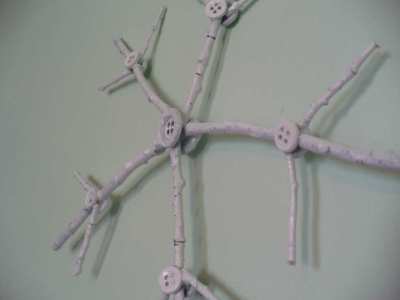
8. When the glue is completely dry, apply several light coats of white spray paint to the snowflake. To hang, tie a piece of fishing line around one of the arms just below the cross pieces. (I snagged my fishing line from the hubby’s tackle box, but if you don’t have any handy, the non-fancy kinds of fishing line are really cheap – and useful!)


5 Comments
Erin
These are so cute! What a great idea! :)
Kate
These are really cute! Smaller versions would make great Christmas ornaments! :)
Bromeliad
You can’t beat the front yard as a thrifty resource for craft supplies.