I’ve loved miniatures ever since I was a kid. Since I never had a “real” doll house, from a young age I started making my own miniatures. They started out as simple creations,cutting and pasting elements I liked from interior design magazines and catalogs into empty boxes to create dioramas of rooms, stacking the finished boxes to create a complete house. By late elementary school, I was taking on projects like creating a teeny-tiny dining room table and chairs out of popsicle sticks and the plastic shafts of cotton swabs.
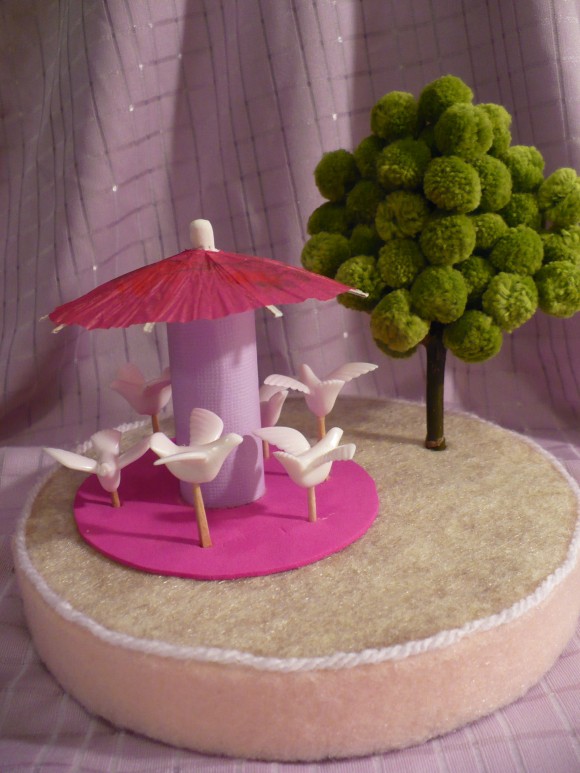
As an adult, I still get giddy when I’m making miniatures, so I thought I would share some of my ideas by writing a series of miniature-making tutorials. I most recently had an idea for making a mini merry-go-round using a cocktail umbrella. Instead of carousel horses, I used some plastic doves that were left over table scatter at my wedding that came from Dollar Tree. You could also use any other tiny animals, including gumball machine prizes. (Note also that if you are making this for a child, it is fairly fragile and won’t stand up well to much play. Definitely more of a display piece!)
Project estimate:
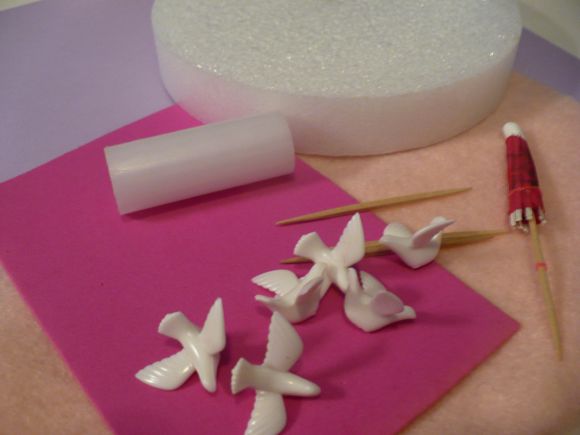
- Styrofoam base, $1
- Felt, on hand or $1
- Craft foam, on hand or $1
- Scrapbook paper, on hand
- Adding machine roll, free
- Dove table scatter, $1
- Toothpicks, on hand or $1
- Cocktail umbrellas, $1
- Yarn, on hand
- Glue, on hand
Total: $3 and up
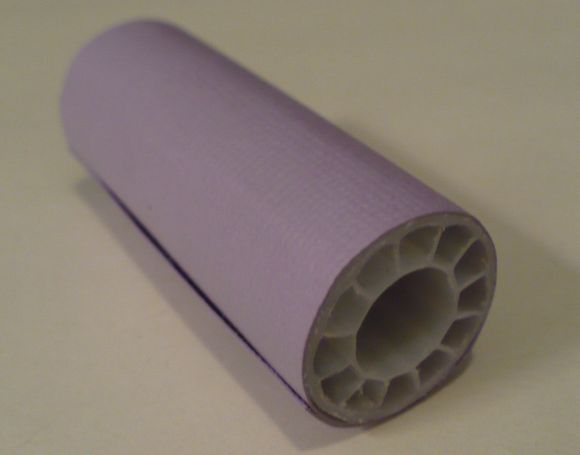
Start with your empty adding machine roll (the plastic tube from inside a roll of calculator paper or cash register receipt tape). If you don’t have one laying around, ask anyone you know who works in retail to save you one! Cut a piece of paper the same width as the tube and roll it around the outside, securing in place with a little glue.
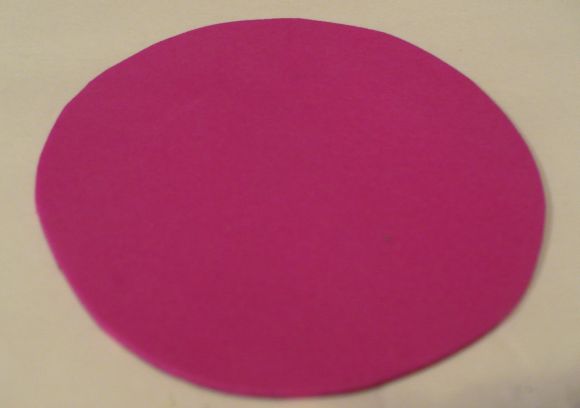
Cut a sheet of craft foam into a circle that is about the same diameter as the cocktail umbrella when fully opened.
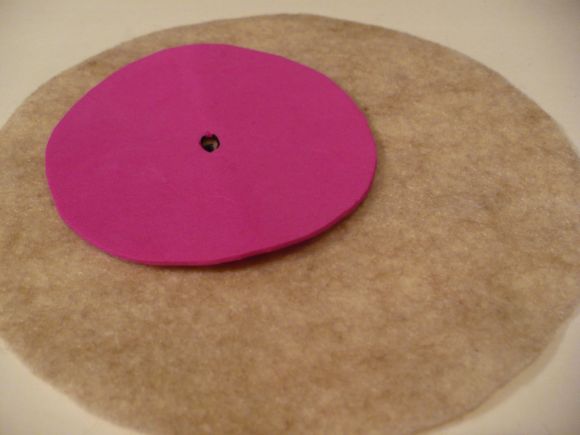
Find the center of the circle of craft foam and cut a small hole. Cut a piece of felt the same size as the base and lay the foam circle on top where you want the merry-go-round to sit; mark the placement through the center hole with a marker.
Using the marker dot as a guide, cut a corresponding hole in the circle of felt.
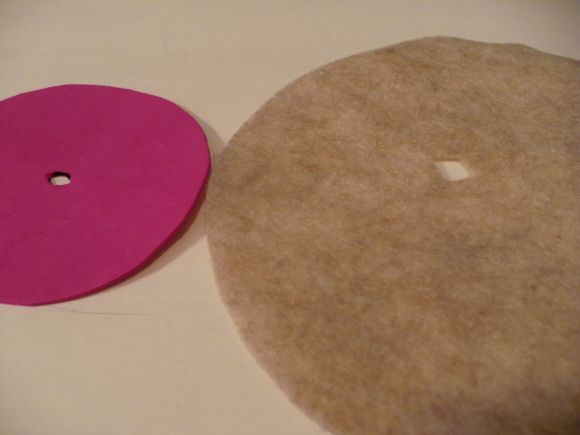
Glue the felt to the top of the foam base, then glue the foam circle to the felt, making sure the cut out points line up. Use a toothpick to make a pilot hole in the foam base at the center of the holes.
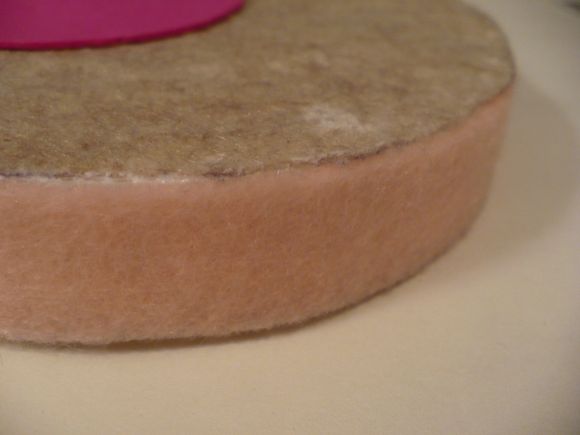
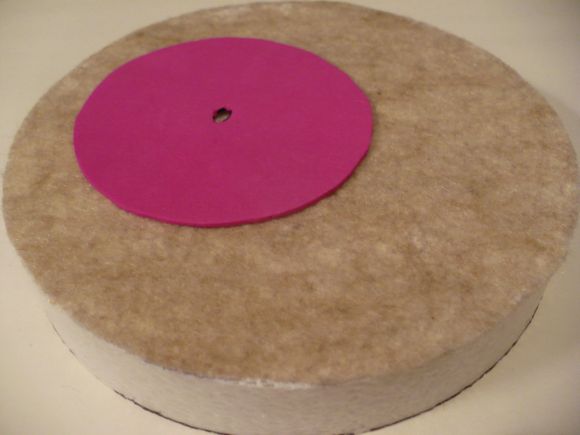
Glue a strip of felt around the outside edge of the foam base as well. If desired, you can give it a more finished look by gluing a coordinating piece of yarn around the seam where the two pieces of felt meet.
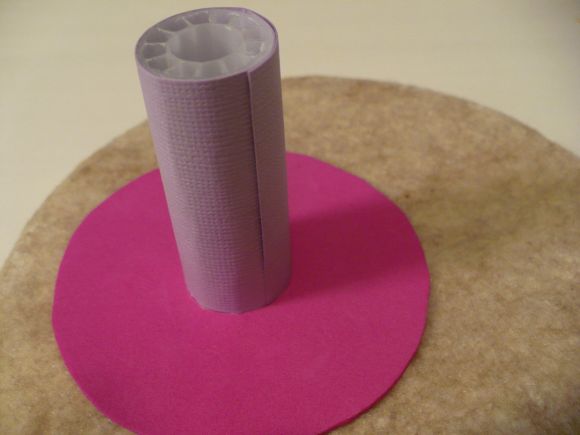
Glue the paper-covered adding machine roll to the center of the craft foam circle, making sure the hollow core of the tube lines up with the holes you cut in the foam and felt.
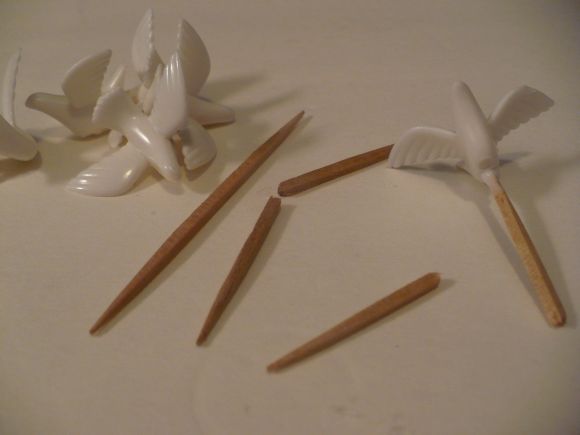
Cut toothpicks in half and glue the pointed ends into the tiny holes in the bottoms of the plastic doves.
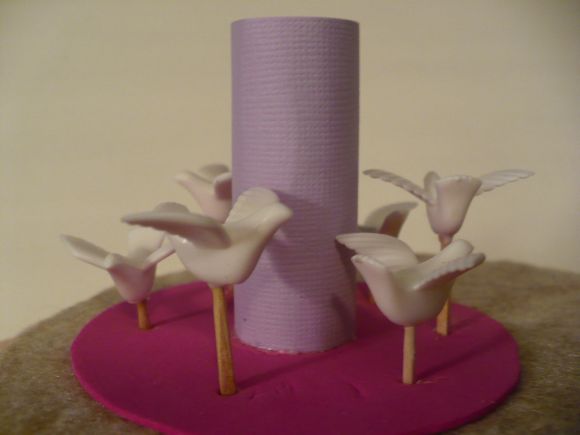
Use a sharp object, such as a tapestry needle, to make a pilot hole where each dove will go, then put a dab of glue on the end of each toothpick and carefully press them into the base. Alternate the height of the doves (if you use an even number, you can alternate them up-down-up-down all the way around).
Try to space them as evenly as possible all the way around the tube.
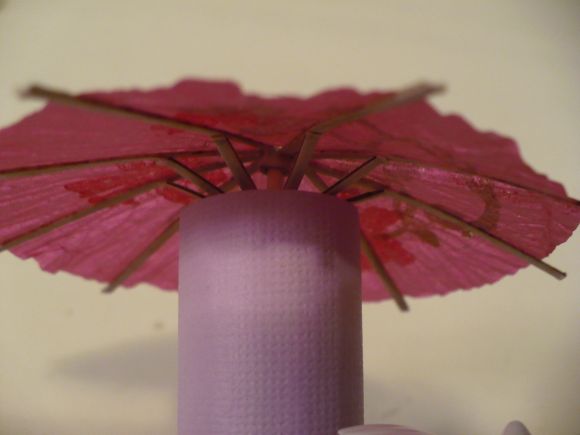
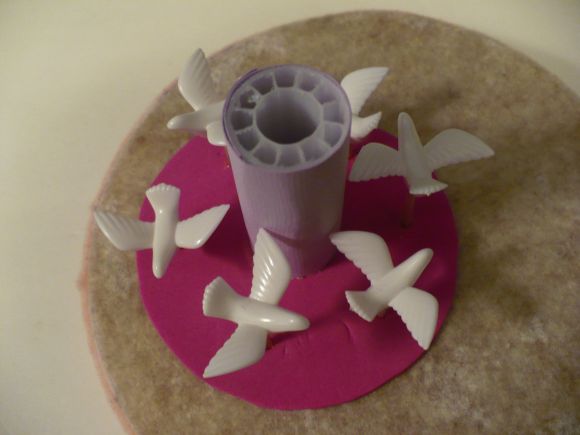
Very, very carefully press the cocktail umbrella through the center of the tube and into the foam base. This might take a couple of tries because the umbrellas aren’t that strong! Push it in until the mouth of the tube holds the umbrella as far open as it will go.
I finished my scene with a tree, which is just a twig from my yard with a ton of green pom poms glued to it. I made a hole through the felt and into the foam base with the pointy tip of a pair of scissors, then put a dab of glue on the end of the twig and pressed it into the hole.
Additional resources:


10 Comments
Care
So cute! I love all things miniature, too.
That pom pom tree is killing me! :-)
heather
I love your tutorial – so cute. And like Care, I am LOVING the pom-pom tree!!
rhonda
Thanks, guys! I think the tree ended up being my favorite part, too! I plan to make more of them to accompany other upcoming miniature projects, so I think I am going to make up a tutorial for them as well. I’ll update the post when I do! :)
april's craft nest
i can’t tell you how much i love that tree! that is so rad!
Rachel
That’s super cute! I love how you used the umbrella. I’ll be linking.
breanna
i think this could be adapted to be an ADORABLE cake!!
Heather
This is so cute! I love the idea so much! Great job!
esther nova
hey.! i superlike your tutorial. it helps a lot. keep on posting art turorials. Thanks.! God speed.