Like most little girls, I played with Barbie dolls a lot when I was a kid. While most of my friends were sending their Barbies on dates with Ken and zooming to the hair salon in their pink Cadillacs, my dolls were engaged in altogether different activities. My Barbies liked to sew their own clothes, bake cupcakes, and of course read. I would sit on the couch with my favorite books and Barbie would sit next to me, the pages draped across both our laps as I told her story after story.
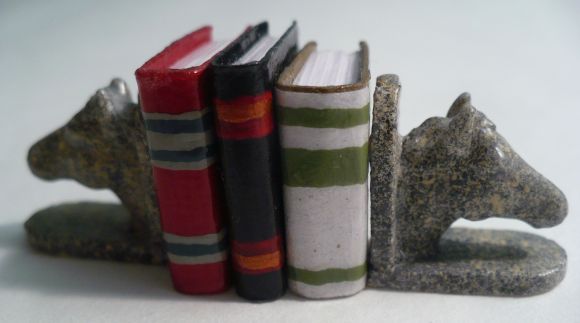
These days, I’ve moved on from playing with dolls to a more grown-up (but no less fun) pastime: making dollhouse miniatures. It’s so addictive! Paying homage to my childhood playtime, I thought, “why don’t I make Barbie her own books?” These tiny volumes look strikingly like the real deal, and despite being made out of paper, they are durable enough to stand up to hours of play. I also made some tiny horse head bookends to go with them; see how to make them on my blog. [how to make miniature horse head bookends]
Project estimate:
- White paper, on hand
- Colored cardstock, on hand
- Mod Podge, on hand
- Craft paint, on hand
- Masking tape, on hand or $1 and up
Total: Free and up
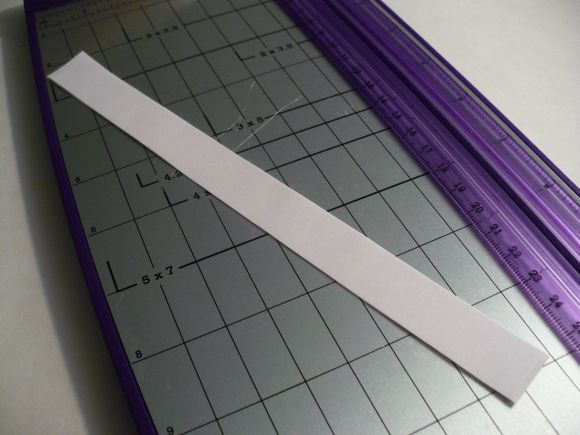
Start by cutting three strips of plain white paper to the height of your finished book pages (just shorter than you want the finished book to be).
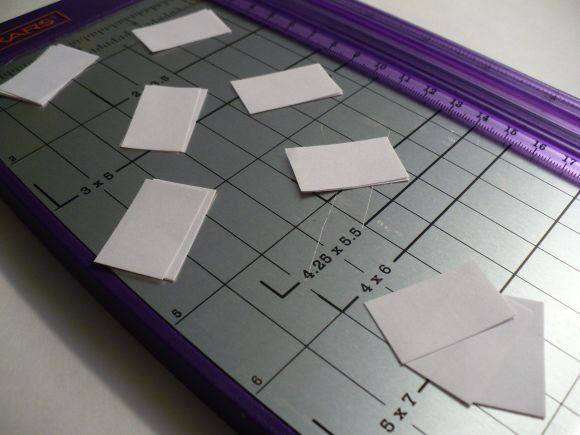
Stack the three strips and cut them into pieces twice the width of the finished pages. Keep the pieces stacked in threes.
Fold each set of three pieces in half. Each of these folded sets will become what is called a signature of pages in your book. You can add as few or as many signatures as you want. The more signatures you add, the thicker the book will be.
Stack the signatures together with the folded sides facing the same direction. This will be the spine of your book.

Give the spine a generous coat of Mod Podge. Use the bristles of a paint brush to work the Mod Podge into the spaces between the signatures. Pinch until the Mod Podge is dry. (If you’re impatient like me, a hair dryer is helpful in speeding things along!)
Apply several light coats of Mod Podge around the other three edges to hold all of the pages firmly in place. Again, pinch the stack until the Mod Podge is dry.

Cut a strip of cardstock just taller than your pages and long enough to wrap around with a little extra at the edges. (Remember, if you’re uncertain about the size of your cover, it’s better to cut it a little bit bigger than you think you need and trim it down to size.) Attach it with Mod Podge, then seal the whole thing in with a couple more coats of Podge.
Mask off the spine of the book with masking tape. I like to use blue painter’s tape because it peels off nice and clean without hurting the cover of the book.

Paint tiny stripes wrapping around the spine of the book.
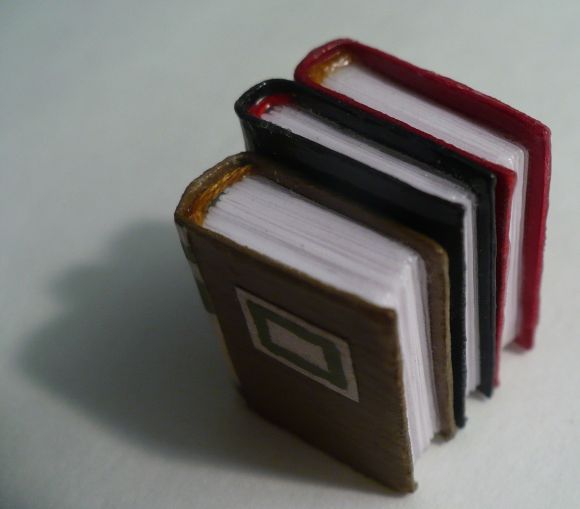
If you’re a detail freak like me, simulate the look of a real book binding by adding a tiny piece of embroidery floss across the end of the spine. Coat the embroidery floss in Mod Podge before you cut it down to size to keep the strands from separating; use tweezers or a toothpick to guide the tiny bit of string into place.
After you add your details, give it a final round of Podge for good measure. (My finished books are so well-Podged that when you drop them on a table they sound like they are made of plastic!)

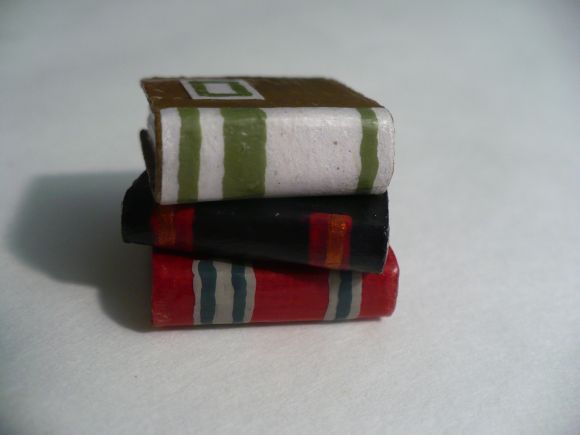
You can make the books whatever size you like. Mine are all a little less than an inch tall, a size that works well in 1/12 scale.

Play around with different stripes on the spines of the books. Look at real books for inspiration.
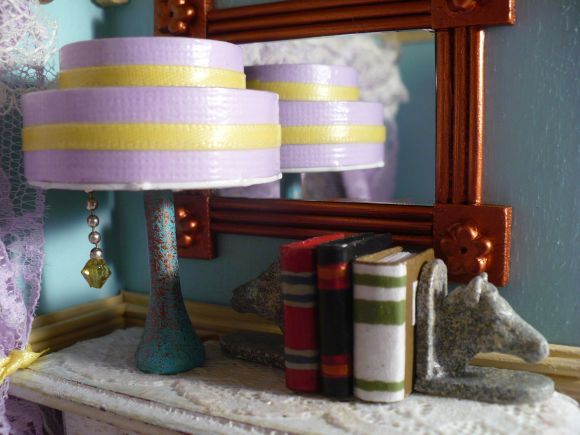
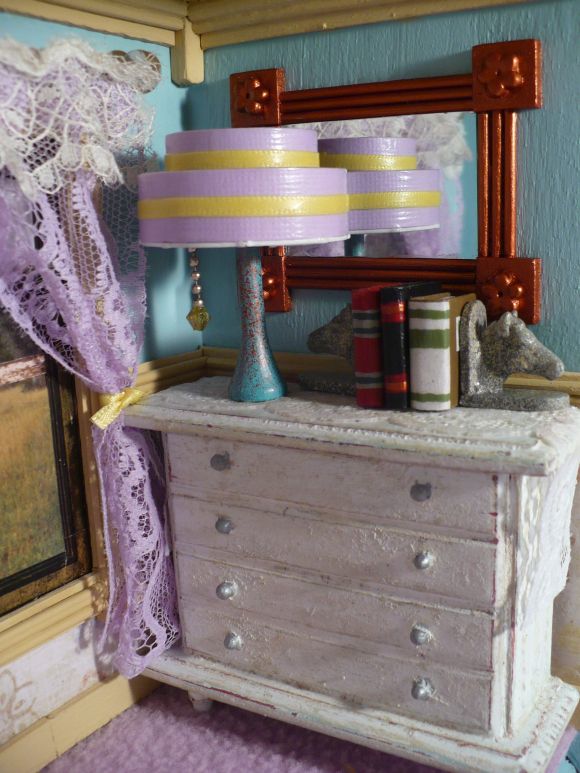
They make a perfect addition to my dollhouse scene! (Also seen here: how to make miniature horse head bookends; how to make an art deco dollhouse lamp; how to distress dollhouse furniture.)


17 Comments
Georgette
wow, so impressive to make something so tiny and cuute!
Kate
These are ADORABLE! Everything is so much cuter in miniature. :)
Niki Turner
Aw! This brought back memories! My Barbie’s chosen profession was as a “bookbinder” (I didn’t quite understand the whole publishing process back then). My tiny books were not nearly as exquisite as these. Thank you for sharing!
heather
Or, use leather for the covers and make these awesome necklaces: http://www.ecouterre.com/essential-reading-upcycled-mini-book-necklaces-by-the-black-spot-books
rhonda
@Heather – those are absolutely INCREDIBLE!
heather
@Rhonda, I had them on my wists list and a craftster swapper actually made some for me! I know, awesome!
Care
love!!!!!!!!!!!!!
Rachel
So, so cute it makes my teeth hurt! I’ll be linking.
April
I am loving these dollhouse tutorials!
Lisa
Wow, I’ve always wondered how to make miniature books. The ‘signatures’ method seems to be the way to go. I’m doing a whole lot of miniature making for my art degree at the moment.
Mod Podge Amy
Love the books AND REALLY love the thought of turning them into those necklaces! What a great idea!!!
Poppy War
That is awesome! I have my own dollhouse which I have been building for over a year now. I’ll try this craft, because I also love to read and I’m sure my dollies do to. :)
Blondie
This is fantastic! Thank you for sharing!!