
 A zoetrope is a classic toy which, when spun, delivers the illusion of animation. The construction is simple and the results are always fun to watch.
Zoetropes work by using a cylinder with vertical slits cut along the top edge and a band of sequential drawings/photographs placed inside the cylinder. When the cylinder is spun the viewer looks at the images inside the cylinder through the vertical slots, resulting in each image blurring together in rapid succession creating the illusion of motion.
With this easy to make and fun device you can make your own looping animations, regardless of your artistic abilities. The possibilities are endless!
Project Estimate
materials:
|
Total: less than $1.00
.
 Start with an empty cardboard coffee can. Measure and cut the bottom 75mm (3″) off the can, the solid bottom of the can will form the rotating platform for our zoetrope.
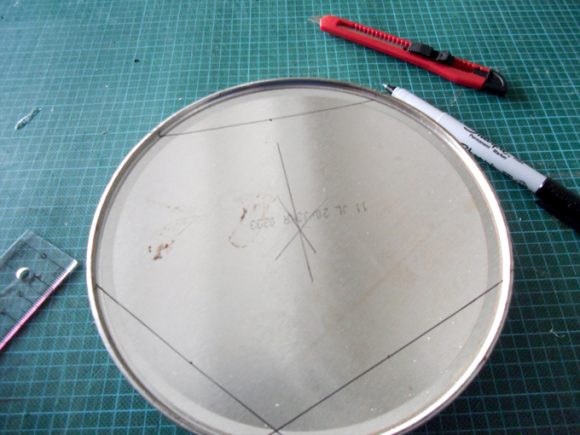 Flip the bottom of the can upside down and mark the centre. One method to find the centre is to draw at least 3 separate lines on the bottom surface, each line needs to have termination points at the edge of the can. Then, draw a perpendicular line from the middle of each of the 3 drawn lines towards the centre of the can. Where the perpendicular lines intersect will be the centre of the can (see above picture).
Once the centre is determined, use the push pin to puncture a small opening in the centre of the can. This will be the rotational point of our zoetrope once it’s assembled.
Set aside the can for now, it’s time to design the image we want to view inside the zoetrope.
.
 Time to plan out the images which will form the animation. The two aspects you need to resolve are number of cells (frames) the animation will have, and context of what you will place in the cells. Spend time on this step, as planning out your animation ahead of making the band that goes inside the zoetrope will pay off.
The more frames you have in your band the smoother your animation will appear. However, more frames means smaller images and more drawing. To determine the amount of cells used and their widths I measured the interior circumference of the can, then tried dividing that number by the largest whole number to produce the cell widths. This may sound confusing, but is easily understood when put into a table to determine the values:
Interior circumference: 47.5 cm
| # of frames |
Interior circumference / # frames |
frame width |
| 10 | 47.5 cm / 10 | 4.75 cm |
| 11 | 47.5 cm / 11 |
4.318 cm |
| 12 | 47.5 cm / 12 |
3.958 cm |
| 13 | 47.5 cm / 13 |
3.654 cm |
| 14 | 47.5 cm / 14 |
3.393 cm |
| 15 | 47.5 cm / 15 |
3.167 cm |
| 16 | 47.5 cm / 16 |
2.969 cm |
| 17 | 47.5 cm / 17 |
2.794 cm |
| 18 | 47.5 cm / 18 |
2.639 cm |
| 19 | 47.5 cm / 19 |
2.5 cm |
| 20 |
47.5 cm / 20 |
2.375 cm |
This table shows us that based on our interior circumference if we use 19 frames we have an easy cell width to measure accurately. Knowing the number of cells will help us plan out the images.
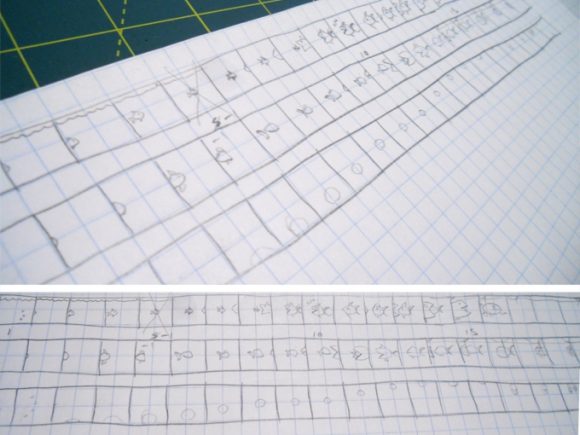
On a scrap piece of paper, sketch out concepts for your animation. Remember that the images shown in a zoetrope are designed to be looping, so the most effective animation will be one that has a seamless looping quality. I sketched out a few concepts, including a ball bouncing animation, and a fish eating another fish; both of which looped back to the original frame after the sequence was finished.
Plan out as many ideas as you can and choose one that is easy to draw, and is entertaining to watch.

Once you’ve determined your image design it’s time to make the animation cells. I took a piece of graph paper and bisected it lengthwise, then taped the sides together to form a long strip of paper which was longer than the interior circumference of my can (47.5cm).
Then, using the data from my table calculation I measured 19 cells of 2.5cm width each onto the paper. The paper was then trimmed to a uniform height of 50mm (2″).

Now to fill in each individual cell. Here’s where all that planning on the scrap paper comes into effect. Using your scrap paper ideas as a guide, sketch out the sequence of images onto each cell with a pencil. Spend some time to ensure each cell is sequential to the last.
When satisfied with your pencil sketches, trace over your work with a fine pen. Erase your pencil work. Then apply colour if desired. This technique is widely used in many artistic mediums: pencil > pen > erase > colour > repeat.

Almost done. With the cells complete, place the band inside the cut can. Using a marker, scribe on the edge of the can the cell widths of the animation band. This will be the location of the slits where you will peek through when the zoetrope is spun. Once you’ve marked out the entire can, remove the animation band and cut 13mm (1/2″) slits at each mark around the perimeter of the can.
Once the slits are cut, place the animation band back in the can and rest the assembly on the push pin, then give it a spin. Looking through the slits at the animation band with the zoetrope in motion you will see your animation come to life.
With your zoetrope setup, you can use the animation band as a template and create new animations for your zoetrope. Your imagination is the limit!
Here’s an example of my animation, he must be thirsty!
Have fun!


8 Comments
heather
This is super cool, mikeasaurus! I have always been fascinated by zoetropes & simple animation. Thanks for the great project!
Rachel
What that is way cool! So many fun strips to create, I love this! Thanks for he how-to Makeasaurus, I’ll be linkingg.
Amanda
THAT is so fun!!
Stephanie
This is so neat. Came over here from One Pretty Thing.
midi
Hello! Great idea, will be setting up a group of kids. I’ve got a silly question – does the thumbtack sit point-down or point-up? Does it spin on the flat round part or the pointy part? Thanks!
mikeasaurus
@midi – this zoetrope has the push pin held in the forefinger and thumb with the point facing upwards, when inserted the zoetrope spins on the flat portion of the pin.
midi
thanks! i will try this with some young kids, using those large, wide take-out soups container/cups instead of the coffee can.