
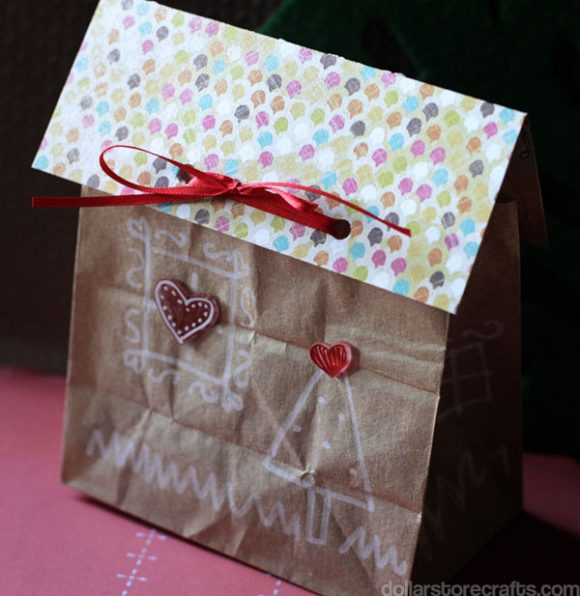
Make an everyday lunch a little more exciting by turning a plain brown lunch sack into a cute gingerbread house. These bags are great for lunch, but they are also a great way to inexpensively wrap holiday gifts. Your kids can get in on the action and help you, too! There’s a job for all ages in this project, from drawing and coloring, to sticking embellishments onto the house.
I had a lot of fun making these little paper gingerbread houses. In a lot of ways, they are more fun to decorate than real gingerbread houses.
![]()
I tried out some of Aleene’s Dry Adhesives products on this gingerbread house. Aleene’s Dry Adhesives come from the maker of Aleene’s Tacky Glue (my favorite craft glue), and are just what they sound like – glues that you can use that are not wet or messy. I especially like this type of glue when I am crafting with small kids (read: my three boys) who are likely to get wet glue all over the place! Aleene’s Dry Adhesives come in all different forms, including Tacky Dots that come on a roll, Tacky Line Rolls – a continuous line of dry adhesive that you can cut to your desired length. There are a lot of other Dry Adhesives, but the Tacky Dots and Tacky Line are what I used for this project.
The Tacky Dots are the ideal adhesive for attaching shrinky charms in this project to paper. They are small enough to use with very small charms, and they have a strong stickiness that stays attached to the slick plastic and the paper.
Project Materials:
- Brown paper lunch sack, 10 for $1
- Contrasting paper (scrapbook or construction paper), on hand or $1 and up
- White paint marker, on hand or $1 and up
- Colored pencils, on hand
- Permanent markers, on hand
- Shrinky plastic or recycled #6 plastic, on hand or $5 and up
- Aleene’s Dry Adhesives: Tacky Dots Small Dot Roll ($5.99) and (optional) Tacky Line Rolls ($6.99)
- Ribbon, on hand or $1
- Hole punch, on hand
- Scissors
Total: $6.99 and up for 10 houses ($.69 each)
Make it for cheaper: Replace the shrinky plastic with foam Christmas stickers ($1). This will also eliminate the Tacky Dots, which are used to adhere the shrinky plastic charms to the paper. If you don’t have a white paint marker, you can use white acrylic paint and a paintbrush. Total: $2
Lunchsack Gingerbread House Gift Bag Instructions:
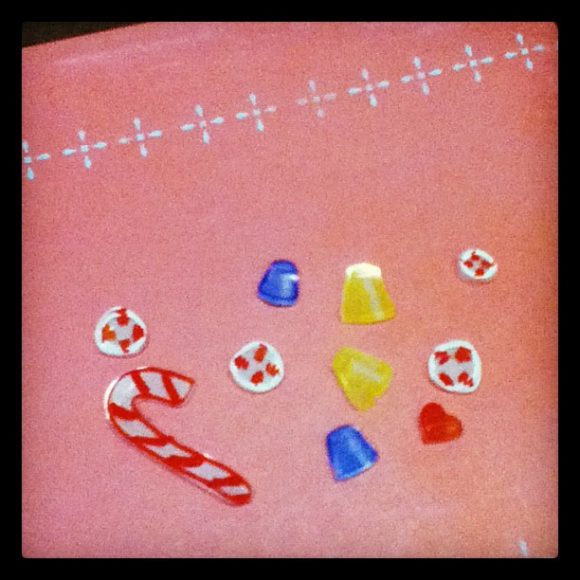
Part 1: Make the Shrinky Charms:
You need:
- Shrinky plastic sheets (I used Shrinky Dink Ruff & Ready) OR recycled #6 clear plastic
- White paint marker
- Permanent markers
- Colored pencils
- Scissors
- Piece of brown kraft paper (or a paper bag) to lay charms on
- Your oven or toaster oven (set to 325 F or according to package directions)
- (Optional) Christmas clip art to trace
Before you begin: If you are making your own shrink plastic, you will need to condition your recycled #6 plastic by scuffing one side up with sandpaper. Also, for this step, print gingerbread candy clip art out so you can trace it, if desired.
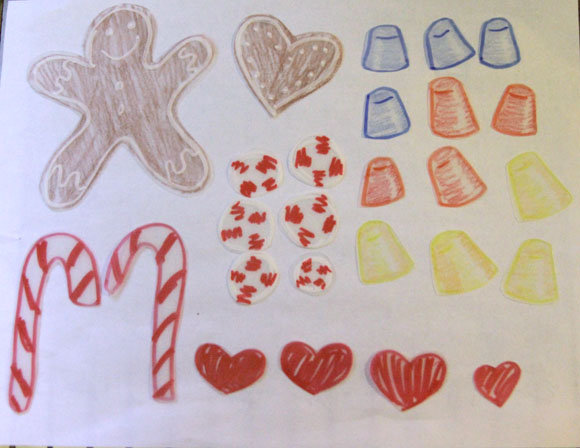
Shrink plastic charms BEFORE
1. Draw or trace your gingerbread house charms on the shiny side of the shrink plastic with permanent or paint marker. Add background color by using colored pencils on the rough side of the plastic. You can color lightly, because they will get darker when they shrink.
Note: you want to draw the objects at least 3 times larger than the final product should be. My gingerbread man started out about 4″ tall and shrunk down to about 1.25″.
The paint markers work great on the shrinky plastic! I wanted white “frosting” on my gingerbread man, so I used a white paint marker on the shiny side of the plastic, and colored the back of it with brown colored pencil (I made sure to leave an extra brown outline around the outside of the white paint marker line)
2. Cut the shapes out with scissors, and place them on a piece of kraft paper to bake in the oven.
3. Bake according to package instructions (or, in a pre-heated 325 F degree oven for 3+ minutes). Remove from oven and allow to cool (gently flatten if needed, while plastic is still warm.)
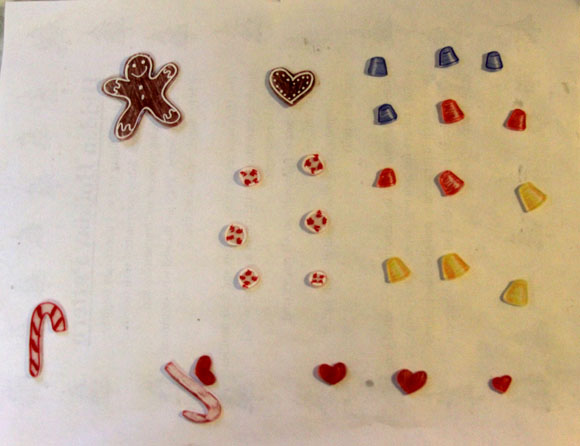
Shrink plastic charms AFTER
Check out the cute little charms!
This is a great step for kids – have them draw their own candy and gingerbread. Or, if they are too young to draw them, let them color the back side of the items once you have drawn them.
Part 2: Draw the Gingerbread House
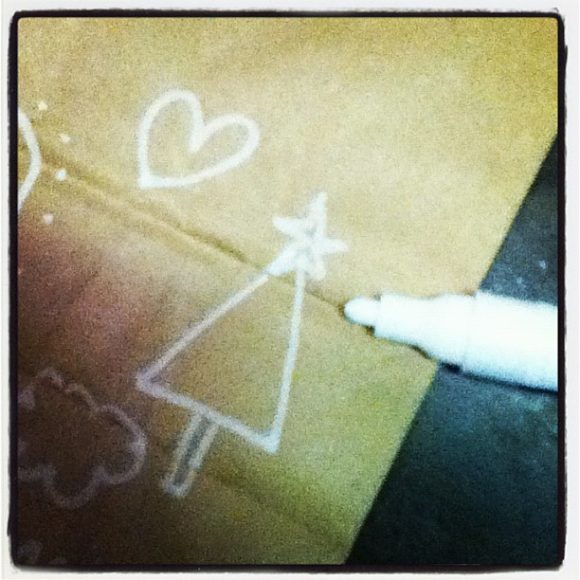
You need:
- Brown paper lunch sacks
- White paint marker
1. Have fun drawing a door, windows, trees, bushes, swirls, dots, and any other gingerbread house features on both sides of the bag. Leave at least 3 inches at the top of the bag so there is room for the roof.
Kids about age 5 and up can draw their own gingerbread houses.
Step 3: Attach Charms to Gingerbread House
You need:
- Gingerbread lunch sack
- Various shrinky charms
- Aleene’s Dry Adhesives Tacky Dot Roll (Small Dots)
1. Place a single shrinky charm on a Tacky Dot to stick it, peel charm off plastic, and stick on your desired spot on the gingerbread house.
This step is good for kids of all ages, although you might need to help smaller kids adhere the Tacky Dots. Just hand them the ready-to-stick charm and let them decorate the bag.
Alternately,
Skip the Shrinky steps, and use foam Christmas stickers to decorate the house.
Step 4: Assemble the House
You need:
- Piece of scrapbook paper for roof
- Tacky Line Roll -OR-
- Hole punch and Ribbon (about 12″ long)
1. Cut Roof paper about 1/2″ wider than paper bag. For instance, my lunch sacks are 5″ wide, so I cut a piece of paper that measured 5.5″ square.
2. Fold roof paper in half.
3. Put a line of Tacky Line Roll along the bottom edge of roof. Attach to top of paper bag (I filled, trimmed and rolled my paper bag down before I attached the roof).
4. If your gift is already inside the bag, repeat with the other side of the roof.
Alternately,
Instead of gluing the roof on, you can punch 2 holes about 1-2″ from each other in the roof and the paper bag. Thread ribbon through to tie the bag closed.
Thanks to Aleene’s Dry Adhesives for sponsoring this post. If you would like to purchase this product, you can visit the Aleene’s website: Aleene’s Dry Adhesives.
Disclosure: I was provided this product to try, and compensated for my post. Opinions are my own.


10 Comments
Charlie
My girls will LOVE this idea! (particularly since I stink at the whole “baking” thing). ;)
Aloha,
Charlie
Nicole Willson
To make it for less, you could also cut out charms from sheets of foam. Dollar Tree sells foam sheets in different colors and sizes, including glitter foam. If you have a Xyron machine (which you can get for $20 at Walmart — great investment if you do a lot of paper crafts), you can run foam sheets through there so it has an adhesive backing, trace patterns on the sheets and then cut them out. I’ve also used this technique to make stencils.
Steph @ The Silly Pearl
This is so cute. My girls would adore this! I would love to share with them the art of shrinky plastic with them, which I haven’t made since I was their age!
tutebot
Cute idea! I tweeted about it. :)
Rush'd Lady
Our son made a paper sack gingerbread house for us when he was in second grade. It doesn’t stand up like this, but is flat. We also made a Christmas Cottage out of poptarts. I believe the article is still on my blog.
Amy @ Positively Splendid
What a darling idea! Love it.
Alexa
Heather, you are so clever. This project is so cute. Thanks to you and Amy for rounding up such a great team of bloggers for our “Tacky” adhesives. All the projects turned out wonderful. We are featuring them on our FB pages!
Amanda
Hi Heather! Just stopping by to let you know that I have featured your project on Fun Family Crafts! You can see it here
http://funfamilycrafts.com/paper-bag-gingerbread-house/
Shoregirl
Linking to this cute gift bag on my blog today: http://estherscardcreations.blogspot.com/2012/05/gift-bag_24.html