
No need to wear plain old t-shirts this Spring. These dandelion shirts are simple and pretty, and would make a fun crafternoon project to do with your friends. Paint your own dandelion design with help from a special paint applicator you can find at the dollar store. Okay, “special paint applicator” sounds intimidating, it’s really just a common household item you might already have on hand. Read on to find out the secret tool!Welcome to Liz, our guest-poster, who designed this project. I saw it on her blog and emailed her immediately to ask her to share how to make it!
Paint a Dandelion Blowing Shirt
by Liz, My Messy Desk
It is such an honor that Heather asked me to be a guest blogger! I’m an Army wife and Mom to two wonderful boys. And I love crafts…all kinds of crafts. I am also afflicted by a serious case of “I can do that….for cheaper!” So of course, Dollar Store Crafts is right up my alley! The project Heather asked me to write about is a cute blowing dandelion shirt a couple of my ladies made at my March Craft Day event. Who can resist blowing a dandelion in the summer? One of my favorite pictures of my oldest son was of him blowing those pesky seeds off into the neighbor’s yard when we lived in Illinois. Shhh… don’t tell John and Lois!
Project Materials:
- T-shirt, on hand or $1 and up
- Piece of recycled cardboard, on hand
- White, Black, and Green Acrylic or Fabric paint, on hand or $1 each
- (Optional) Fabric Medium for acrylic paint, about $3
- Shower pouf, $1
- Thin-tipped paint brush, on hand
- Paper plate for a paint palette, on hand
Total: $1 and up
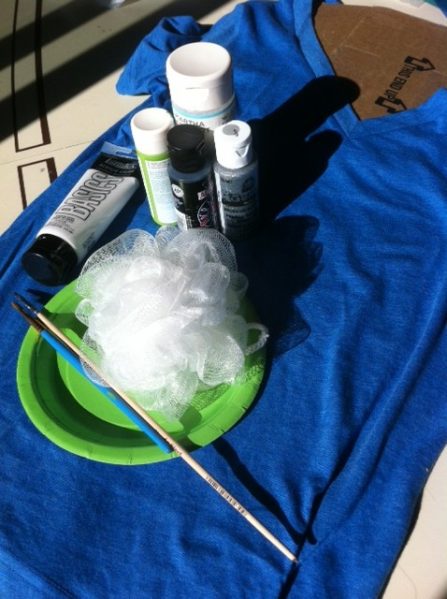
About the supplies:
T-shirt: any color but white is fine, so choose what you like (reclaimed from your closet, purchased on clearance or even Goodwill like mine was).
Cardboard: Flat piece of cardboard large enough to fill the inside of your shirt (cereal boxes work perfectly)
Paint: White, black and green paint (fabric paint is great, but you can add Martha Stewart’s Fabric Medium to any acrylic paint to keep it from being stiff and un-wearable)*
Shower pouf: You can get these at the dollar store, or pretty much any other store for $1 or less. I got 2 for $1 at Wal-Mart.
Paint Pallet: I used a left over paper plate or two, but if you don’t have one, you can use a piece of recycled cardboard (the rest of your cereal box?).
*Note: Be sure you are using paints with the same curing process.
How to Make a Dandelion Shirt:
1. The first step is to put the cardboard inside the shirt, to keep paint from seeping through to the back, which is not attractive.
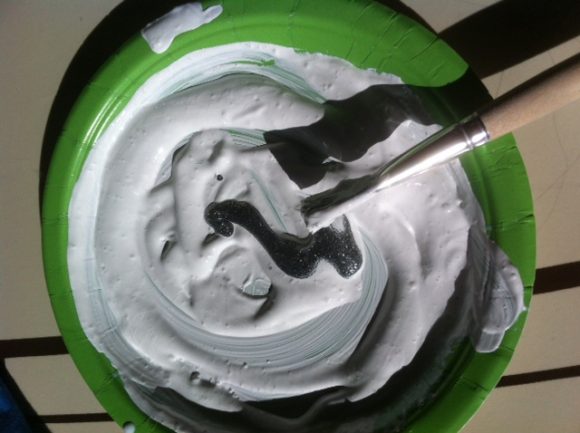
2. Next, you want to squirt a generous amount of the white paint on to the plate. If you are using regular acrylic paint and fabric medium, follow the directions for mixing on the bottle. As you can see, I added some glitter paint, but it didn’t give it noticeable sparkle, so I don’t recommend the extra step.
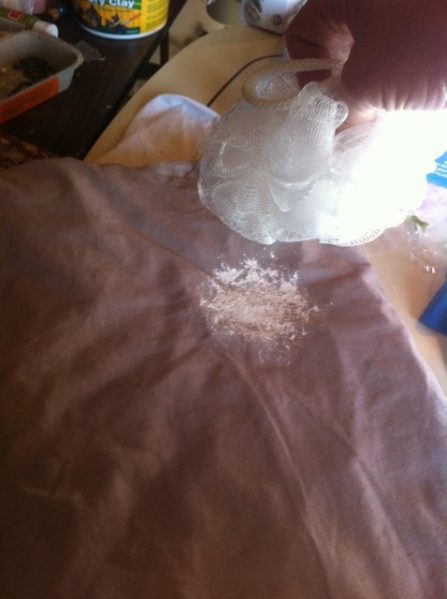
3. Then comes the fun part – pounce the shower poof up and down in the paint and then gently pat it on the shirt where you want the head of the flower to go. I recommend starting with as little paint as possible, gently tapping most of it off on a scrap paper towel before you touch it to your shirt. You can always add more.
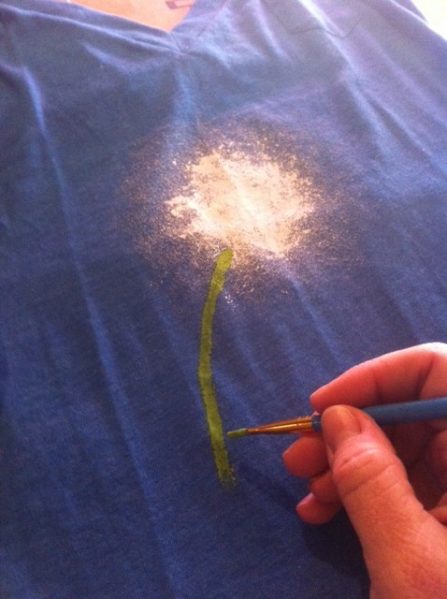
4. Next, squirt a bit of the green paint on your plate and using the thin brush, paint your stem. Perhaps you want to give it a slight curve so it looks like it is bending in the direction of the wind.
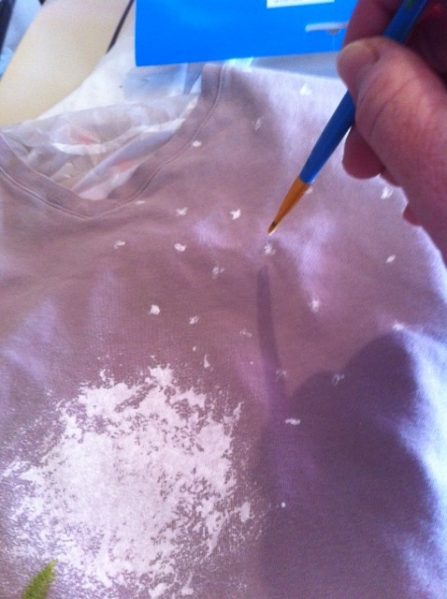
5. Next, we added some seeds to look like they were being scattered by the wind. We used two methods with the same white paint mixture:
- Ever so lightly sweep the poof out and up from the head of the flower, or
- Paint each individual seed with the thin paint brush, making little crosses. Then rinse the brush and dip it in the black paint to put a tiny stem on each seed.
Either method seems produces pleasing results, it is just a matter of whether you want fast and abstract or painstakingly real. After much deliberation, we decided that the seed band started at the same width as the head of the flower and then scattered and broadened as it moved upward. I think a few blowing over your shoulder and onto your back would be fun, too.
Now you just have to be patient while your creation dries (generally for 24 hours), heat set with an iron as directed (mine was 3 minutes on as hot a setting as the shirt fabric allows), wash and wear!

If you want to know more about me and see the other fun we are creating at My Messy Desk, please check out my web site, www.CreativeInspirationsAtMyMessyDesk.com, especially my blog on the Musings page.


28 Comments
Jessica
Oh my goodness! These are AWESOME!!! I have to do some… Thanks so much for sharing!!
Terry Moore
Makes me want to do this right now! Love it!
Shannon
I love these, I am making at least one for me and one for my MIL.
Crystal r.
OoooOooOOooOoo I love that!!! I have to make some!!!!
Erin @ The Great Indoors
This is way simpler than I figured it to be! I bet it would also look great on pillows.
Julie
Absolutely GORGEOUS!! Thank you for sharing…my mind is RACING now with ideas!!
Stephanie
This looks fabulous…but where does the black paint come into the instructions?
Liz
Stephanie-A tiny bit of the black paint is used if you want to put a little stem on each of the blowing seeds.
Peggy
I love these! I want to make me one!
rhoda
what a clever idea! thanks for sharing. :)
Joyce Avans
Great idea can’t wait to try it!
Keisha - Cupcake Wishes & Birthday Dreams
What a smart idea!!!! I love it!
Sheila Green
Wow! I have tomorrow off, and I have a t-shirt I was thinking of getting rid of, and I have fabric paint and a spare pouf…thank you so much for giving me a project! Hope mine comes out as nice as yours!
Anshu
Very clever and cute. I’m going to pin this.
Shannon
These are awesome!!! Who would have guessed how simple these are to make?!?! Thank you for sharing!
Laura
How did you use the black paint?
Sherry
So cute! I always seem to get a bleach spot on my cute Tee shirts. THis would be a good way to save them and look even cuter.
Erin
I just made one with a friend of mine and we are in love with our new workout shirts!!!!!!
Kim K
thank you so much I have just found my craft for my Girl Scout troop.But instead of t shirts I think I’m going to have them make wall art!! put it on squares a fabric and then after it dries will make a frame and have them staple it so it looks like a canvas!!! Im excited!!!
Leia
How does the acrylic paint not wash out? Love the idea, I want to figure out how to do cherry blossoms. I think that would be cool done like this also.
heather
@Leia, once acrylic paint gets on fabric and dries, it’s basically permanent!
seattlecris
I think this would work with bleach. I would paint the stem with bleach too then color that part in later, after washing and drying, with a fabric marker.