We’re happy to have our friend Shannon from Madigan Made here today to share a wonderful jewelry tutorial! You know we love recycled t-shirt crafts, so this project is right up our alley. Thanks for the great project, Shannon! ~Rhonda
Have you ever tie dyed anything? I dyed a t-shirt when I was a kid and I remember that it was an involved process. When Tulip sent me a tie dye kit recently, I was excited to see that their dye was simple and easy to use. Instead of multiple steps with vinegar and soda ash, you just mix their color-fast dyes with water and apply them!
I wanted to create a pretty pattern with the dye and then create something fun out of that fabric. I decided to make fabric jewelry. I was inspired by this braided silk necklace at Martha Stewart and the fabric jewelry closure method for braided bracelets at Henry Happened. I searched my closet for some old cotton t-shirts for the base fabric. I also had some dollar store clear ponytail holder beads that I thought would be fun to add.
Want to learn how to create your own tie dyed jewelry? Just follow these steps below:
Project estimate:
- An old, white, cotton shirt, on hand
- Clear ponytail holder beads, $1
- Needle and thread, on hand
- Craft glue, on hand
- Strong ceramic magnets, less than $1-2
- Tie dye kit (optional), $8 and up
Total: $3 and up
Tulip makes tie dye kits of all sizes, but they sent me this huge tie dye kit that contained: 8 bottles, 12 colors of dye, rubber bands, gloves, surface protector and instructions. I had such a hard time picking what colors to use but I settled on lime, coral and teal.
Step one: Prep your fabric for dye.
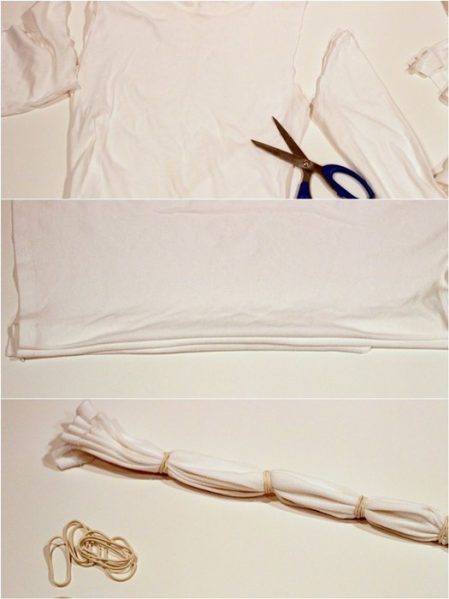
If you are using a new garment, be sure to prewash your fabric. I cut apart two old tees and used the front and back panels of each shirt for my project. When you are ready to dye, dampen your fabric. Pleat the fabric lengthwise and wrap rubber bands tightly every 3-5 inches to create stripes. Repeat the process for all of the panels of fabric.
Step two: Mix and add your dye.
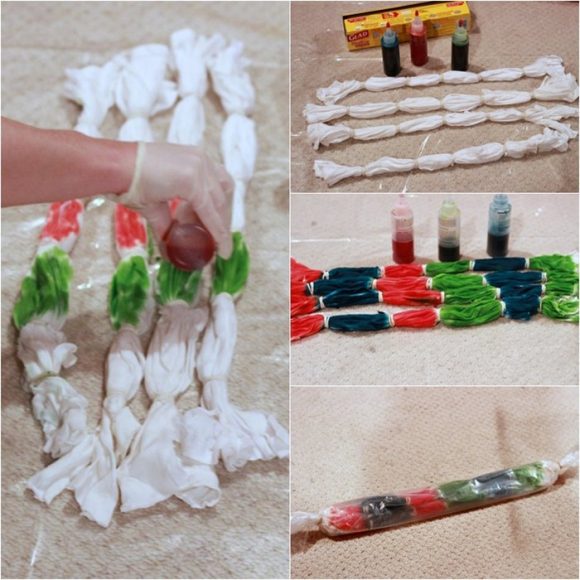
Lay your tied fabric on a plastic surface protector. Wearing gloves, pick out your favorite colors and mix each color in the bottles as directed by the instructions. Carefully apply each color to the desired sections with dye. Be sure to flip your fabric over to get the other side and do not oversaturate the sections.
Tightly wrap your fabric in plastic (I just wrapped the surface protector around the fabric) and allow the dye to set for at least 4-6 hours.
Step three: Rinse and wash.
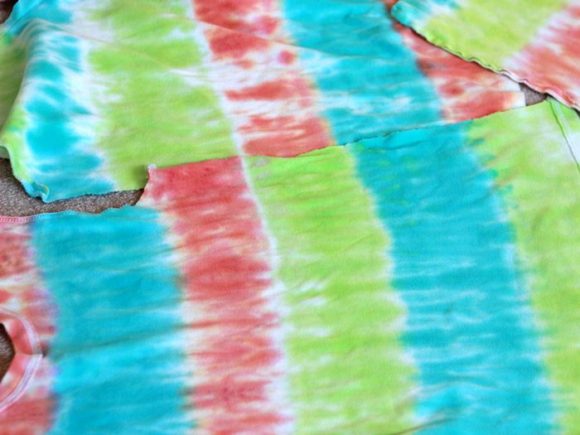
Now for the exciting part! You will start to get an idea of what your tie dyed pattern looks like after you carefully unwrap your tied fabric. (Again, wearing gloves!) Rinse out the remaining dye and wash the fabric in your washing machine and dry it. Ooooh and aaahhh over the fancy new color pattern you created!
Now let’s use this fun fabric to make a pretty necklace and bracelet!
Step four: Cut fabric strips for your necklace.
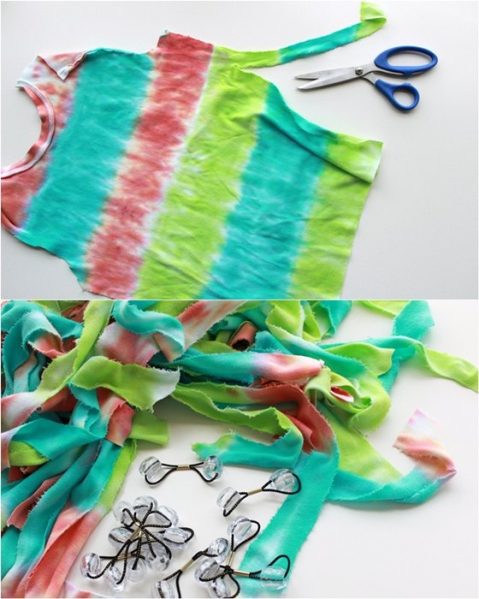
Using scissors, cut approximately 1” wide strips of fabric from your dyed tees. It does not need to be perfect, since you will be braiding it. I like how the frayed edges added texture to the pieces. Depending on how long you want your jewelry to be, one t-shirt should be plenty to create enough strips to make a long necklace and one bracelet.
Step five: Braid your fabric.
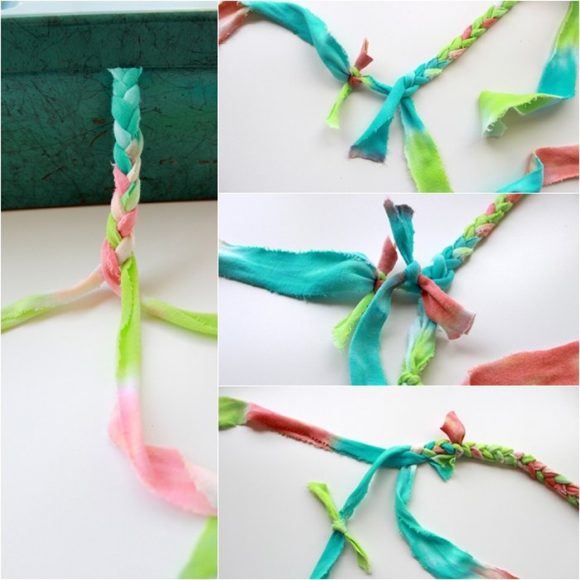
Take 3 strips of fabric and tie a knot at one end. Secure the knot down (with a clip board or under a box lid like I did) and start to braid your strips. When you get to the end of each strip, just tie another strip onto each piece. Keep braiding and adding fabric until you reach well beyond your desired jewelry lengths. (It is better to have a little extra.)
Step six: Attach your magnet closures.
Carefully consider where the fabric knots are on your length of braid. We will be adding beads to those sections in the next step and you want the placement to make sense when you cut your braid down to create a necklace.
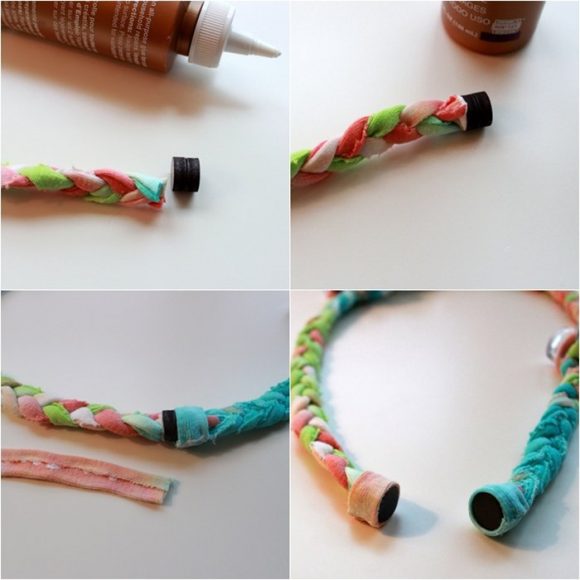
Measure how long you want your necklace or bracelet to be. (My necklace was ~24 inches and the bracelet was ~7 inches long.) Trim the braid and attach the fabric ends to a magnet with glue. Repeat on the other end.
(I should warn you that these magnet closures are not super-duper secure. They will hold up to wear, but if someone pulls on the necklace or bracelet, the piece will fall off. If you are worried about that happening, just make a necklace long enough to fit over your head and tie a permanent knot in the two ends instead.)
After the glue on the magnets dry, take two small strips of fabric and fold each one over with adhesive for a finished look. Wrap a folded strip around the magnets on each end and attach them with more glue so the fabric edge is flush with the magnet surface.
Step seven: Add beaded embellishments.
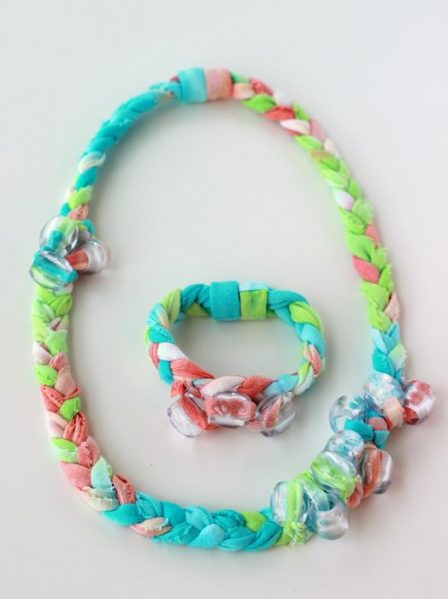
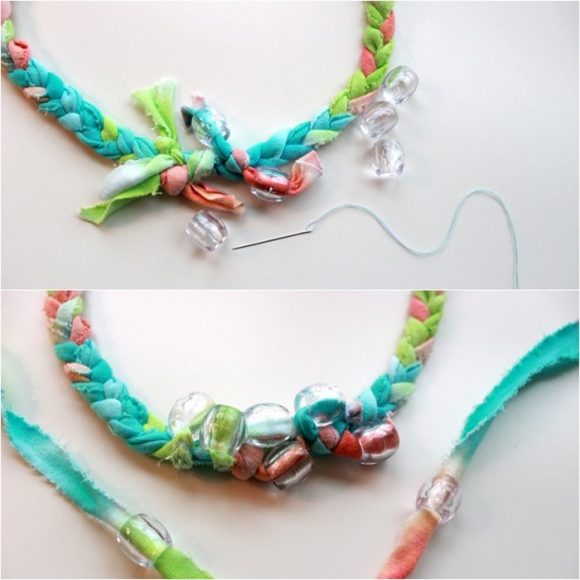
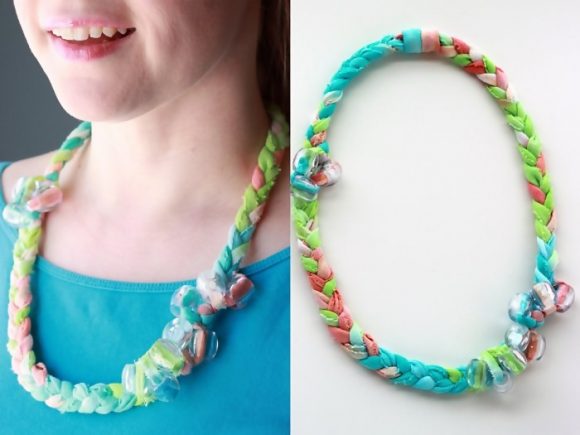
If you want, you can add clear bead to sections of the jewelry. Where there are knots and fabric ends, string a clear bead over the loose fabric end. Use needle and thread to tack the fabric strip down to the necklace. To add a few more beads to any “empty” spots, take a small strip of fabric and tied another bead around the braid in the desired area (sewing any loose ends down, too).
You might choose to use a solid color bead instead, but I like how you can still see the color of the fabric and pattern through the clear beads.
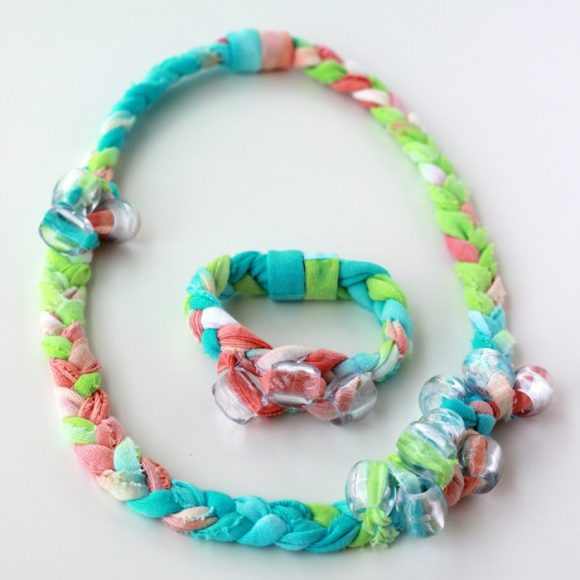
Once the beads are added you can just put your braided jewelry on and enjoy your modern tie-dyed creations!
Wear one around the neck …
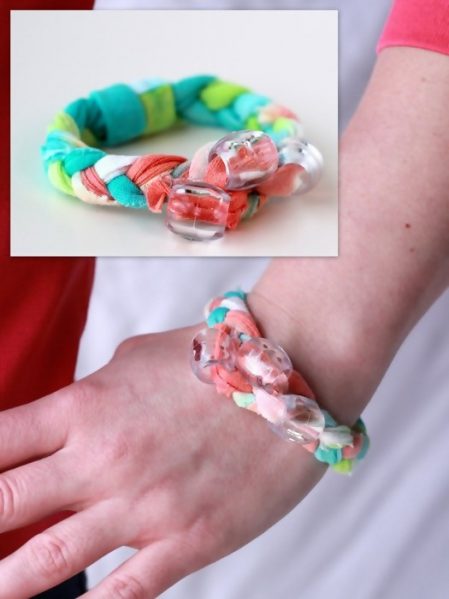
or around the wrist another day… or wear them together!
I must confess, it was a lot of fun… yet a little scary to dye my own fabric. I’m kind of a Type A crafter. I like having a vision and plan before I make something. But when I dyed this fabric, I was powerless while the dye set. I kept wondering how it was going to turn out… it was nerve wracking!
But once I saw the color variations and pattern I created, I decided that can’t wait to dye something else with the leftover colors in the kit!
Want to try your hand at tie dye? Tulip Tie Dye Kits are available at Walmart, Walmart Canada, Michaels, JoAnn, A.C. Moore, Hobby Lobby, Hancock Fabrics, Meijer. Tie dye kit contents and colors may vary by store.
And for more fun, crafty inspiration, be sure to follow Tulip and @ilovetocreate on Twitter, on Pinterest or like them on Facebook here or here.
Find tons of tie dye ideas here:
And great tips for tie dye techniques in here:
For more great tie dye projects:
Find my post disclosure here.
You might call Shannon the Clark Kent of craft blogging. By day, she works as a pharmacist and by night she helps readers find simple and elegant solutions for their home. Shannon enjoys blogging at Madigan Made where she shares easy crafts, DIY décor and much more. She also craves chocolate, loves a thrifty find and strives (often unsuccessfully) to avoid glue gun burns. Shannon resides in the Philadelphia suburbs with her husband and dog (and always anticipates miracles).







4 Comments
Trish @ Uncommon
This turned out so cute! I love the addition of the beads!
Take care,
Trish
Mod Podge Amy
Oooh! The secret is in the magnet! I wondered how to get that over the head. Love it! Such beautiful colors, and the beads were the perfect addition. Pinned!