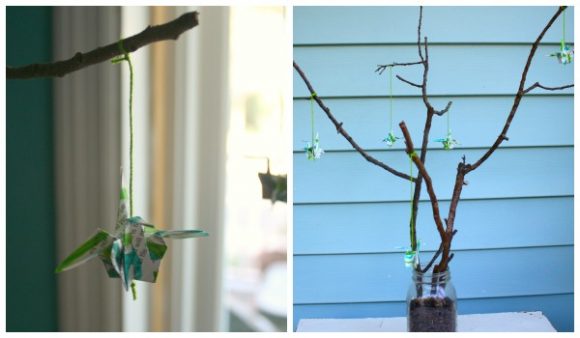
Hi there! My name is Becky Striepe, and I am a freelance writer and vegan crafter who’s life’s mission is to make green crafting and vegan food accessible to everyone! You can find my craft projects and recipes on my site, Glue and Glitter. I am super excited share a project today that uses two of my favorite reclaimed craft supplies: junk mail and fallen tree branches.
Does it feel like no matter how hard you try, junk mail still finds its way to your mailbox? I know the feeling! The major culprit around our house lately has been unwanted credit card offers. The upside to all of that unwanted mail is that companies are basically sending you free craft supplies every day! Rather than toss all of that junk mail into the bin, you can use your crafty skills – and some fallen branches from around the neighborhood – to make a decorative junk mail tree.
Project estimate:
- Fallen tree branches, on hand
- Mason jar or medium vase, on hand or $1
- Junk mail, on hand
- Markers (optional), on hand
- Needle and thread, on hand
Total: Free and up
Fill the mason jar or vase about 2/3 with rocks coffee beans, dried beans, or rice to weigh it down. Arrange your branches in your vase. This will help you decide how many cranes you want to fold. For my arrangement, I have 3 branches and am thinking that 6 cranes will do the trick.
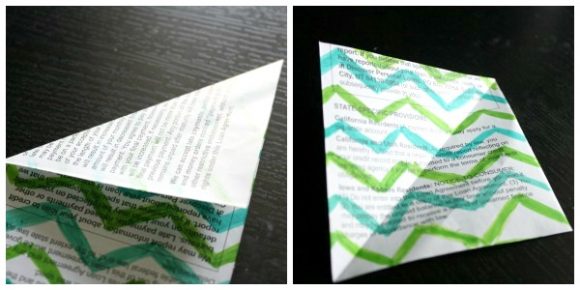
Decorate your paper. This is optional. You can use your junk mail as-is, but if you want a pop of color on something black and white, like the paper that I chose, use your permanent markers to draw some kind of repeating design. I went with chevrons, but you could do stripes, polka dots, flowers – anything kind of small and repeating works well. Think about the designs you’ve seen on store bought origami paper to get an idea of what would translate to all of that folding.
Cut your squares. Origami paper is square, so you want perfect squares here, too. You don’t need a ruler to make a perfect square, though! Here’s my favorite square-making trick: Grab the top left corner of your piece of paper, and fold it up and over to the right, until the left side of the paper lines up with the right side. Crease, cut, and voila! You have a square!
Now, it’s time to fold your cranes. I like these instructions. There are diagrams and a video, so no matter how you learn, they’ve got you covered.
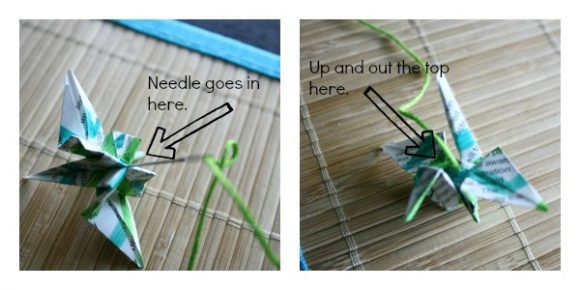
Once the cranes are all folded, it’s time to string them up. To string them, you first want to decide how you want them to hang. Cut your embroidery thread to the length you need, leaving a few inches to tying knots. Tie a knot in one end of the thread and thread the other through your needle. If you flip one of your cranes over, you’ll see that it has a teeny, tiny hole in the bottom, right in the center. You want to gently press your needle straight up through that hole and through the paper that’s opposite it.
Tie your threaded crane to your branch. Repeat with the rest of the cranes, arranging them however you like.


3 Comments
heather
Thanks for the beautiful project — who knew junk mail could look so great? I love the technique of adding the pattern to the junk mail with the permanent markers.