The other day I was walking through the Valentine’s Day aisle at Dollar Tree. Despite having been up and down that aisle a dozen times in the past couple of weeks, this time something jumped out at me that I hadn’t paid much attention to before: some cardboard “mailboxes” for collecting Valentine cards. When I first saw them, immediately thought of fast food kids’ meal boxes. Then I thought… Why not? So I brought them home and transformed them! There is something about putting a meal in a box with a fun little toy that makes it more exciting and special, right? Here is how I did it!
Project estimate:
- Valentine mailbox kit, $1
- Cardboard, on hand
- Glue, on hand
- Washi tape, on hand or about $1.50 and up
- Other embellishments, on hand
Total: $1 and up
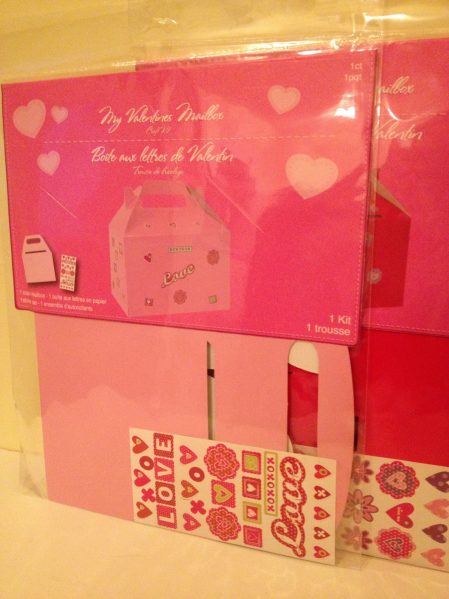
Each kit comes with a box and a sheet of stickers. I set the stickers aside for a future project, but you could also use them to decorate your box in the final step!

First, assemble the boxes. You will notice that the cardboard is a little flimsy, so before you fill it up you will want to reinforce the bottom of the box.

Trace the bottom of the box onto a piece of cardboard (I used a cereal box out of the recycling bin); cut and glue the cardboard into the bottom of the box.

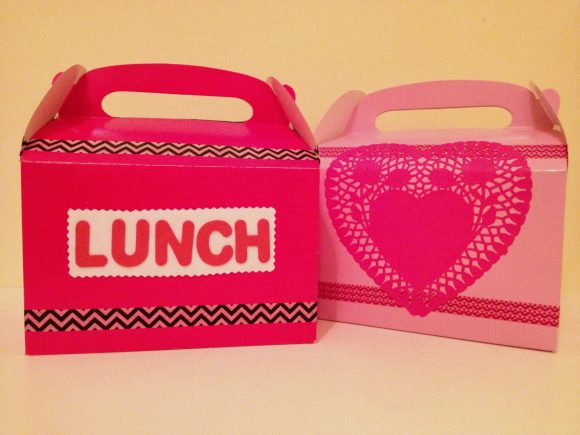
Since the boxes were originally intended for holding cards they have a slot on each side at the top. Cover the slot by gluing or taping a piece of paper the same color as the box over the slot from the inside.
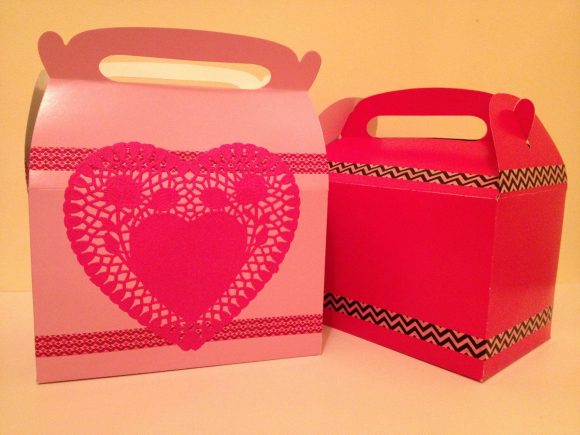
Cover the outside of each slot with a strip of washi tape, then add a strip of washi tape around the bottom as well. If desired, add more embellishments to the box. I kept it fairly simple, adding a paper doily to one box and labeling the other with scrap paper and some foam letter stickers. There is plenty of room inside for a whole meal plus a special treat!


2 Comments
Cindy deRosier
I’m the Editorial Assistant for Fun Family Crafts and I wanted to let you know that we have featured your lunch box! You can see it here:
http://funfamilycrafts.com/valentines-day-lunch-boxes/
If you have other kid-friendly crafts, we’d love it if you would submit them. If you would like to display a featured button on your site, you can grab one from the right side bar of your post above. Thanks for a fun project idea!