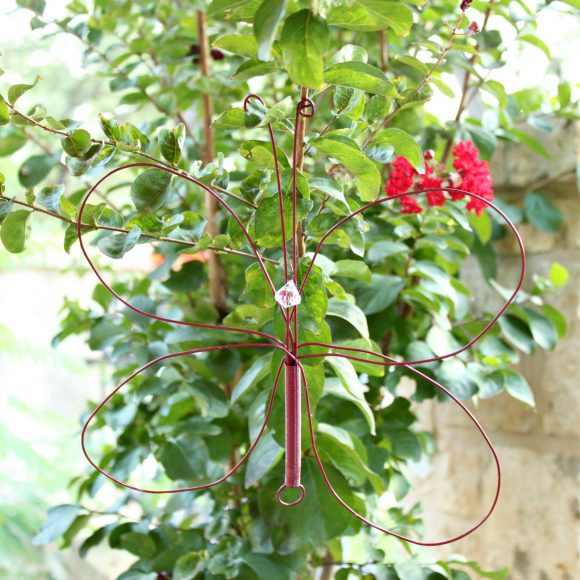
As I’ve mentioned several times in other posts, I have been slowly putting together a “fantastical” garden area inspired by the Mad Hatter’s tea party in Alice in Wonderland. My garden is made up of tea pot and tea cup creations, and I’m also filling it with whimsical DIY garden art.
I made a dragonfly out of a whisk, and my daughter liked it so much that she wanted to make some. I went to the thrift store and bought all the whisks they had. Since I had a nice collection, I wanted to make some other winged critters to go with my dragonfly, and that’s how the idea for this fun, whimsical butterfly came about.
Project estimate:
- Whisk, $1
- Spray Paint, on hand
- Large bead, on hand
- Wire, on hand
Total: $1
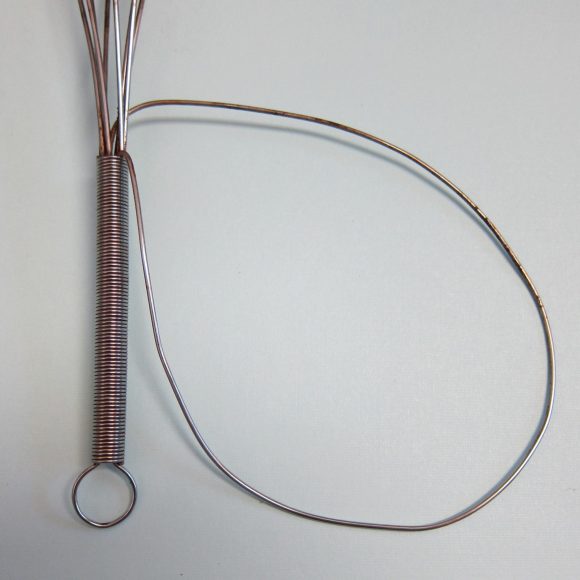
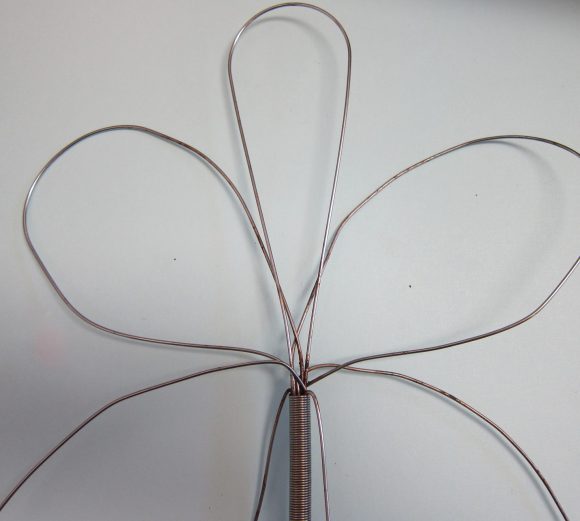
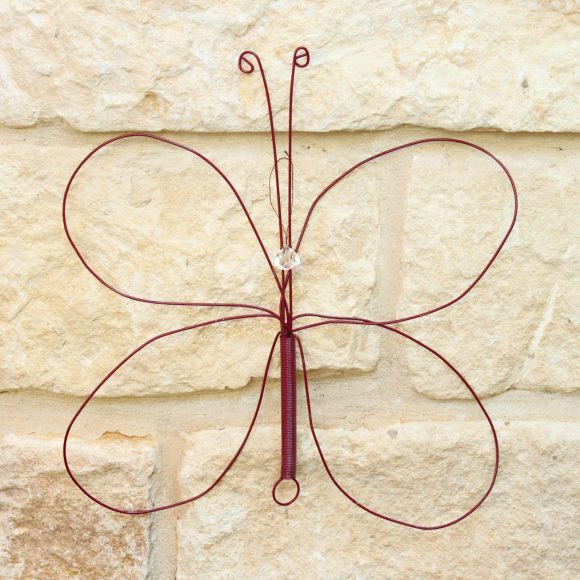
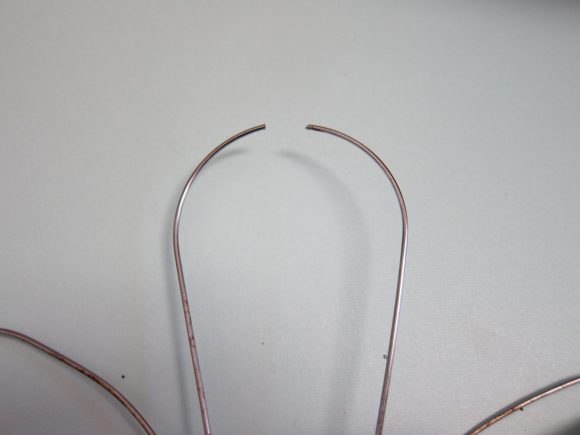
Step one: Bend the loops of the whisk to form the butterfly wings. Start by creating the bottom two, shaping the wire with your hands to the desired form. Then make the top two wings.
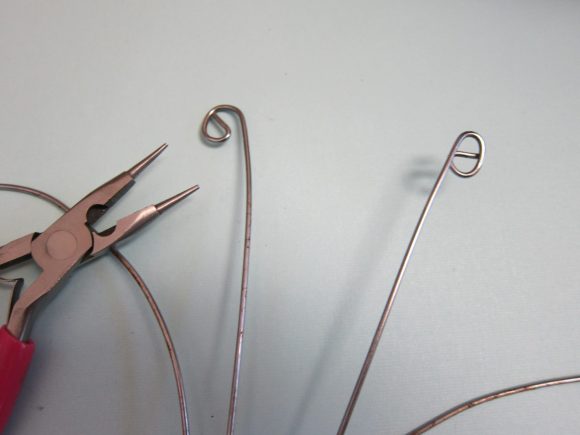
Step two: Cut the remaining loop in half with wire cutters, and use pliers to loop them into antennae.
Step three: Spray paint the butterfly.
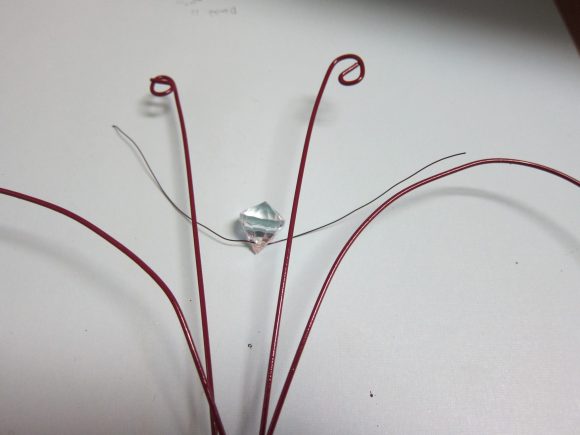
Step four: Thread a piece of wire through a bead and loop the wire around the two antennae. The bead is now the butterfly’s head, and the excess wire can be made into a loop that you use to hang the butterfly.

I plan to make several colorful butterflies like this one and hang them from trees. I think they will be a fun, unexpected addition to my garden. If you prefer, they could also go on a stake or even be hung on a wall. You could even hang chimes from them to create your own unique wind chime! Have fun crafting and creating whatever your imagination dreams up.


4 Comments
Michelle L
Yay! I love this even more than your dragonfly, if that’s possible! Cute and fun, I love this upcycle idea.
morena
Thank you very much!
Bonnie A.
I would like to see a photo of the “fantastical” garden you mentioned.