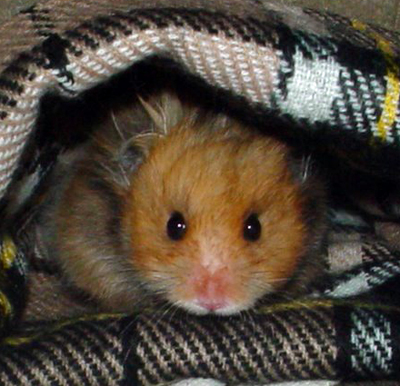
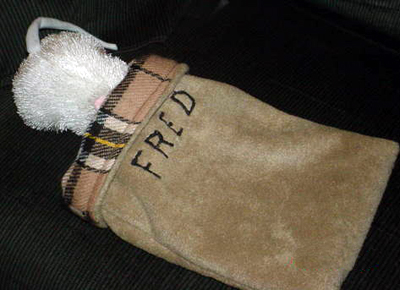
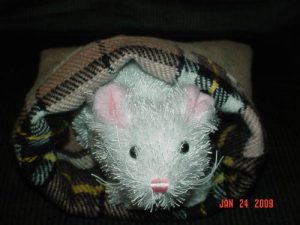
This is Fred the Hamster. Isn’t he cute? I sewed him a custom hamster cozy using two different dollar store scarves (for a swap on Craftster). Sewing a hamster cozy is pretty simple, and using scarves for fabric makes it even simpler!
Since the project was simple and I wanted to make it special for Fred, I embroidered his name on the cozy with my sewing machine. My sewing machine is in sore need of a tune-up (it barely zigzags–what was I thinking trying to monogram like that?), and the letters are a little wonky, but I am happy with the personalization.
Scarves are abundant at the dollar store during the winter (and especially before the holidays! I have noticed that the scarf supply is waning now that we are heading toward spring); I picked up a fleece scarf and a woven plaid scarf. This cozy is fully reversible, too!
If you are making a cozy for a hamster, just sew securely, trim threads, and you’re good. If you are sewing for a gerbil (or other chew-loving animal), you might want to choose fabrics that can’t be easily chewed into and make sure you reinforce the seams by sewing a second seam millimeters away from the first seams. Don’t try this project for a gerbil! Fred’s mommy told me: “I really wouldn’t recommend any fabric for gerbils. They are maniac chewers. Cozies would be excellent for rats and mice.”
Project Materials:
- Fleece scarf, $1
- Plaid scarf, $1
- Sewing machine and thread, on hand
Total cost: $2 (with scarf leftover–you could make a couple hamster cozies with two scarves).
To make:
- Fold one scarf over lengthwise until scarf is desired hamster cozy size. Add two inches to the length for seam allowance. Cut.
- Fold second scarf to same size and cut. If the scarves aren’t the same width, trim to the narrower scarf’s width.
- If you want to add an applique or monogram to outside scarf, now is the time. Sew it to the scarf that will be facing outward. Make sure you sew it to the outside-facing side of the scarf.
- Fold both scarves with right sides together and sew up sides of each scarf. (And again, if sewing for gerbils).
- Turn inner lining scarf inside out (right side should be facing out now), and put it inside the outer scarf.
- Pin top seams together. Leave a spot where you won’t sew about 2″ long or so – you will turn the cozy inside-out through this hole. You can mark it with double pins to remind yourself, or just remember it – you’re not gonna be sewing for long, here!
- Sew around the area you just pinned, remembering to leave the 2″ gap.
- Turn inside out through gap.
- Turn exposed fabric (where the gap is) into the gap so the seam looks finished. Iron lightly if desired (use a very low setting – dollar store scarves, y’know!).
- Sew around top seam, making sure the place where the gap was is sealed satisfactorily.
- Fold top over, and you’re done!
Don’t be scared by the instructions here. They sound more complicated than they are. Even if you are a beginning sewer (or have never sewn anything before), you can do this project!


6 Comments
Molly
Fred is adorable!
Just a warning to the small critter lovers out there:
A lot of people don’t think it is a good idea to give their rodents fabric because they can ingest the threads, which then are likely to cause blockages in their digestive systems that result in a very painful death for the animal. I’m not guaranteeing that every rodent would immediately eat your craft and then die from it, but such things have been known to happen. If you’re concerned, maybe it should only be used with supervision and not just left in the cage.
I know my gerbils would just chew it to bits within hours, regardless of the thickness of the cloth, because anything you put into their cage that they can sink their teeth into is taken as a personal challenge to their chewing abilities, but I’ll bet my degus would love something like this (and be smart enough not to eat it).
Love the blog!
heather
Thanks for the note, Molly! I am not a hamster or gerbil owner, but Fred’s mommy told me that he wasn’t likely to chew the fabric and gave me the okay to use these fabrics! But thanks again for the warning!
Diane N
Hi!!!
Just to let you know that my little Fred still loves his cozy. He plays in it everytime we take him out to play. It has become one of his if not his main toy to play with besides his ball.
Ethan
Also to be avoided is cotton/or synthetic pillow stuffing. I added bits of nontoxic fabric-fill to our hamster’s cage, for lining his nest, until one day I noticed he’d twisted fibers around his foot, apparently while turning in circles in his burrow, and the fibers held his foot like a tourniquet. It was swollen and bleeding, apparently from trying to bite through the fibers.
His foot looked absolutely awful; it seemed certain he would lose the foot, and probably would have had I not noticed his injury in time. It was very difficult to isolate the tangle due to his distress. I finally managed to cut the fibers away with a small set of sewing scissors, and amazingly, his foot healed normally. It was traumatic enough for me; but I was very glad my child did not witness it.
Strictly paper-pulp and wood fibers for us, from now on!
heather
@Ethan thank you so much for the input! Definitely useful information.