Did you know you can carve stamps using just school supplies? It’s true – you can use the metal eraser-holder part of a pencil instead of carving tools, and an eraser for the carving surface. It’s a lot safer for kids, and a lot cheaper than buying legit printmaking tools. Of course, the end of a pencil won’t carve as well as said tools, but for dabbling, this is a great way to go, and you can’t beat the price! This is today’s Make Something Cool!
This is a great entry-level project for stamp-carving, or would be great for kids with a bit of supervision. It’s also a great spur-of-the-moment craft to do in a moment of boredom, say in class or at work (on your coffee break!). It’s also a super-quick craft, and can take as little as ten minutes to complete.
You can use the stamps to adorn all kinds of things, from papery things like notecards and stationery, to fabric (with fabric paint), or just about anything else you can think of! Stamp-carving is a very valuable crafty skill to learn.
Project Estimate:
- Erasers, $1 or on hand
- Pencils with metal eraser-holders, $1 or on hand
- Pencil to write with, on hand
- Black permanent marker, on hand
- Stamp pad, ink, or paint to make prints with, on hand or $1
Total cost: FREE to $3
To make the tool:
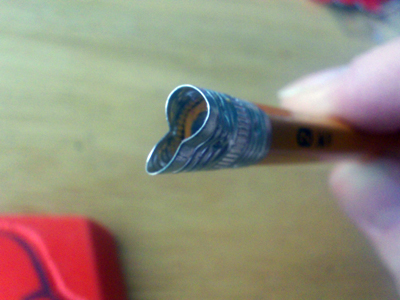
To make the pencil carving tool, pull out the eraser, and bend the metal to the desired shape. I just pinched this one here to make a two-sided carving tool – a thinner side for finer work, and a wider side for removing big sections of carving material.
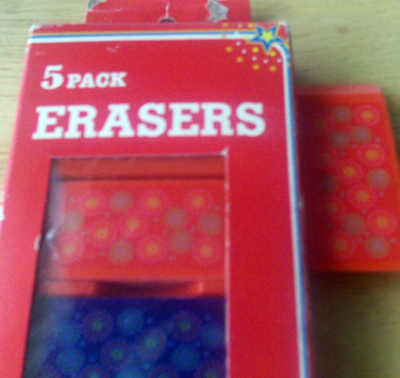
You can pick up erasers of different sizes and shapes at the dollar store. I just used standard school-sized erasers for this particular project.
Designing the Stamp
To make the design for your stamp you have two options.
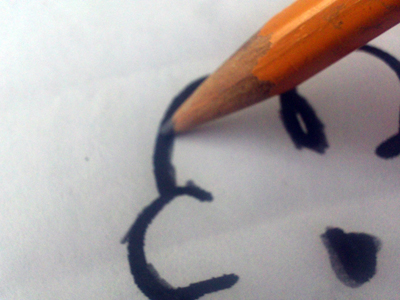
Option #1: Draw design directly on the eraser and then carve – this is self-explanatory, right? You can draw with pencil and then go over it with a black permanent marker.
Option #2: Print out a design and transfer it to the eraser. To transfer the design, color over the black parts of your printed out design with a pencil (thickly), and then turn paper design-side down on your eraser. Burnish (rub hard with a hard tool like a spoon or coin) the back of the paper. When you lift the paper, you will see the design transferred to the eraser. You will want to go over the design with a black permanent marker.
Tip: When I carve stamps, I imagine that the image I am drawing is what the final stamp will look like. Any parts that I color black, I do not carve. These will be the parts that end up making the imprint. (Of course, the actual stamp will vary from your initial drawing – for one, it will be reversed, and it will morph a bit just based on the process of stamp-making. Also, using these cheaper materials will make a cruder stamp.)
If you are carving words, letters, numbers, or symbols, remember that you need to reverse them when you are planning out your design. If you carve a regular R on a stamp, it will end up looking like a backwards R.
Don’t include too many fine details – especially for these stamps. Your tools are crude, so you won’t get a super-high level of detail.
Carving the Stamp:
Your design is drawn on the stamp, so you’re ready to carve. Carve away all the parts that aren’t colored black. Be sure to leave anything that’s colored black to assure you get the image you planned out.
Safety rules (go over these with kids):
- The eraser-carvers really aren’t dangerous, but do remember to always carve away from yourself. This is an important habit to get into in case you eventually move on to higher-quality tools.
- Keep your fingers out of the way of the carving tool.
You will want to experiment with depths of carving to see how deeply to carve away the eraser. Obviously, the deeper the carving, the less the chance that ink will somehow transfer from it. If you want a sketchier look, carve shallow cuts. Remember, it’s always better to carve less because you can always go back and carve more (but you can’t replace the carving medium once it’s carved away!).
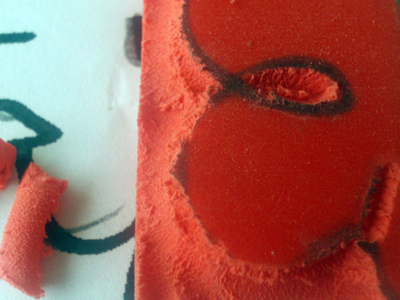
Pay no attention to the stamp technique in the photo above! I obviously didn’t follow my own advice and carved away some of the black stuff and left some of the un-colored stuff.
Check your carved stamp with a stamp pad or paint, and make any adjustments. For instance, some areas might not be carved deeply enough and might leave artifacts on your stamped surface.
One of my readers, and super-crafty lady Su, has also been experimenting with stamp-making on the cheap. Check out her findings at Tanglecrafts.


3 Comments
Paula
Love. So very resourceful!!
Rachel
Oh that’s way cool! I know I have an old pencil around here… I’ll be linking.
Tami
Awesome idea! I think I used to do this in school while bored in class, but I don’t think I ever actually used ink. I just used the pencil lead to color the stamp and made a REALLY crude stamped image with that.
I’ll have to try this when I’m bored some day.