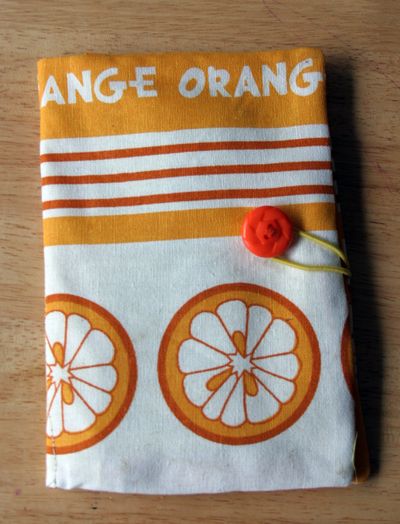
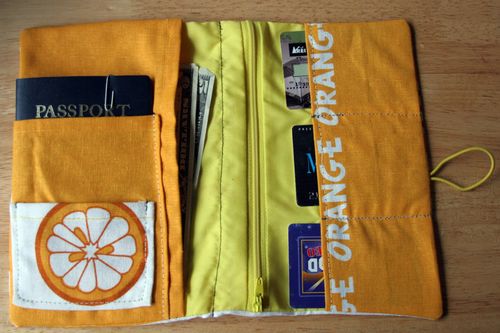
I made this passport organizer a couple months ago for a craftster swap. I made it out of a dollar store dish towel (possibly the cutest DS dishtowel I have ever seen) and some spare plain yellow fabric I had in my stash. It has pockets for a passport, important credit card-sized cards, a zip pocket for change and other loose stuff, and a sleeve for keeping money or boarding passes for planes.
Project Materials:
- Dish towel or other cute fabric, $1
- Lining fabric, on hand
- Zipper, $1 or on hand
- (Optional) Velcro-type tape, on hand or $1
- (Optional) Hair elastic and shank button, on hand
Total: $1 and up
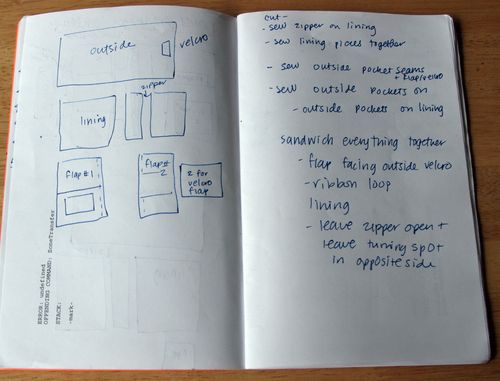
I didn’t take step-by-step photos of how I made it, but I wrote down the steps for constructing it and drew out rough pattern pieces in my sketchbook before I made it. I also don’t have specific measurements for these pieces at this time.
I used 8.5 x 11 sheets of paper to draw and cut out the pattern pieces for each piece.
Pieces you need:
- Outside
- Inside lining – cut an inch or so wider than the outside to accommodate seam allowances for a zipper
- Left side flap – make sure it is more than wide enough to accommodate a passport pocket
- Passport pocket piece (on top of left side flap) – cut 1″ wider than passport to allow room for seam allowances
- Small goodie pocket piece (on top of passport pocket piece)
- Right side flap – narrow enough to allow cards to peek out from pocket
- Optional: Velcro flap (2 pieces) – I ended up just using a button and hair elastic loop closure
Pre-Assembly:
- Measure and cut pattern pieces
- Cut lining piece about 6″ from right side and sew zipper on
- Sew seams on edges of flap pockets, passport pocket, and small pocket
- Sew small pocket on passport pocket
- Sew passport pocket on left side flap
- Sew pockets onto lining (right sides facing out, as it would look if you were going to use it)
- Sew credit card dividing lines on right side pocket, reinforcing seam at opening
- (If you are using a velcro closure): Sew velcro flap, sew velcro to outside piece
- (If you are using a button & elastic closure): Sew button to outside piece
To Assemble:
Sandwich everything together, right sides facing:
- Velcro flap facing outside velcro OR Elastic band facing button
- Lining with all pockets sewn to it
- Leave zipper open to allow for turning
Sew around the outside of the sandwich layers, taking special care to reinforce elastic loop.
Turn inside out.
Sew a line down center of organizer (next to zipper) if desired.


5 Comments
Charis
Holy cow! I bought all of my girlfriends these dishtowels for Christmas last year. Now I wish I’d saved a couple. Very cute
Kami Wilt
It’s ingenious! I love it.
Rachel
That is SO cute, I love it! Being able to add your own dimensions is great. It’s so customizable. I’ll be linking.