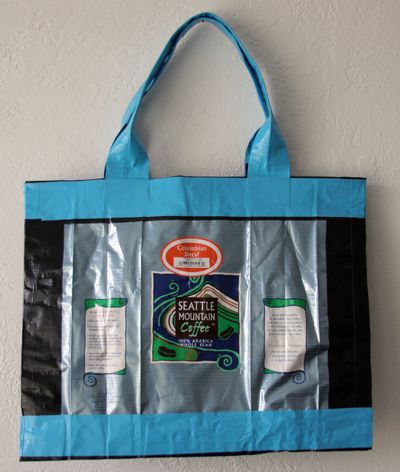
I love the idea of recycling mylar coffee bags by making them into handbags. Do you sew them? No! You use duct tape! I came across this idea via the CraftyPod blog, in a review of a book that looks amazing, Eco Craft by Susan Wasinger. I have made duct tape purses and wallets before, so I was drawn to the idea of using duct tape along with such a strong recycled material. For some duct tape crafting basics, check my article How to Make Stuff With Duct Tape on the CROQ Zine blog.
We use a lot of coffee beans around our house, so it was only a short matter of time before I had saved up three bags. Our bags are large (holding 2 or so pounds of coffee each), so I used three bags total to make a good-sized tote bag–two bags for the outside and one bag for inside pockets. If you use one-pound bags of coffee you will probably want to use five or six bags to make a tote. Duct tape is so fun these days–it comes in so many colors! I even found purple plaid duct tape in the dorm supplies section at Target (hurry up and pick some up if it appeals to you–it’s a seasonal thing so it won’t be around for long!). You can get duct tape at the dollar store, but I recommend picking it up at your local hardware, craft, or warehouse store, as a name brand duct tape is your best bet for quality and longevity. It’s also the best way to find the fun colors!
I gave this bag to my mom, who wanted to use it as a “wet bag” to tote her swimsuit home in from the gym. What a great idea! Oh, and p.s. this purse is a lot cuter in person!
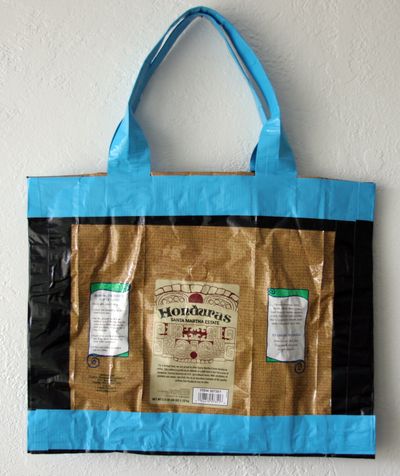
Here’s the second side of the bag. You can get totally different looks based on which coffee bags you use, and what colors of duct tape you choose.
Project Estimate:
- 3 recycled mylar coffee bags, on hand
- Duct tape, each roll about $3
Total cost: $3 investment for duct tape, will make several bags
Time needed: Took me about 1.5 hours for this simple bag
Technique Notes: You will cut the tape with scissors. You might have to de-gunk your scissors periodically.
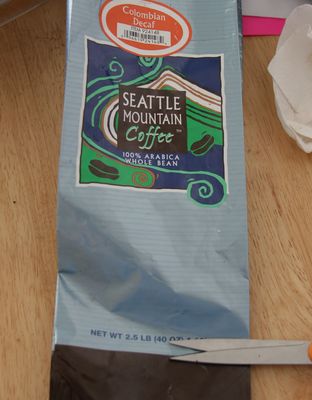
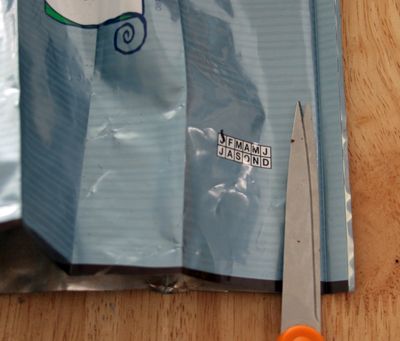
To Make:
1. Cut bag open at seams on bottom and back of bag. I also cut out the plastic vacuum-sealing spot on my bags, but you can leave it intact if you like the look.
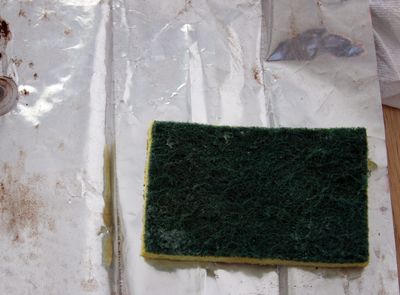
2. Clean inside of bag with damp sponge or washcloth. Bags that hold ground coffee are messier to clean, whereas bags that held just beans clean up with just a swipe.
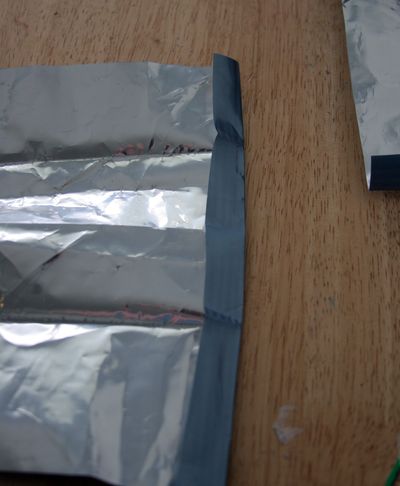
3. Fold top of bag over to form “seam.” Crease bag.
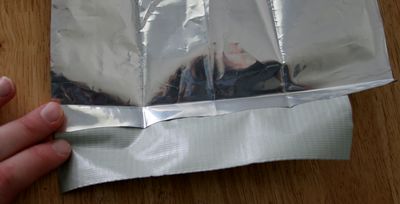
4. Place a length of duct tape along the good side of the coffee bag, along the “seam.” You can see I have my tape sticky side up here, and I placed the bag on top of the tape.
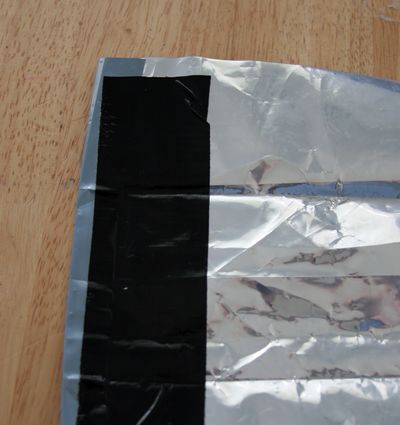
5. Fold bag at crease and press tape to inside of bag. (As in the photo, the tape doesn’t have to reach the edge of the bag because you will be taping over the edges of the bag anyway).
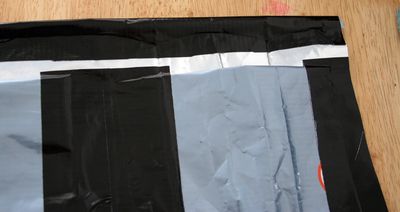
6. Create pockets using the same crease and tape technique. Tape pockets onto main piece. Make sure your tape extends far enough up past the pocket to stay secured to the bag (NOT like this photo! The black tape should extend all the way up to the edge of the purse.)
7. Complete two sides of bag. Trim so both pieces are the same size.
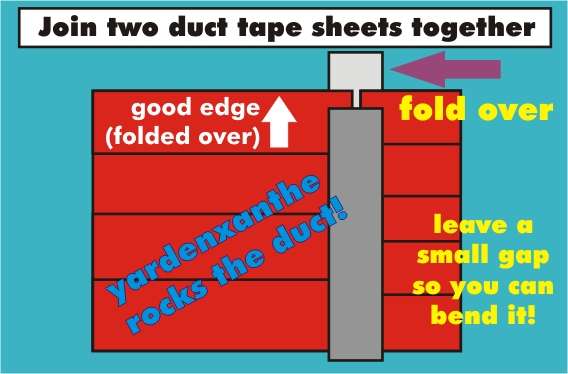
8. Lay the two pieces out on the table so the bottom sides are side by side, leaving a very small gap, wrong sides up. (This sounds confusing, and I forgot to take a picture! Here’s my illustration for joining two duct tape sheets–hopefully it will help!) Tape over area where two bottom sides are next to each other. Then flip the whole thing over and tape the same area on the other side.
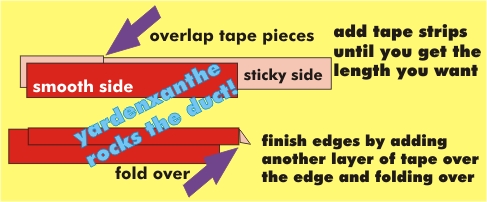
9. Make handles by making a long strip. Here’s another illustration to show you how to make a strip.
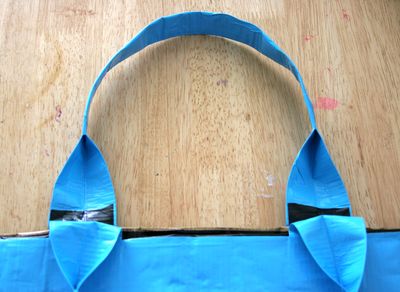
To make my handles more comfortable, I creased them lengthwise and then taped them together, leaving wide parts at both ends where I could secure them to the bag.
10. Tape handles to both sides of the purse. You will want to put duct tape on both sides of the handles (both inside and outside of purse) to reinforce. I added an additional strip across the bag (the blue one) that served to further secure the handles, as well as adding extra style!
11. Fold purse so good sides are showing on both sides. Handles should now match up.
12. Tape up sides. Do your best to reinforce sides on the inside of the purse as well (this might be slightly challenging since the purse will be folded up.)
13. Add any decorative tape or reinforcing strips now. If you’re in doubt about the strength of your bag, just add more tape.
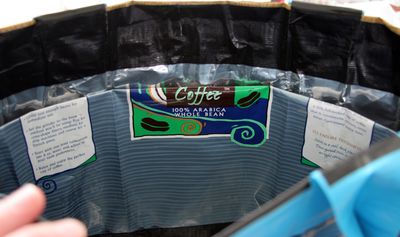
Here’s a view of the inside of my bag. Happy recycling!
If my tutorial is less than perfectly clear (which I’m afraid is the case because I didn’t take enough photos of the process!), just start doing it anyway. You will find out many of your own duct tape insights during the first five minutes you start working with duct tape. Sometimes, the best way to learn is just to jump in and try it!
Add your insights here, and please send me pics if you make one.
p.s. If you are in Ithaca, NY, you can get BIG mylar coffee bags at Gimme! Coffee, which would be awesome for this project! Did you know they have shiny silver duct tape now? You could make a really cool designer-inspired handbag with it.
If you’re not in NY, maybe your local coffee roaster uses the same kind of bags and will give them to you for upcycling. It’s worth checking!


19 Comments
Kathy V.
It is a very impressive bag, Heather! I love your duct tape projects.
Jan
This is a really great use for coffee bean bags! Being a bit of a coffee-holic, I can’t wait to make one for myself! Thanks for this.
Rachel
Whoa, that’s super cute! Any craft where I get to breathe in the smell of coffee goes to the top of my list. Plus this is soo cute! And I love the wet bag idea. I’ll be linking.
Corinne
Very awesome! It looks like a bag in one of those “hip” uptown shops – you’ve just got to love duct tape!
Thank you for sharing this great idea!
Maura
What a cute idea! I’m going to try it using those new indestructable dry cat food bags.
macey
haha that was awsome
italmama
I love you!
Carol Hartley
Just love the idea. I have already started making HUGE bags out of large plastic dogfood bags. Those you have to turn inside ot and scrub, though or they will get sort of rancid. Can’t wait to start playing with the coffee bags.
party bags
Very unique! One advantage of having this bag is that it’s water proof. Awesome!
Denise
Thank you so much for this GREAT idea! I have started making bags from a variety of different coffee bags and duct tape. I have been saving these bags for YEARS just waiting and searching for the right idea on how to reuse them. I’ve posted pictures of a couple of the bags on Flikr. And you’re right – you just need to start cutting and taping and it is easy to figure out as you go along. My bags have flat bottoms reinforced with tape on the inside. VERY strong! Thank you again!
http://www.flickr.com/photos/65619975@N04/sets/72157627278105012/
LaShahn
Wow! This looks great. I have a healthy coffee co and the packs I want to use to make a tote are rather small compared to a 2 lb coffee bag. About 3″x3″, can I still use duct tape? I will look for the colored tape today. I will try home depot & ACE hardware. thx a lot I was looking for someone to make the bag for me, but you have inspired me to make it myself. wish me luck!
ps- anything I should be aware of or look out for pls don’t hesitate to let me know.