
Bandanna Cape by Lauren at Us Wheelers: $3
Lauren used bandannas to make quick capes for her kiddos:
I made superhero capes out of bandannas and an iron-on letter (all from Hobby Lobby). I used one bandanna (the blue) and cut off about 4 1/2 inches of another bandanna (the yellow one). I sewed the yellow onto the bottom of the blue (making sure the finished edge of the bandanna was on the bottom. That’s the beauty of using bandannas: all the edges are finished and you don’t have as much sewing to do.).
On the top of the cape (the top of the blue) I folded under about an inch and sewed a “tube”. Once sewn, I found some red ribbon in my stash and trimmed it to about 3 feet long. I put a safety pin in one end and threaded it through the casing at the top of the cape. Then I made two seams across the casing (securing the ribbon) about 1/3 of the way in on each side.
I traced a Superman emblem from a picture that I printed off the computer and used it as a pattern, cutting from the rest of the yellow bandanna. Then I ironed on a red letter (the first letter of the child’s name) to the yellow emblem. I centered the emblem onto the blue bandanna and then did a simple zigzag stitch around it to secure it. I’ve also serged the edges on other capes (which I think looks better). After that, you’re done! Tie around the child’s neck and let them fly away!
Project Estimate:
- 2 bandannas: $1 each
- iron-on letter: $1
- ribbon and thread: from stash
Total cost of project: $3

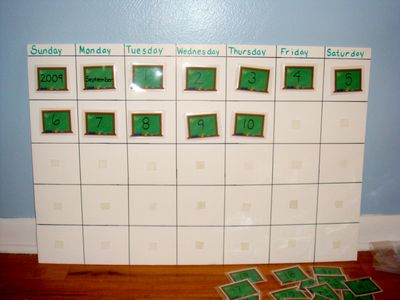
Perpetual Learning Calendar by Linda: $2 and up
Reader Linda C. sent this project in; a perpetual calendar to help her daughter learn days, months, dates, and year:


2 Comments
Nela
Paper cut-out bookcovers I made for my child: http://nela-cutnelacut.blogspot.com/2009/09/kad-je-kosta-krenuo-u-skolu.html
amy
I love the calender idea! I’d take it a step further and make the days of the week velcro too. Might be fun to pull them off, mix them up, and have a child put them back on in order to help learn the days!