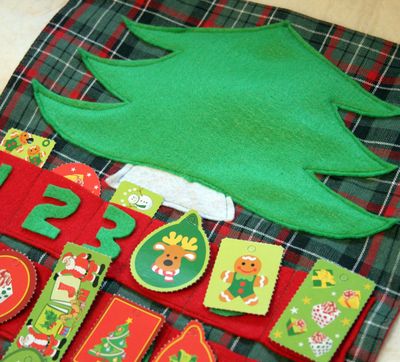
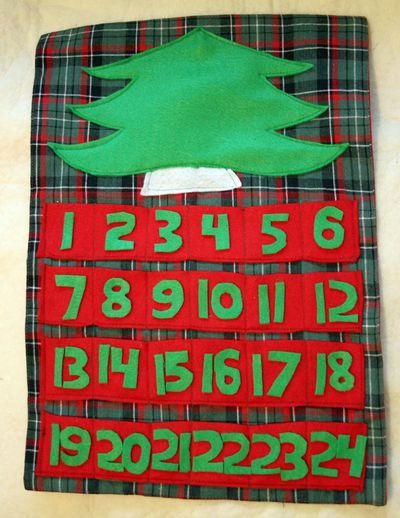
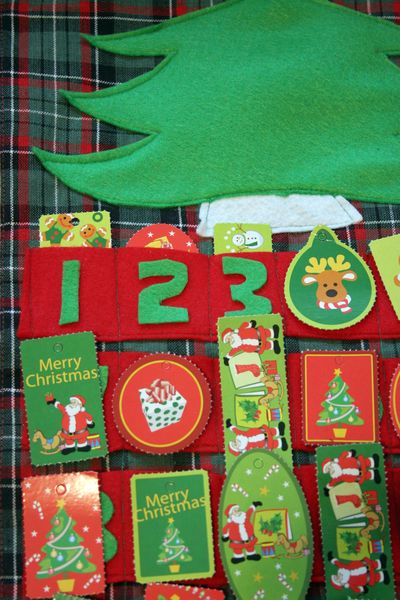
I dollar store craft-ized the traditional advent calendar by using a place mat for the calendar base, and paper gift tags for the ornaments. I’ve made several advent calendars in my lifetime, all in this same basic category: the picture up top, the numbered pockets below, and “ornaments” for each day to hang up on the top.
Project Estimate:
- Place mat, $1
- 2 or 3 sheets of felt, $.25 each
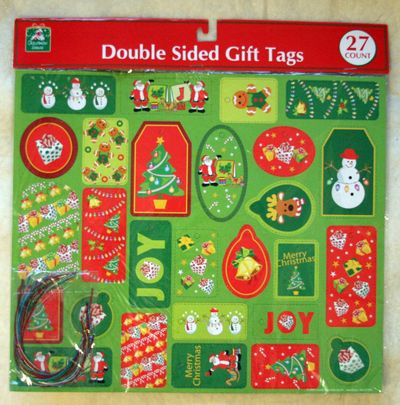
- 1 package of chipboard gift tags, $1
- Craft glue (I used Aleene’s Quick Dry Tacky Glue), on hand
- Safety pins, straight pins, velcro, or diaper tabs, optional
- Sewing machine
- Dowel and ribbon for hanging, optional
- Printed out template (optional) – download here
Total cost: $2.75 and up
Time needed: about an hour
The place mat will help simplify the construction process, but you’ll still have to cut out the numbers. I tried really hard to think of a way to circumvent the seemingly tedious number cutting-out process, but when it came down to it, nothing worked for me. I timed myself, though, and it only took me 20 minutes to cut all the numbers out, so it’s not THAT bad. I’ll give you my tips for cutting them out a little later.
If you really don’t want to cut out the numbers, alternate suggestions are:
- Cut out the numbers with your die-cutter (if you have one… I don’t!) or call your local scrapbooking store to see if they can do it for you (or maybe a friend?)
- Find ready-made numbers to glue on your calendar. (I didn’t find anything suitable at my dollar store, but maybe you’ll be luckier or have more ingenuity).
- Paint the numbers on with acrylic paint or fabric paint.
- Stencil the numbers with ready-made stencils or freezer paper stencils.
- Omit the numbers altogether — you will still get a visual idea of how close you’re getting to Christmas as the ornaments disappear from the pockets.
Here’s my thinking on the paper gift tags: use them this year to make the project quickly before December 1st rolls around, and then after the holidays when you’re in your post-Christmas crafting lull, make some higher-quality ornaments to use on the calendar next year. Sound like a plan to you? If not, my other suggestion for making quickie ornaments is to string a stash button on a ribbon or string for each day. That sounds pretty cute!
To Make:
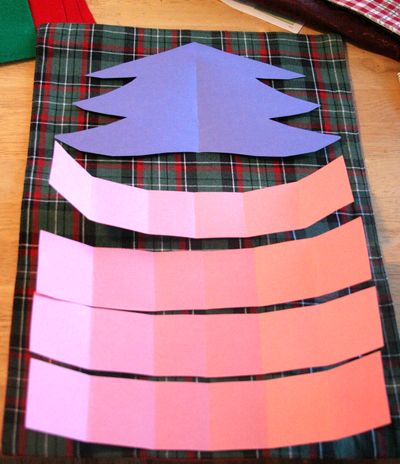
Cut out a paper template for the pockets. I cut a sheet of construction paper (same size as a piece of felt) in four strips, lengthwise to get a visual of how much space I’d have left for my tree. I made the tree kind of short and wide to fit on my available space. Here’s a tree template if you want it.
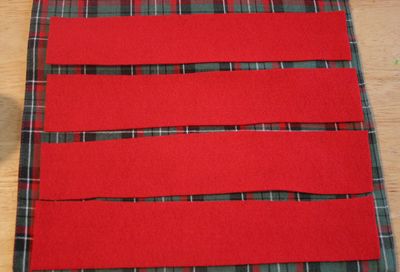 Cut out the four strips of felt and the felt tree.
Sewing the Pockets:
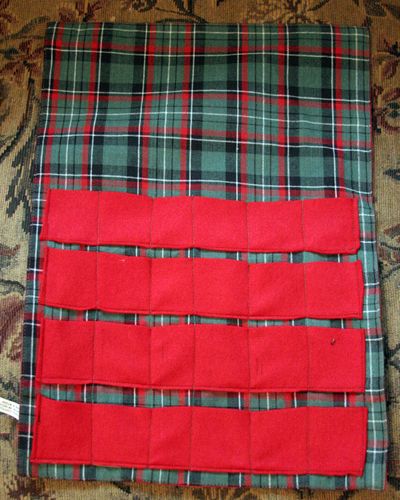
Sew the felt strips onto the place mat. I sewed one edge of each strip first, then across the bottom of each, then the other edge. Then I sewed across all the strips of felt to form the pockets (starting from the bottom of the placemat). You want six pockets on each strip of felt, so you’ll sew across the felt strips five times to create the pockets. You can eyeball it, or mark it off with chalk before you sew (suggested, but I didn’t do this because I’m not sure where my chalk is). If you eyeball it, sew the center line first and work your way out from there. The pockets are going to be approximately 2-1/4″ tall by 2″ wide.
After you’re done with the pockets, sew the Christmas tree on the top.
Cutting the Numbers – the 20 minute method:
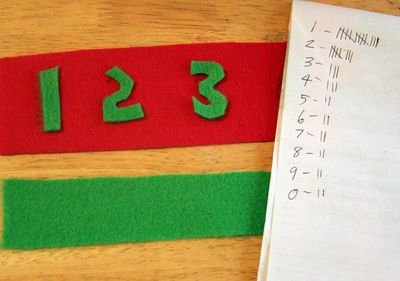
You’ll need numbers in the following quantities:
- Ones: 13
- Twos: 8
- Threes and Fours: 3 each
- Fives, Sixes, Sevens, Eights, Nines, Zeroes: 2 each
I suggest cutting out all of the like numbers at once; all the twos at one time, etc.
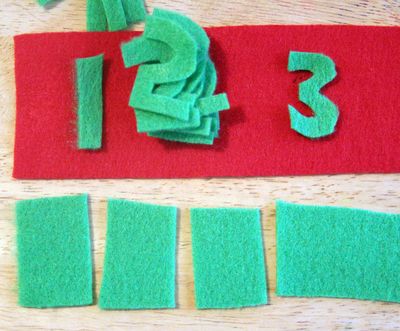
To cut the numbers, cut a long strip of felt approximately 1-1/4″ tall.
- For the ones: cut a narrow strip about 1/2″ wide (it looks like a one – ha ha!)
- For the rest of the numbers, cut the strip into rectangular pieces (each about 3/4″ wide). I like to cut the necessary number of rectangles for each set of numbers, so I can just cut without counting. (Like, I’d cut eight rectangles out, cut all my twos, and then move on and cut more rectangles for the next set of numbers).
- Cut out the necessary parts to make the number. (On my number templates, the black parts are the parts you cut away from the rectangle).
- To cut out the center circles, make a small cut where the circle should be, and widen the circle from there.
- Hint: 2’s are the same as 5’s (just upside-down and backward) and 6’s are the same as 9’s (just upside-down)
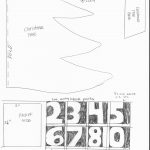 Click here to download the template
Glue the numbers onto the pockets with craft or fabric glue.
To Hang the Ornaments:
You will want to attach some sort of hanging apparatus for each ornament. Use whatever you like or have on hand.
- Safety pins: tie a string or ribbon to the ornament, and attach a safety pin
- Straight pins
- Velcro (scratchy side) or disposable diaper tabs (they work like Velcro!), glue onto back of ornament
If you want to attach a dowel for hanging, you can either make several ribbon loops on the top of the place mat, and run the dowel through the loops. Alternately, you can use a 1″ piece of ribbon and sew it on the top back of the place mat for a casing for the dowel. Tie ribbon or cord to the ends of the dowel to make a hanger.





10 Comments
Jessica H.
That is awesome!!!
steph
Love it! I should do this.
Heather H
What a cute idea! I love advent calendars :) This would be an easy craft with the kids helping!
Jean Saporito
I love this advent calendar. I always want to make one but it’s either in the middle of December or Easter time when I see something on the internet. This year I will try to make myself make one. Thanks for the patterns.detailed instructions and [
Stephanie
Love this idea! Mainly because I thought I thought of it LOL. I just bought some really pretty place mats at Home Goods (didn’t think of the dollar store, shame on me!) The light went off in my head when I was at Home Goods and saw the place mats. Hey I said to myself ” I could use them as the background for my advent calendar and it would save a TON of time.” Now look, I can do it even faster with your tutorial! Thanks so much!
Cate
This is cute! I will be using this in my Christmas Decoration Marathon starting next week. I will be putting up Christmas decoration ideas through the rest of November and then gift ideas starting in December.
-Cate from Random Crafty Georgia Girl
Mary Williams
This is too cute!! I featured it on my Friday Favorites!
http://lilbitofus.blogspot.com/2010/12/friday-favorites.html