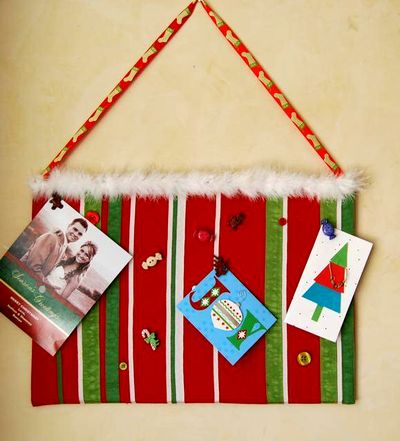
Thanks to Stephanie from Cre8tive Designs who submitted this great idea (and tutorial) for turning a place mat into a holiday card holder! You can get most of these supplies at the dollar store. I even saw feather boas in the toy section with the dress up clothes last time I was at the DS! Sweet! -Heather
Make a Card Holder out of a Place Mat by Stephanie at Cre8tive Designs
I am not one to be called lazy, but I am someone who is always looking for a quick and easy way to get from point “a” to point “b”. And that is why I love place mats! To me, place mats are more than just a pretty table decoration. They come in all different shapes, sizes and colors and all the hard work has already been done for you. I have used them in multiples for many valances, bed skirts and table runners. So, when I saw these place mats at the store a light bulb went off in my head!
I had been attempting to make an advent calendar and was not happy how it was turning out; it was looking like a bad homemade project. I realized that I could use the place mat as my backdrop for the calendar and just add some cute decorative embellishments and numbers! But then reality set in, and I remembered how I couldn’t cut a straight line, let alone 24 small numbers! Buying little numbers was too expensive and I didn’t have a die cut that I could use, so I went to plan “b”. I decided to use the place mat for a Christmas card holder. It was very simple to do, and took no time at all. Now I can’t wait to look for more cute place mats that go on clearance for next year and give them as gifts.
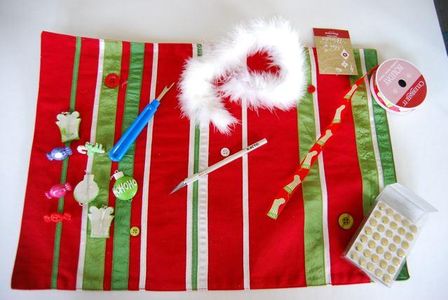
Materials I used
- Place mat, $1
- Ribbon, on hand or $1
- Marabou, $1
- Card board or foam board, on hand
- Flat decorative embellishments, on hand or $1
- Thumbtacks, on hand or $1
- Seam Ripper, on hand
- Exacto knife, on hand
Total: $2 and up
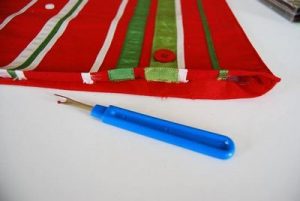
Take apart the seam on the top portion of the place mat from end to end.
Cut a piece of cardboard or foam board about 1/4″ smaller than the size of the placemat and insert it into the opening. (You might have to make some minor cutting adjustments to your foam board or cardboard once you insert it because the place mat may not be exactly square)
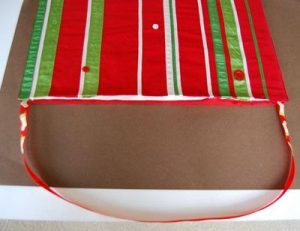
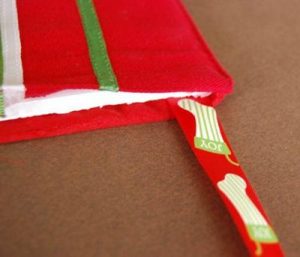
Cut a piece of ribbon 30 inches long. Insert about a 1/2″ of the ribbon on each end to the two corners of the placemat. Making sure you have the ribbon under the cardboard or foam board and on the inside of the back of your place mat.
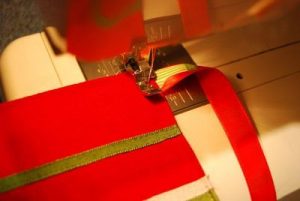
Now you need to sew the lip of the place mat back up, I used my sewing machine for this. I probably should have pinned the ribbon and opening down before I sewed it, but to me that takes too much time :) I just wing it. Oh, and by the way, don’t be afraid if your machine sews into the cardboard, it doesn’t damage your machine; well at least it didn’t mine.
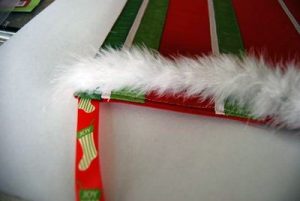
So since I am not an expert sewer, and tend to cut corners quite often (like not using straight pins), my seam line wasn’t the straightest. No worries, marabou to the rescue! Using my hot glue gun, I attached the marabou over the seam.
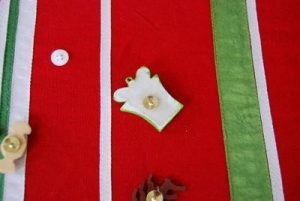
I then attached a small tack (you have to use short tacks since the cardboard is not very thick) to each decorative embellishment with my glue gun. Scrap booking stores have great embellishments that work great for these.
What is great about this cardholder is that it is very lightweight and easy to hang and you can put it anywhere! I am sure you crafters out there can come up with even more decorative ways to make this; I would love to see or hear your ideas! http://cre8tivedesigns.blogspot.com/




4 Comments
Karen
Cool idea! I love your site and I love the Dollar store!
Anne Weaver
Great project! And the easy sewing is perfect for my crazy-busy holiday schedule!!
I featured your tutorial on Craft Gossip Sewing:
http://sewing.craftgossip.com/tutorial-christmas-card-holder-from-a-placemat/2009/12/19/
–Anne
Joanne
Hi, what an awesome idea. I have not made this, but am considering doing it with a variation. Instead of the tac idea. I will use my glue gun and stick clips to hold the cards and put christmas embellishments on the top of the clips with a glue gun to cover the metal. You can also get cute Christmas stickers and attach them to cut out card stock. Thanks for the inspiration.