Thanks to today’s guest poster, Beth from Scrimpalicious, whose blog is dedicated to frugal living with style. Check out her Five Dollar Decor posts on Fridays for great decorating ideas on the cheap. -Heather
Make Blown Egg Ornaments By Beth Jurns, Scrimpalicious
These eggshell ornaments are delicate, beautiful, and a lot of fun to make. Who needs glass when nature provides such great materials to work with?
You can let your imagination run wild with this craft–it takes about 20 minutes per egg, and you can decorate them with anything you like and have on hand. You know you’re already going to be buying dozens of eggs for Christmas baking anyway–save the shells for this project.
Materials:
Eggs, on hand
White Glue, on hand
Acrylic paints, $0.75 and up, or on hand
Embroidery floss or ribbon, on hand
Optional:
Felt, various colors, $0.29/sheet or on hand
Glitter, $0.50 and up, or on hand
Stickers, vinyl decals, or foam shapes, $0.25 and up, or on hand
Total: FREE and up
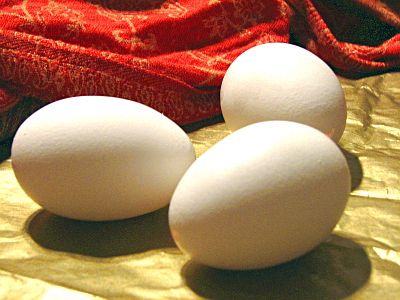
1. Blow the eggs. If you are like my husband and come from a family that never did this at Easter, it’s very simple–get a paring knife or other pointy implement and gently tap a hole at the top and at the bottom of the egg. You’ll want the hole on top to be fairly small and the one on the bottom to be a little larger. If both holes are too small, the egg will explode under pressure when you do the next bit, which involves placing your mouth over one hole, positioning the egg over a bowl to catch the innards, and blowing until there’s nothing left inside.
2. Rinse inside and thoroughly dry the egg. If you don’t give it time to dry inside, it will drip at inopportune moments.
3. At this point, you have the option of filling in the hole at the bottom of the egg. Do not fill in the hole at the top–you’ll need it later! There are several ways to do this. The simplest is probably to cover it with a bit of white tissue paper coated in glue and let it dry.
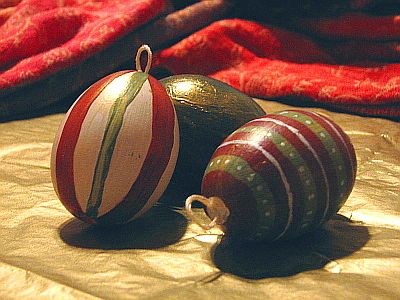
4. Once your hole is covered up, you’re ready for the fun part. It’s time to decorate your egg! I decided to go with a less glitzy version, so I painted in a dark brick red, a sage green, and off-white, and skipped the glitter. I also cut out felt stars and glued them to one of my eggs.
(Note: If you’re impatient and doing multiple coats of paint, a hair dryer will set the paint in less than a minute and let you continue on without waiting for ages while it dries. )
I finished off my paint job with a very light wash of gold paint, to add some iridescence.
5. Once you’ve decorated your eggs to your heart’s content and in any way you see fit, it’s time to turn them into hang-able ornaments. I puzzled over this for a while, and finally hit on this method: Take a short length of embroidery floss — about 1 1/2″–and fold it in half. Moisten your fingers and rub the two ends together until they twisted into one slightly pointed strand with a large loop at the other end. Insert it, pointy end first, into the hole at the top of the egg.
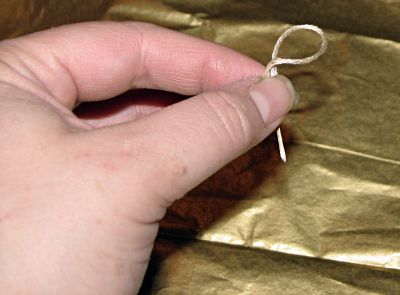
Feed the floss, string, or ribbon into the hole until the loop is the size you want it, and then fill in the spaces around it with white/clear-drying glue and prop it up to dry. I did very small loops so that the ornaments could be hung on metal hooks, but it would probably be better to use a longer length of floss and simply hang the eggs from the loop of floss itself once they dry.
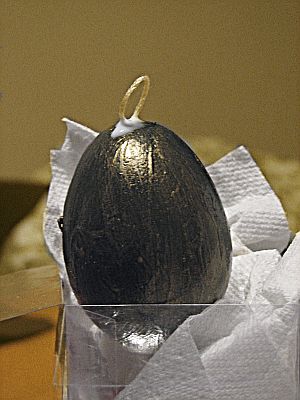
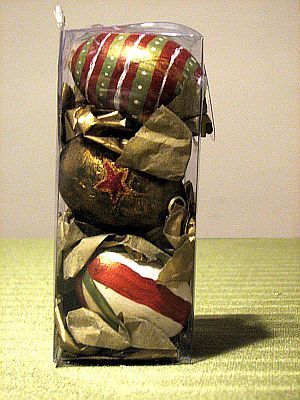
If you’re keeping these for yourself, you can pop them right back into their egg carton for easy storage. I decided to package mine as a gift, and tucked them and a little gold tissue into the clear plastic box that my craft glue came in. Happy Christmas, and happy crafting!




6 Comments
linda pare
What a great project. Thanks for sharing.
B.
Thanks again for the invitation to do a guest post, Heather! I had a lot of fun getting it put together for you.
Katie
I’ve never blown an egg before, and I’m kind of nervous to try! I really hope I can master it- these decorations are adorable, and since I’m new to doing my own Christmas tree decorations they could save me a bundle! Thanks!
Rachel
How pretty! I remember way back in Jr. High blowing eggs with my neighbor. We painted them with nail polish. =) Thanks so much for this, I’ll be linking.
Vone
Super idea. I’ve also never blown out an egg – maybe I’ll try. I think they would look great with lots of glitter.
Erin
Thank you for this great idea! My mom is just crazy about dated bulbs, so I made one for each of us (mom, dad, my sister and I) and dated them. I know she’ll just love these! They turned out beautifully!