I also used a metal stamping kit to mark the washers with numbers to suggest a clock face (you can get these at Harbor Freight), a permanent marker to antique the metal stamping, and a dollar store chain and jump ring to turn it into a necklace. I used needle-nosed pliers to help me open and close the chain link and jump rings. I intentionally mixed metal colors because I thought it added to the steampunk feel.
This applies to all my projects: please substitute whatever materials you have on hand to make this project your own. I encourage improvisation.
To Make:
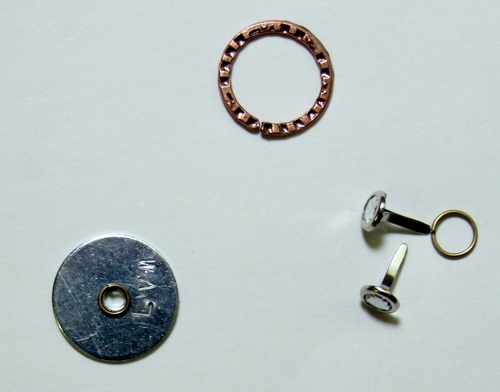
1. If desired, stamp numbers on washer with your metal stamping kit. Alternately, decorate the metal washer with decoupage, or inks that can be stamped onto metal. Otherwise, move on to step 2. (My example washer here was test-stamped, so ignore the stamping pattern on it.)
2. Glue small jump ring around the center hole of the washer with E6000 glue. Allow it to dry a bit for a few minutes (it will take 24 hours to completely dry and cure, but you can assemble the rest of the charm before then!)
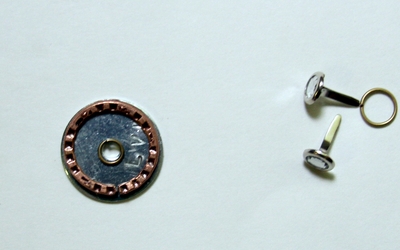
3. Remove one link from the oversized copper chain. I used needle-nosed pliers and a bit of force to open my link (it wasn’t designed to be easily disassembled). Straighten link out and make as flat as possible. Glue to outside of metal washer.
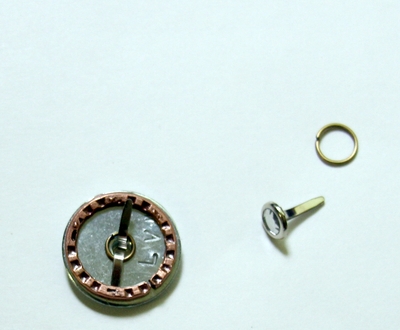
4. Put rhinestone brad through back of metal washer and bend prongs out on front of charm to suggest watch hands. You don’t need to glue the brad or anything.
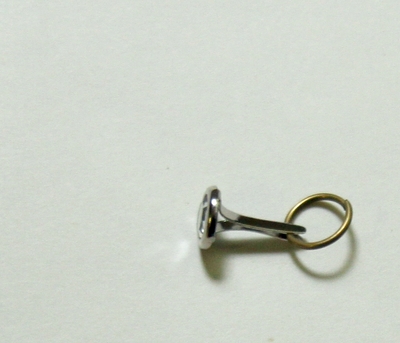
5. Put large jump ring between prongs of second brad (note: make sure the jump ring is larger than the rhinestone brad head, so the ring can move freely), pull it all the way to the head of the brad. Use needle-nosed pliers to clamp prongs together tightly, if necessary.
6. Glue brad/jump ring combo to back of washer (make sure it lines up with the “12” on the clock if you have one).
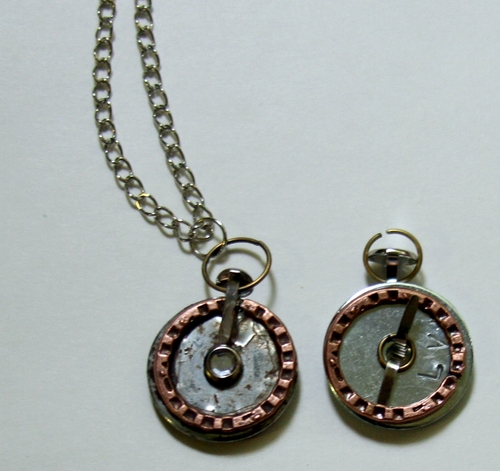
7. Here’s the back view and the front view. (I put copper rings on the back of my prototype, but I like it better without the additional copper ring on the back). Antique with antiquing medium or slightly watered-down acrylic paint, if desired. Let it cure for 24 hours before wearing. Mount onto chain with an additional jump ring (to make sure the pendant lies flat with the chain).
Uh oh, someone’s crashed my photo shoot!
Will our pendants be saved? Find out (and see my custom steampunk packaging) on Page 3





16 Comments
Whim Wham
Neat idea! Love the metal stamping on the washer that makes it look like a clock. Too cute!
Great article link defining steampunk too. =)
The Answer Is Chocolate
Oh thank you for this. Last month, I bought a “bag o watch parts” at a street fair and have only used a fraction of them for one project so far but want to do some more so this is great inspiration!
Mich L.
Those are so so great! I am dying for that bail idea. Brad into clock hands?!?!? Too smart for words. I love that you didn’t use pre-made steampunk components. These are also such a nice size, and I love the simplicity of it while still keeping that clockwork feel. I kinda really want one.
Rachel
These are so cool! I love tiny things. Thanks so much for the how-to, I’ll be linking.
Jenny
Oh my sweet thrifty Jesus. I must make this immediately.
Bridgette
Oh…..I am sitting here trying to decide how to tell you how much I LOVE these! Maybe I should just give you my mailing address! hahaha Just AWESOME! LOVE THEM! ~Bridgette
donnalee
VERY VERY CLEVER! just what i needed to make charms for a swap. THNAK YOU SO MUCH!!! blest be :)
shelbi
Omg these are amazing! And just what I need! Trying to plan a mad hatter tea party wedding on a tight budget and these will make amazing accents without breaking my budget!
Krafty_Karasu
hey! I have one of those!!! lol. I thought this charm looked familiar!!! I still love it!
nykke
How do you get the little numbers on there? Leather stamp?
Jan
I am wondering where you got the over sized copper chain for the steampunk necklace??
heather
@Jan I got it at Wal-mart. You should be able to find something similar at Michaels, Joann, or a local bead store.
Jan
thanks for letting me know.. I have not been to a hobby lobby as we don’t have one closer… but have checked at our only craft store ..JoAnns.. not any.. but will be on the lookout..!!
Jan
thank you for the info.. there is only 1 craft store near me.. the rest are about 2 hours at least.. but will check when I can get there…
Jan
thanks for the info.. I can’t wait to make these…