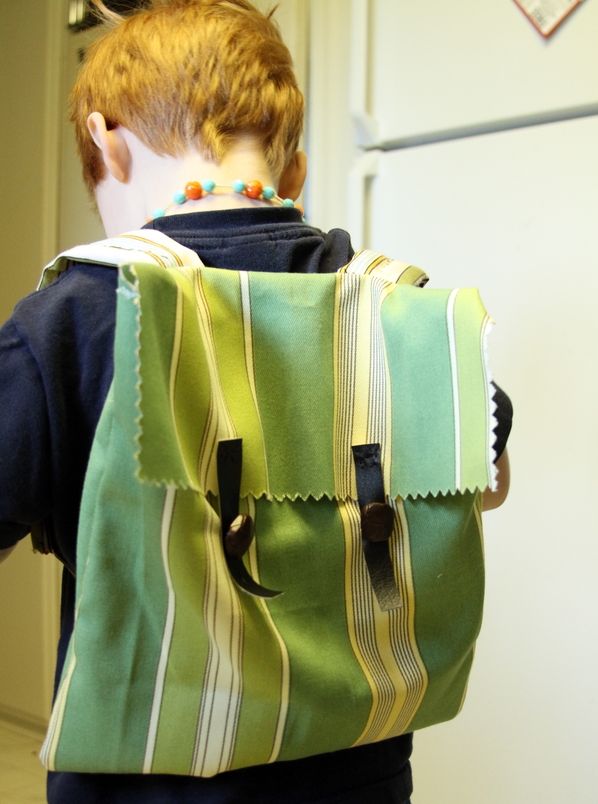
What do you do when you have spare upholstery samples, a couple of hours to kill, and no sewing machine? You hand-sew a backpack out of upholstery samples, that’s what you do! I could have finished this in fifteen minutes with a sewing machine, but there was no sewing machine.* The good news? If you are afraid of sewing machines, you can make this backpack in about an hour and a half. Or, you can have your kids (mid-grade school and up) hand-sew them as a fun summer project.
I made this backpack last week while attending the Summit of Awesome (which, let me assure you, was AWESOME. I highly recommend you put it on your calendars for 2011). They had an all-hours craft table stocked with supplies, which could have entertained me for the entire week. I found a sample of this indoor-outdoor upholstery, which came in two pieces which were the same width, but one piece was about six inches shorter than the other one. The difference in size suggested “backpack” to me, and since I was at the conference sans my little toddler shadows, I thought they’d appreciate it if mommy made something for them. Yes, I craft all the time. No, I never craft for my kids (rarely, anyway). It’s a sad fact.
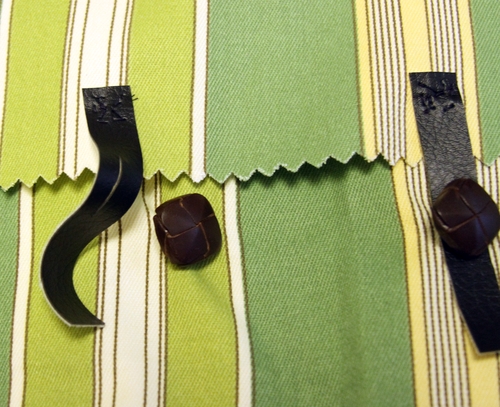
If you don’t have upholstery samples, use two dish towels or placemats. Or scrap fabric will also work. I padded the backpack straps with a felted sweater (because that’s what they had at the craft table), but you can use scraps of batting or no padding at all. I just like padded backpack straps. I used strips of pleather to make the fasteners for the buttons. You can cannibalize an old purse or a dollar store pleather purse for these if you need to.
*It’s a good thing I hand-sewed this, though, because if I used a sewing machine it wouldn’t have been done in 15 minutes because I would have complicated the construction by adding a lining, extra pockets, and other things. I kinda like how this turned out – elegant in its simplicity. And a great sewing project for kids.
Project Estimate:
- Set of upholstery samples, on hand
- A bit of scrap fabric or more upholstery samples, on hand
- Scraps of felted sweater or batting, on hand
- Scraps of sturdy, non-fraying material like pleather, leather, wool felt, on hand
- Four buttons, on hand
- Needle and thread or other sewing stuff
- (optional) Pinking shears
Total: FREE and up
To Make:
The upholstery samples come pre-pinked so they won’t unravel, which is another great reason to use them. If you are using scrap fabric, use pinking shears to finish the edges, or zig-zag around them with your sewing machine.
If you’re cutting your own pieces, you want to
Cut these pieces:
- one about 12×18″
- and another about 12×12″
- two pieces of fabric for the padded straps, about 6×12″
- four pleather straps about 5″ long and one inch wide
- two pieces of batting/felted sweater for strap padding, about 2×10″
note: increase strap length for an adult backpack
I’m giving you instructions for hand-sewing. If I made this on a sewing machine, I would change some of the steps, like sandwiching two pleather straps in between the upholstery pieces, at the bottom (they’ll be sticking up toward the good side of the fabric, in between the 2 pieces).
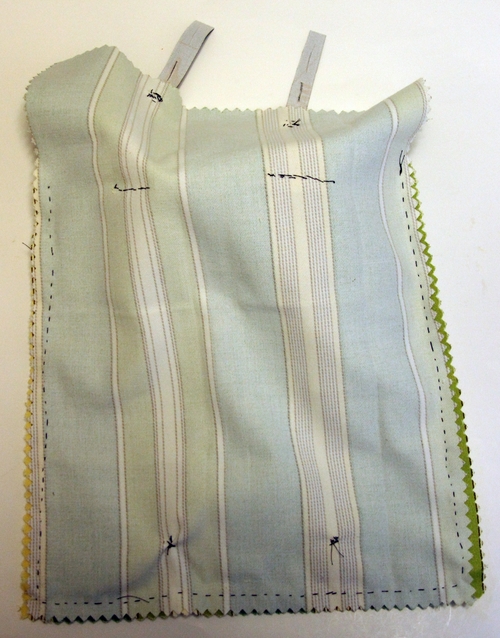
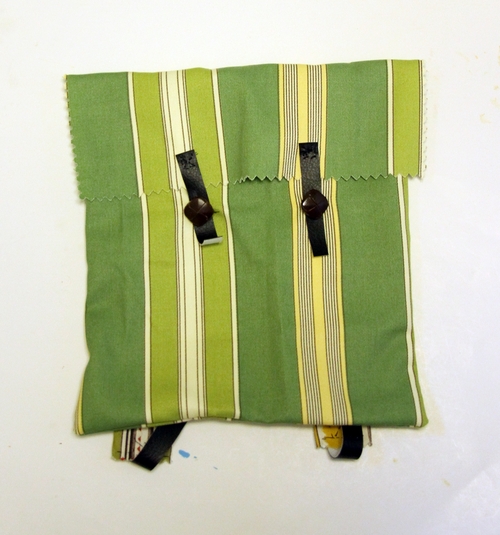
1. Place upholstery samples good sides together and sew around the edge with a running stitch (or a straight stitch on a sewing machine). There will be about 6″ of fabric sticking off the top. This is gonna be your backpack flap.
2. Turn good side out. Poke out corners.
3. Make straps by taking the 6×12″ piece of fabric, laying the 2×10″ piece of batting in the center, and folding the fabric over the batting (you’re basically folding the fabric in thirds, but putting batting inside first). If your fabric isn’t pinked, you’ll want to fold the unfinished edges under as well. Pin. Put one of the pleather straps inside one of the edges of the straps, sticking out from the bottom about 4″. Pin and sew the whole strap up, making sure the pleather strap is securely attached to the padding.
Alternately: Skip the padding, and just cut two strips of pleather about 16″ long and 2 inches wide, and use those for straps.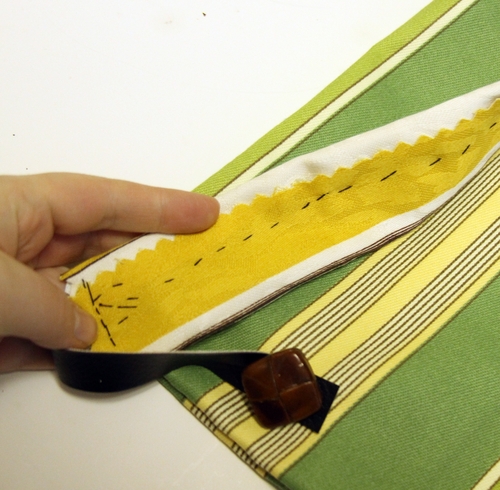
4. Sew top of strap to top of backpack by folding the strap over, and then sewing securely through the width of the strap. I used a backstitch for extra reinforcement.
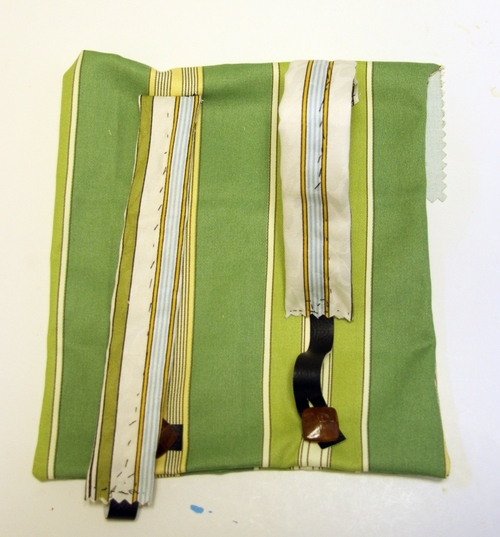
5. Sew buttons to bottom back of the backpack, roughly corresponding to the placement of the straps.
6. Cut a slit the size of your button in the bottom of the pleather strap. (You can cut an additional slit above the first slit, if you want to make the straps slightly adjustable. Just leave plenty of space between the two slits to give the strap adequate structural integrity!)
7. Sew two pleather straps to the flap. Make sure they’re securely attached to the flap.
8. Sew buttons to the front of the backpack, roughly corresponding to the placement of the pleather straps on the flap.
That’s it! Hope this will keep your natives entertained for a few hours this summer!
Here I am making the backpack! Woo!
I stole this photo from the Summit of Awesome Flickr pool but I can’t figure out who I stole it from! Sorry person!




8 Comments
Samantha Baldwin
Great idea. Our local thrift store has tons of upholstery samples.
pam
OK, Heather – we need to tell Diane about this one! She picked up about – well – too many to make public – upholstery samples at SCRAP!
heather
@Pam, I saw Diane’s video about her excess of supplies! I was actually wondering if she donated her samples to Summit of Awesome’s craft table!
nataluna
if you had 2 scraps the same size (dishtowels, for example mentioned), and wanted to keep the nice hemmed edges so your dishtowel doesn’t fray, you could fold one of them so that it makes a pocket at the bottom-outer side of the backpack (sew a couple of lines in it to make divided pockets)…
i hope that makes sense.
i am actually imagining fun purses made following this model (although i would have to machine sew anything i would use, in order to klutz-proof it a little better).
Rachel
That is so smart and really cute! I’ll be linking. The summit sounds like it was so much fun! Reading all these posts really makes me want to go next year!