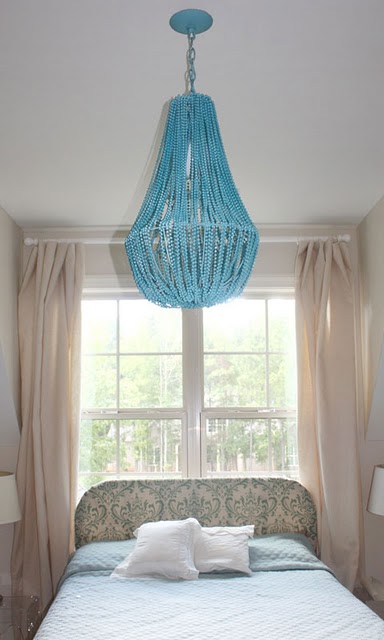
A few months ago, I posted a tutorial for a beaded chandelier made from a hanging basket and mardi gras beads (it sounds cheesy, but it looked great, and it’s been one of my most popular projects ever). Britt from A Penny Saved took the tutorial and ran with it and created a fabulous beaded chandelier that is also a working light fixture. To top it off, she painted the chandelier a fabulous blue and hung it in a beautiful room. Her upgrades to the project are so amazing, I have to share them with you. [how to make a turquoise beaded chandelier]

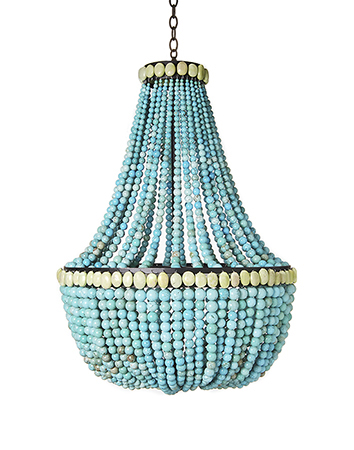
Like Britt, I have been so inspired by these chandeliers by Marjorie Skouras, which are made with semiprecious stones. So beautiful. So, if anyone wants another jump off point for this chandelier, how about buying some bead strands and making one of these?

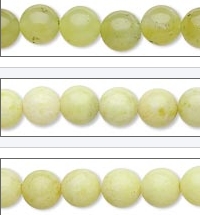
Fire Mountain Gems has promo bead strands as low as $.69 a strand which would be perfect for this project (and you could probably figure out how to make it work without unstringing the prestrung strands). These ones are peridot “jade” but there are tons of colors and styles to choose from.

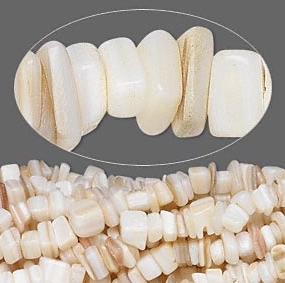
Promo chip beads are even less expensive (and the strands are much longer), and would be really interesting in chandelier form. These are mother of pearl.
Confession: I admit, I hesitated in giving you this idea because I want to do it myself and wow you. But, realistically, I probably don’t have time right now, so I hope one of you take my idea and run with it! If you do, you are morally obligated to send me pictures!
But back to Britt’s project. I’m not sure how much some of the hardware costs, but my guess is the mounting bracket and ceiling cap probably cost less than $10 total.
Project Estimate:
- Hanging basket, $1
- Spool of thin-gauge wire, $1
- Mardi gras beads, 20+ strands, $2 and up
- Spray paint, $3 and up
- Wire cutters, on hand
- Wire clothes hanger, on hand
- Pendant light kit (cord & socket), $5
- Metal chain to hang the fixture, $1 and up
- Light fixture mounting bracket, bolt and loop, $1 and up
- Light fixture ceiling cap, $1 and up
Total: $15 and up
If you go the semiprecious bead route, add $20 or more, but it will be well worth the cost to have a fabulous light fixture.
Nothing in this post is an ad or paid placement… I just thought these bead strands were so cool and cheap!


12 Comments
Penny
I will be making some of these for my wedding reception. I’m thinking a mix of chocolate brown and ivory for a couple, then tiffany blue and ivory for the others. thanks for the idea!!! i will definitely send pictures =]
Erin @ His and Hers
Gah! So pretty. I can’t believe it’s DIY. I love the color, too.
desi
the original tutorial is gone. does anyone have a link to another in-depth one?
heather
You can see how I made the original (but it doesn’t include wiring): https://dollarstorecrafts.com/2010/05/make-a-beaded-chandelier/
Cindy Pearsall
Creativity and cleverness
Shawnia
Those are wiiden beads painted. They are not mardi gras beads. Unless you are talking about doing a “version” of this craft. But the turquoise beads on that diy chandelier are either wood beads painted blue , or beads on a string. But I am from Louisiana , I have seen thousands of mardi gras beads and thise are not msrdi gras beads.
Sorry
heather
@shawnia — they are the plastic molded “mardi gras” beads from the dollar store. That’s how the dollar store sells them. They look a lot different once you spray paint them.
heather
@shawnia, I should clarify – the mardi gras beads are used in the TOP photo. The other photo (the inspiration photo) is not made using Mardi Gras beads.
emily
Have you had any trouble with the lightbulb getting too hot?