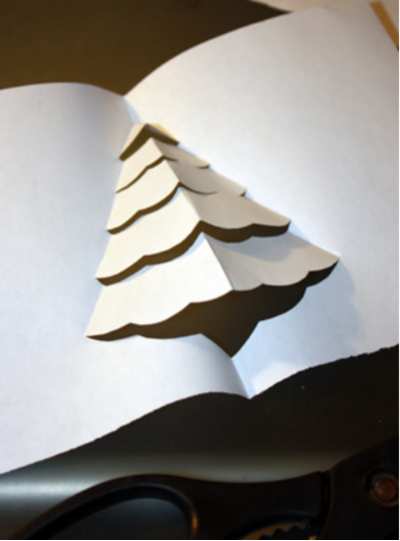
We’ve been talking recently about how great free printables are for cheap crafting on the fly. In this guest post, DSC reader Maria Rainier shows us another example with a tutorial for using a printable to make a quick and easy popup Christmas card. Thanks much, Maria! – Rhonda
With the holiday shopping season coming up, it’s easy to just take a deep sigh and simply ask, “How much?” No need to spend money on greeting cards this year, though—cheap DIY cards are a great way to save while showing that you care. Take it an extra step to those especially close to you by making the card really pop.
Project estimate:
- Paper, on hand or $1
- Scissors, on hand
- Glue, on hand
Total: Free and up
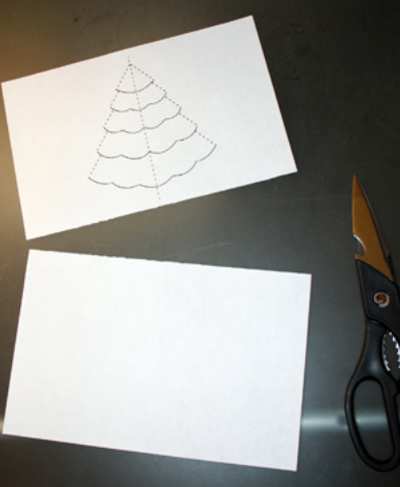
First, print out a popup design on the paper. There are many free ones online, and in the holiday spirit, I chose a tree, thanks to http://robertsabuda.com. Robert Sabuda is a respected childrens author, illustrator, and popup book maker, and he’s generous enough to offer several popup tutorials and patterns on his website.
Cut away the sides of the pattern so only the tree and the dotted lines remain. Cut from the same bit of construction paper (you should have enough left) so you have two sheets of the same size, but only one of the tree.
Fold along the vertical dotted line as carefully as you can with the pattern on the outside. Carefully cut along the solid lines.
Fold over the first tier of branches at the top of the tree along the folded line, back and forth. Gently open the card so you’re looking inside it, without the lines. Bring the folded top tier of branches inward and fold it. Repeat the process with the other tiers so they fold inward toward the person opening the card.
Take the Christmas tree card and turn it so you’re seeing the dotted lines. Line the edges of it with glue. Next, fold the other bit of construction paper down the center to align with the tree. Carefully glue the two together so the edges correspond and press flat.
Now, the tree is ready for decorating. If you used white construction paper, try using glue and just a pinch of silver sprinkles for a classy, White Christmas look. Line the bottom edges of the branches with glue and sprinkle, and add dots here and there around the tree to simulate falling snow. If color is more your thing, go wild with markers, colored pencils, or paint (but easy on the water!).
Maria Rainier is a freelance writer and blog junkie. She is currently a resident blogger at First in Education, researching various online programs and blogging about student life issues. In her spare time, she enjoys square-foot gardening, swimming, and avoiding her laptop.


8 Comments
Amanda McMillen
Lovely! I will be making some of these this year!
kami
SO SIMPLE AND CUTE! I love this!
Renee J.
This is awesome! Thanks so much for the tutorial!!
Michelle
Expressing Interest in Cute Idea-
This craft caught my eye while I was on my iGoogle since I am subscribed to your blog. This craft is so simple and I can use this to make cards for my family this holiday season. Thanks for your creative ideas!