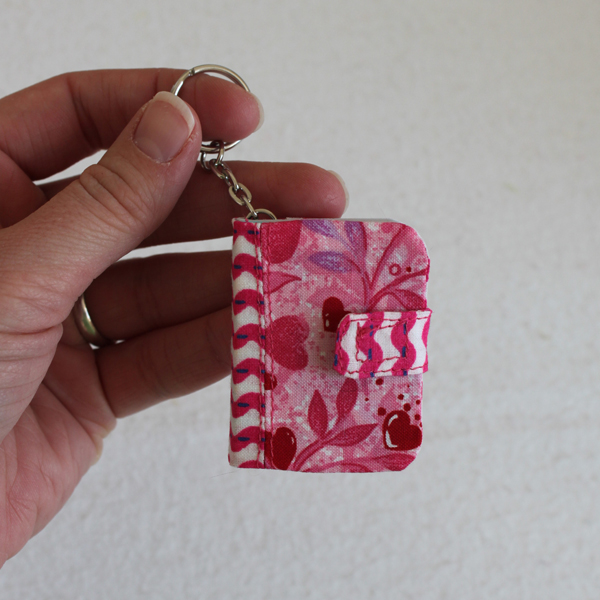
It’s no secret that I love tiny — and it is also no secret that I love office supplies! I simply adore going to the office supply store and looking at notebooks, pens, pencils, journals, folders, etc. For that reason I was thrilled to find four packs of tiny little key chain notebooks in the party favor aisle at the dollar store. Tiny + notebook = Love at first sight!
One small problem: The notebooks I found had a princessy theme to them. Not a fan. No problem for me, though! I simply created little removable covers for them, using some cute little scraps of fabric, and — ta da! Super cute key chain notebooks! They would be so cute clipped onto a backpack or purse!
Project Estimate:
- keychain notebooks, 4/$1
- fabric scraps, on hand
- velcro scraps, on hand
- posterboard scrap (for pattern), on hand
- pencil
Total: $0.25!!
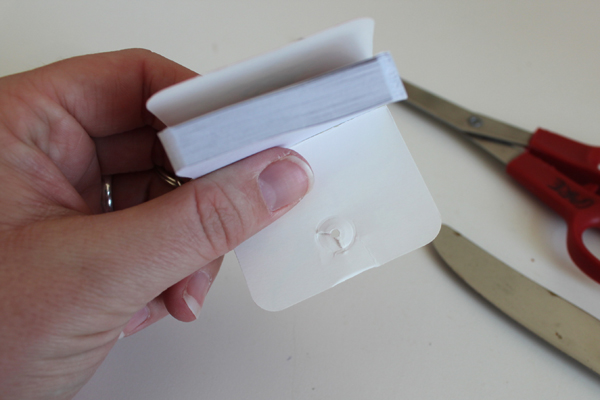 STEP ONE: Get rid of the cheapo plastic snap closure. Cut off the tab flush with the edge of the notebook, and pop off the other side of the snap using a table knife. It will leave an ugly mark, but this is not a problem. Just be as careful as you can not to bend or tear your cover.
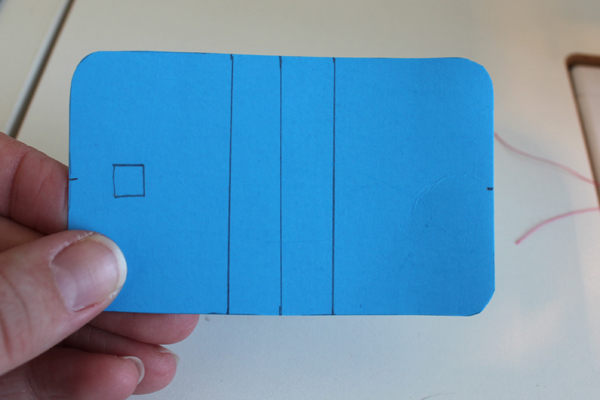 STEP TWO: Create a pattern. Start by opening your notebook flat on your piece of posterboard and tracing around the perimeter. Refer to photo and mark your pattern as follows: Mark and draw a center line. Mark the center of both left and right sides. Draw a line on 3/8″ to either side of your center line. Cut a 1/4″ square 3/8″ from one side.
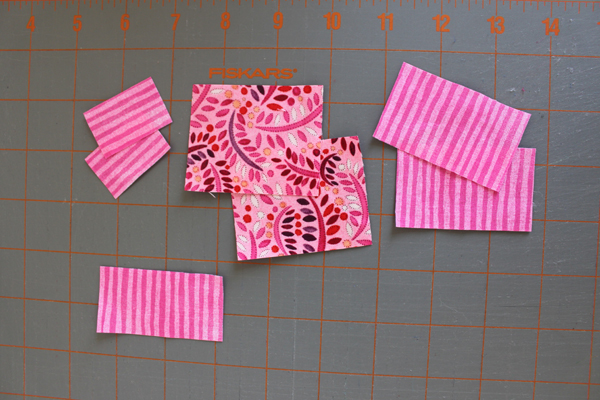 STEP THREE: Cut fabric pieces as follows:
front and back cover pieces: cut two 1 7/8″ x 2 1/2″ rectangles
spine: cut one 1 1/4″ x 2 1/2″ rectangle
inside pockets (that fit over the cover): cut two 1 1/2″ x 2 1/2″ rectangles
tab closure: cut two 1″ x 1 3/4″ rectangles
 STEP FOUR: Press one long edge of each of your pocket pieces down 1/4″ and hem with a 1/8″ seam allowance.
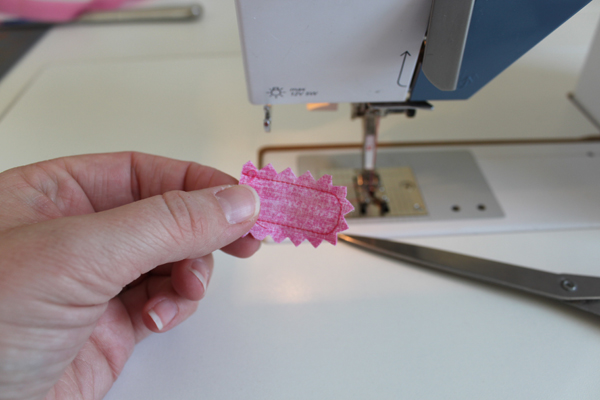 STEP FIVE: Layer your tab pieces right sides together and sew around as shown. I just eyeballed my curve, but you could draw it on first if you are nervous. Trim with pinking shears (notch if you don’t have any) and turn, then topstitch around the edge. You will then sew a 1/4″ square of the scratchy side of your velcro to the curved end of the tab.
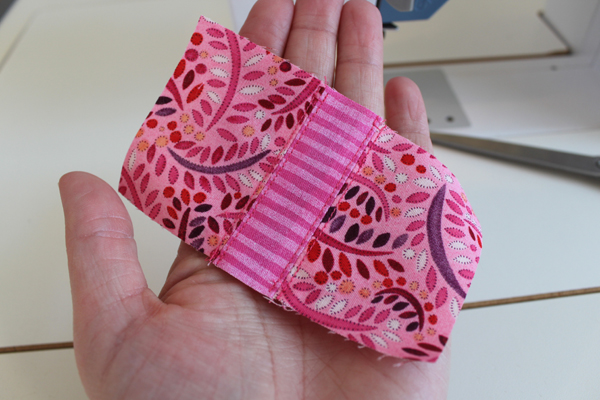 STEP SIX: Sew your cover and spine pieces together as shown. Press seam allowances open and topstitch on either side of your seam, as shown.
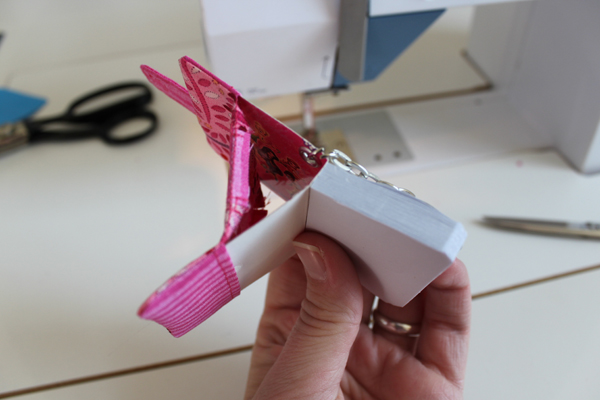
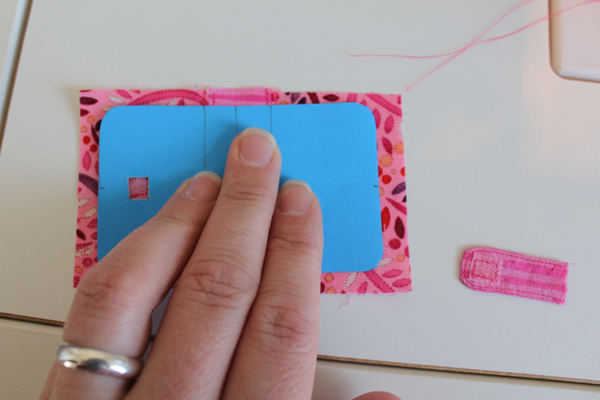 STEP SEVEN: Lay your pattern on top of your cover piece. Line up your seams with the lines drawn on your pattern, as shown right above my middle finger in the photo. Center your pattern vertically. Draw an X in the square to mark where you will sew your velcro. On the opposite side, mark on the very edge of your fabric (with pencil) a dot where the center point of your pattern is. Sew a 1/4″ square piece of velcro (fuzzy side) right on the X. Center the raw edge of your tab on your mark on the opposite side, velcro side UP, and sew just along the edge to hold it in place.
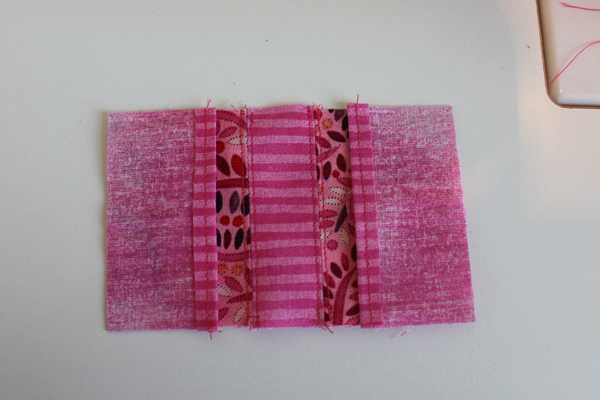 STEP EIGHT: Layer your pocket pieces on top of your cover, right sides together and hemmed edges toward the middle, as shown in the photo. You will then lay your pattern on top, centering it again as in Step Seven, and draw a line all the way around the perimeter of the pattern, using a sharp pencil.

STEP NINE: Sew all the way around, directly on your line. Trim just around the curves, using pinking shears if you have them. If you don’t have pinking shears, be sure to notch your seam allowances so it will turn nicely.
 STEP TEN: Turn your cover right side out and carefully press — don’t melt your velcro! :o)
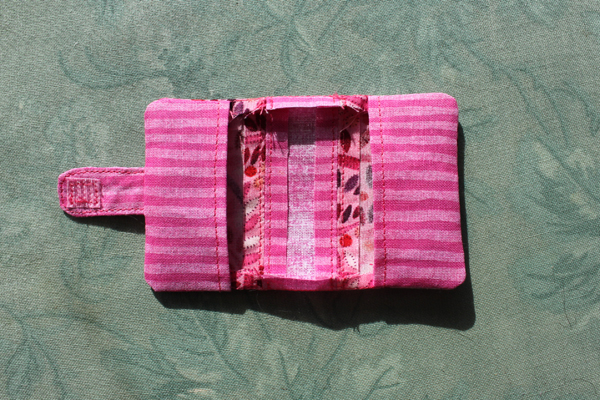
STEP ELEVEN: Open your notebook covers back as shown, and carefully slip on your cover. You’re done!
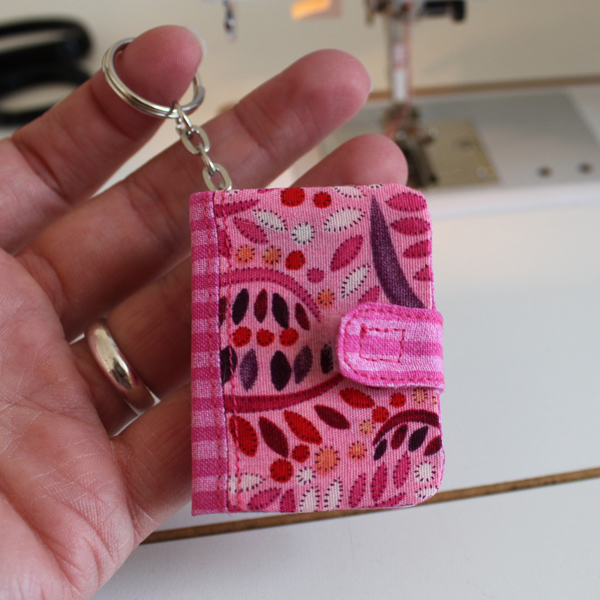 So cute and tiny!
These would make great little gifts to have on hand for any occasion!
Caroline Sanchez (Care) has been sewing since her mom taught her the basics at around six years old. She has always been driven to CREATE, even from a very young age. She is mommy to two little boys and one little girl, and almost every spare moment she has is spent in her sewing room or working on her blog, Obsessively Stitching.


9 Comments
Marci
Oh my goodness! That little book cover is ADORABLE! I love it! I go crazy over miniatures…and office supplies! I wish I could go to Staples and buy all the bulk containers of paper clips, push pins, etc. And Post-It Notes! :)
Anyhow, I think this is a super idea and I am definitely going to try it! :)
Thanks!
marci
maria
That is adorable, nice way to dress them up. They look so fun, I can totally use one of those for my purse. I’m always writing things down so I dont’ forget. I’ll be looking for them in my dollar store, I hope we have them here.
heather
Oh gosh, soooo cute. Love the wee little sewing. I guess we are all on a miniature office supply kick this week! :)
Kathy V.
Super cute…I love little things too.
Jackie
Too cute!
Ms Muffin
CUTE CUTE CUTE!!!!
Am loving this! Now where do I get those tiny notebooks ….
Maybe I get lucky sometime! :-)
Love
Ms Muffin
Tracy
What dollar store did you find these at?
Care
They were at Dollar Tree — in the party favor section!
Mary Beth
So Cute and EASY!! I keep “emergency gifts” this would be a great one and use up my sewing scraps too!