When dressing up for an occasion, it’s important to make sure your look is perfect. If you’re like me, you hate having stuff in your pants pocket. When wearing nice clothes, it’s nice to have a clean look to your pants without your wallet bulging out. A nicely ironed shirt and a double windsor may go a long way, but that bulky wallet in your trouser pocket is an eyesore. Think of it as the VPL for men.
Instead, why not just carry a few important items with you, all tucked away neatly in a secret pocket on the back of your tie. Using a few scraps of fabric, you can transform your boring tie into a storage tie!
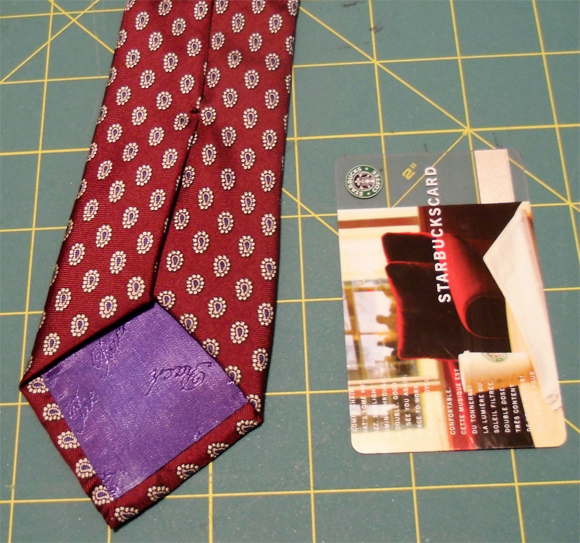
I found this smart tie at a local thrift store for $2.00. Almost any tie will work, it just needs to be wide enough to fit a credit card.
Project Estimate
- Tie – $2.00
- Scrap fabric
Total: $2.00
Before you start cutting up your ties, check to make sure the tie is wide enough to accommodate a credit card. To test, simply place any plastic credit card over a tie and see if any portions of the card doesn’t fall inside the tie dimensions.
 A note about tie construction:
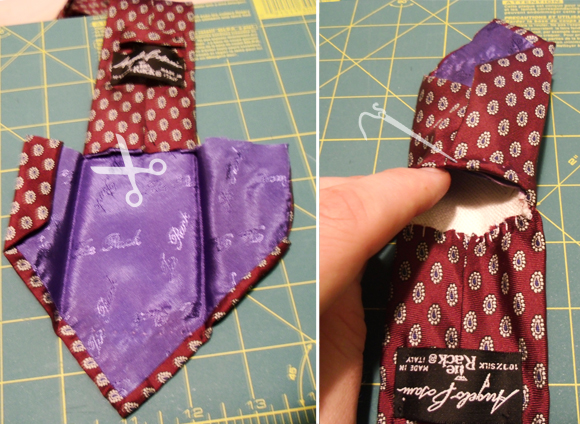
Most ties are made with a stiff fabric core with a decorative silk sheath over. The silk has the pattern and the core holds the shape. When sewing pockets into the tie you need to make sure you penetrate through the core, but not through the front side of the silk fabric, otherwise you’ll see stitch marks when the tie is worn.
 Working on the back of the tie, sew a stitch along the widest portion near the bottom, starting from one side and working your way to the other. This will form the bottom of the pocket.
Do not sew through front of tie! Sew only through the back and core, stopping before you go all the way through.
Next, most ties will have a stitch sewn partway up the back of the tie to hold together the two sides, remove this stitch if your tie has it.
 With the bottom of the tie sewn shut, measure the length of your card. Most credit cards are 3.4 x 2.1” (86 x 54 mm), your pocket needs to be slightly shorter in length and slightly larger in width. I used about 3.23 x1.97″ (82 x 50 mm).
After measuring, cut back seams of tie perpendicular to its length until just before the crease at the edge. DO NOT CUT CORE, only the silk sheath. This will form the opening of the pocket.
With the core exposed and the sheath cut, fold back the flaps of the tie to their original position and sew the sheath back together. The top portion of the opening can be folded under and sew directly to the core. The bottom portion will form the opening of the pocket and the fabric needs to be sewn together, but not to the core.
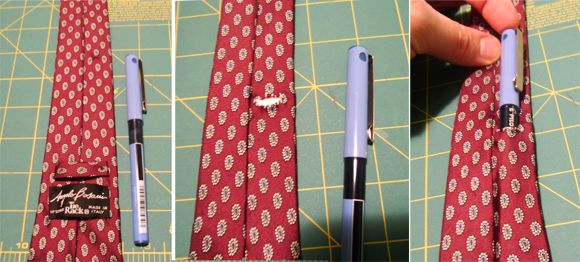 With the same concept, you can repeat this pocket procedure again further up the tie for another tier of cards (if you have room), or you can create a small opening to store a pen or two.
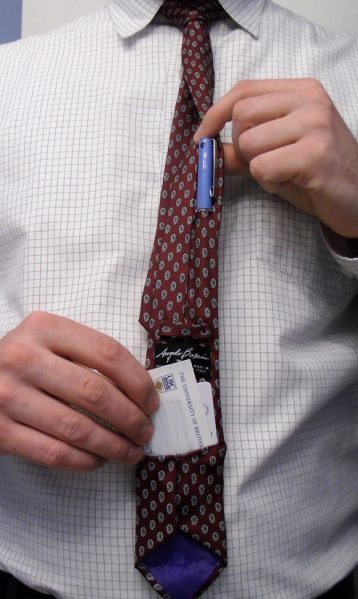
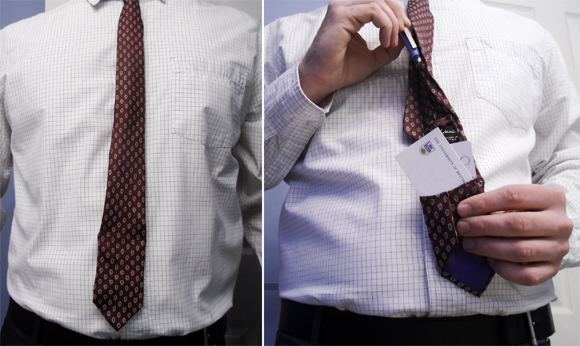
Once finished sewing, tie your tie as usual, then insert your goodies. I keep a few business cards and my trusty reusable coffee card in the bottom. And since I’m always writing notes to myself, a pen up top.
With your new tie you’re ready to attend that impromptu business meeting, or slip out for coffee and not have your cards and pens floating around in your pants pockets. Leaving you looking sharp, and never far without your important cards!


9 Comments
heather
I love this project. Such a handy hack!
Beckie
What an awesome idea! I love it! What an innovative way not to lose business cards or a piece of gum or something. I love man crafts. Great job Mikeasaurus!
mikeasaurus
@ Beckie
This tie has saved my bacon a few times already, and I feel so clandestine wearing it.
Thanks for the feedback on Man Crafts, I love sharing my Dollar Store ideas with you guys!
Tawna
I know what the boy is getting for our anniversery. :-)
Rachel
That’s genius! Thanks so much for this, I’ll be linking.
Karl Dilkington
This was my idea first. You’d better not steal my idea for the scarf version.
AMB
Just made a pocket in my husbands tie. Not for his cards but for his reading glasses! He is always losing them and now they are tucked away safely! Great idea. I will now have to do the other 35 ties he has! ;-)