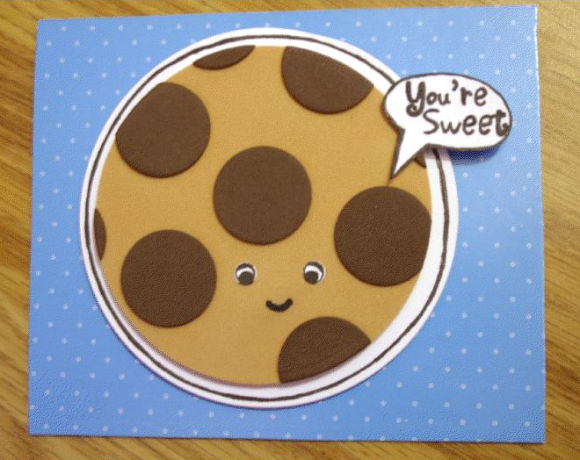
How is your April stash bust going? Our super secret stashbusters have been busy, busy bees, and we’ve been seeing all kinds of fun things start coming our way! Our UK stashbuster, Sam, sent us this abso-freakin’-lutely adorable kawaii cookie greeting card that she made using a couple of items from her challenge box. If you’ve never heard the term kawaii, it’s a Japanese term that refers to a style featuring extra-super-over-the-top cuteness. She doesn’t have her own blog, but she was kind enough to write about the project for us!
Project estimate:
- Craft foam, on hand or $1
- Circle die or templates, on hand
- Creative Hands Sm’Art Foam Markers, on hand or $4.49
- Gel pen, on hand
- Scrapbook paper, on hand
- Glue, on hand
Total: Free and up
Make a Kawaii Cookie Greeting Card
by Secret Stashbuster Sam Child
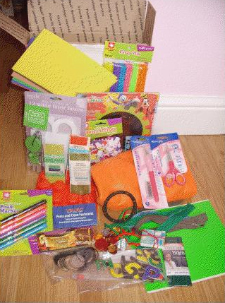
On 15th April 2011, a box arrived at my house in the post, which had me puzzled! My first thoughts upon seeing the ‘mystery box’ (as a frequent swapper on Swap-Bot!) were that it must be a parcel from a swap partner; yet I could not recall signing up for any large swaps recently…
 Eagerly delving into the parcel, a friendly letter soon answered my question regarding its sender – Dollar Store Crafts!! (I am ashamed to admit to it, but until the letter refreshed my memory, I had forgotten all about signing up for a chance to take part in the crafting experiment – my memory is so poor lately! – but I was most excited about having been chosen & feel very lucky!)
From the exclamations of ‘wow!’s, ‘ooh!’s and ‘aah!’s that anybody passing my room would have heard as I sorted through the box’s contents, methinks it was most clear that the contents did not disappoint!! Despite this, I was somewhat ‘stuck’ to begin with, as to what to do with the fabulous goodies…I felt somewhat overwhelmed, I guess!
Slowly but surely, ideas began to creep into my brain… boys pirate-themed birthday cards with medals attached, decoupage upon the magnetic letters with some pretty papers from my stash…the Sesame Street ice cube tray had me somewhat stumped still, but I knew I’d just have to use it for something fun, as my brother is often (lovingly!) referred to as ‘the cookie monster’!!!
Despite this, my first (and so far, I’m afraid to say, my only completed!) project took me by surprise! You see, other than the ‘fuzzy stix’, the one thing which perhaps appealed to me the least of the box’s contents was the coloured foam sheets. Not that I have anything against it, mind you, but I’ve had some sitting in my own crafty stash for (what seems like!) forever and never seem to find any use for it. Thus, when I found myself planning out a project using some of the foam, I was somewhat shocked; I guess it goes to show that anything ‘new’ can inspire you..even if you already have access to something similar (..that, and the fact that perhaps I need to stop buying craft supplies and have a good ol’ rummage around through what I already own – who knows, maybe I’ll be inspired by something!!)
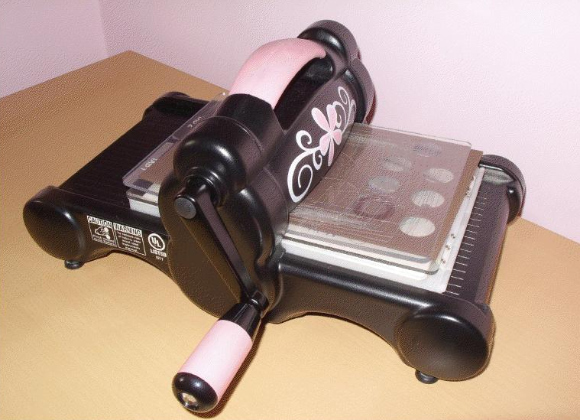
To begin with, I decided to have a play with running the foam through my Sissix Bigshot machine – something I’ve never done (nor even really thought of doing!) before now. I wasn’t sure that any dies that I currently own would cut through the foam, but a quick search on Google informed me that the nestabilities dies were indeed capable of cutting foam. My limited die supplies proved somewhat useful in my project, for it made me consider – what I could do with circles, perhaps? So, the idea of a cookie came about!
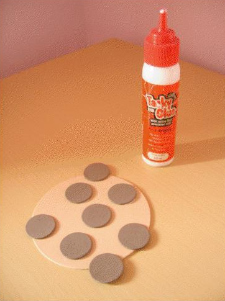
After using a large circle die to cut the cookie ‘base’ from the beige foam sheet from the stashbuster goodies, I used the smallest circle die to cut multiple ‘chocolate chips’ from the brown foam sheet…and so – with a little tacky glue, some firm pressure & a fair amount of drying time! – the ‘cookie’ began to take form!
 Whilst I left the glue to dry, I decided to open the Creative Hands ‘Sm’Art Foam Markers’ and test ‘em out on some of the scrap foam I had from cutting my ‘cookie’…
First impressions? I was quite impressed that these did seem to draw on the foam relatively easily and ‘bleed-free’, but I wasn’t sure if they seemed much different to using a permanent marker on the foam… Enter my faithful black permanent marker! To be honest, after comparing the two pens in a few test doodles, I still wasn’t not wholly convinced that there was a huge difference in how the two markers ‘took’ to the foam, the time taken to dry to be smudge-proof, nor in the extent of bleeding, although the foam marker was perhaps slightly easier to control on the foam & retains the ‘black’ colour a little better than the permanent marker (which, once dry, can appear to have a purple-ish tint in some lights). One quandary I think I’d have with the foam markers is the thickness – they are thicker than I expected, which makes it difficult to accurately draw on any fine detail. I know I can get permanent markers with a fine tip, but as for the foam markers? I’m glad to have been introduced to them courtesy of this stashbusters giveaway (thank you, Heather and Creative Hands! :-D)… fine-tipped foam markers are definitely something I might have to look into!
Next, after ‘finishing’ the edges, by running the ‘cookie’ back through the die cutting machine with the large circle die, I used a (normal, office-type) hole punch to create two tiny circles from a scrap piece of white card, which were finished with details drawn on using my faithful black gel pen; the ‘eyes’ were then glued onto the ‘cookie’ using the aforementioned glue and I drew on a ‘smile’ using the black foam marker, which I had previously tried out. The ‘cookie’ was then backed onto a white card circle, which I bordered using my black gel pen and attached (using ‘sticky fixers’ from my stash) onto a card (which I had given a blue dotty background to, using a scrap of patterned paper) Finally, I used another small scrap of white card from my stash to create a small speech mark, onto which I doodled some text & a border; this was also affixed using ‘sticky fixers’ from my stash, to add more dimension to the card.
..and there you have it – a cute ‘kawaii’ style cookie card, suitable for all sorts of occasions!!


3 Comments
Tina
That’s too sweet!!
JohnnyW(really CharisaW)
I think you did a great job with your new ‘stash’! Love the cookie card, and also enjoyed the story about the whole production, from stash’s arrival, to card completion.
Dawn Raftery from Creative Hands
We have two things to thank you for, Sam: Teaching us a new word–kawaii–and giving us helpful feedback about our foam markers. You’ve made an absolutely adorable craft. We’re ecstatic you were able to find such a cute and nifty use for our foam sheets and markers! :)