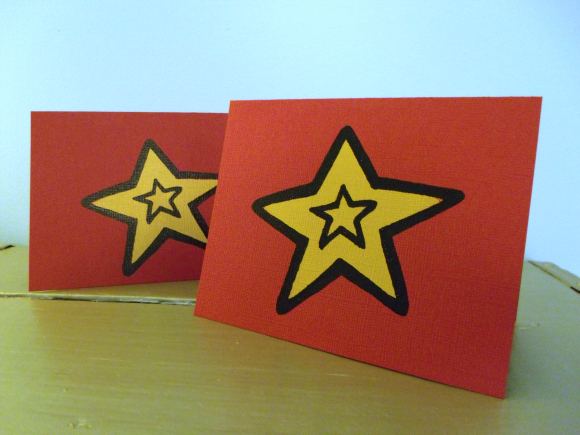
Silkscreen printing is something that has long been on my crafty bucket list. I’ve wanted to try is for as long as I’ve known what it was! So when I was offered the chance to try out Plaid’s new DIY Simply Screen kit, of course I jumped at the opportunity. Then there was the question of what to make with it. I love the idea of easy-to-mass-produce Christmas cards, and found myself wondering if I could design a card that I could screen over and over again. And so, I got to work experimenting with the kit. Tutorial and review after the breakdown!
Project estimate:
- Simply Screen kit, about $40
- Sharpie, on hand
- Paper, on hand or $1
- Masking tape, on hand or $1
Total: about $40 and up
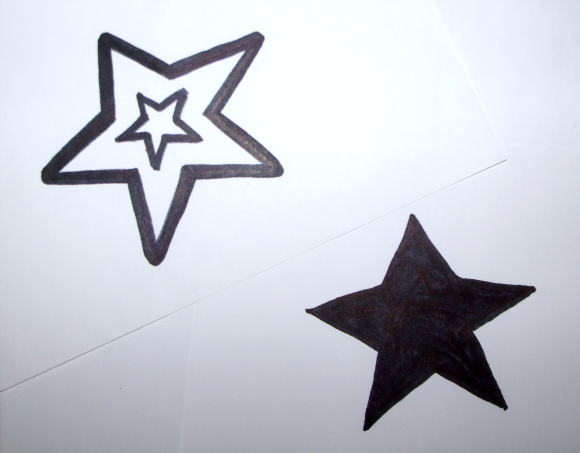
Draw a simple design and go over it with Sharpie to make the lines dark and bold. This will be the black outline around your design.
Using a light box (if you don’t have one, a sunny window works), trace inside of any areas that you want to be filled with color. If you are using multiple fill colors, trace on a separate sheet for each color. Take the traced shapes off of the light box and fill them in with black marker. (Don’t color them in while the outline portion of your design is underneath to avoid the chances of ink bleeding through onto it!)
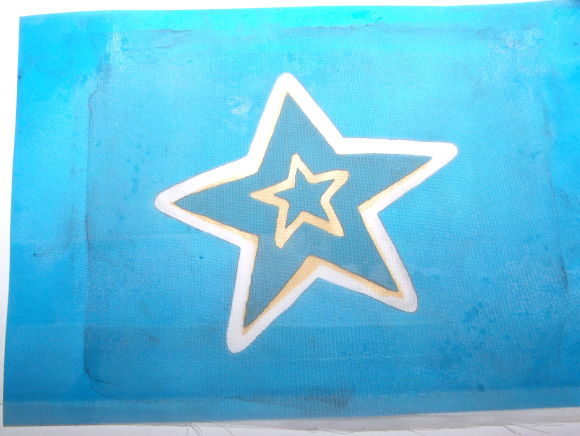
Use the Simply Screen kit to transfer your artwork onto screens. The box itself becomes the enclosure for exposing your screen and includes a lightbulb and cord. The process is pretty easy; you just place the artwork into the screen (with no need for transparencies or for reversing lettering), tape it down in the box, and turn on the light. About 25 minutes later, you soak the screen in water, and as you gently scrub the design appears on the screen. For more details on the screen printing process and my experience, read the review following this tutorial.
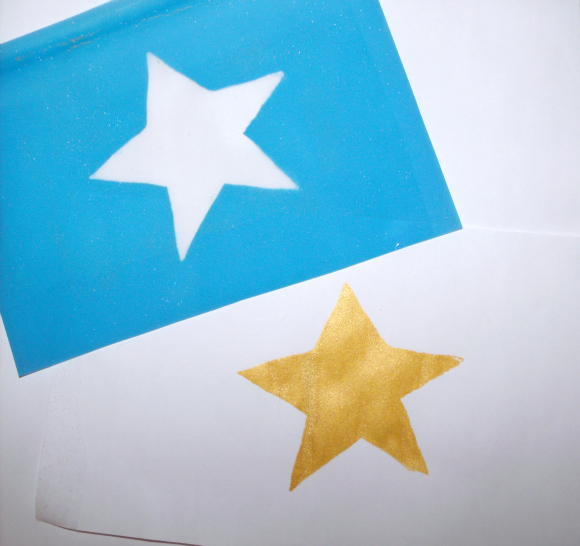
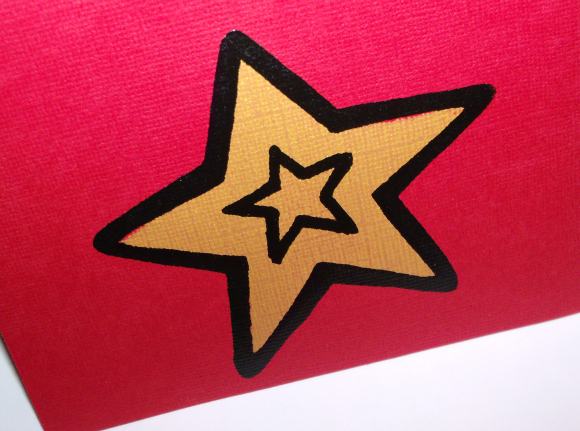
Cut a piece of paper to the size of your card. (For the sake of photography, I used white paper so that you could see the images more clearly!) When you print your image, start with the fill. Center the screen so that the design will be in the middle of the front of your card. To make sure that the screen stays put while you apply the ink, tape down the paper, then tape the stencil in place over it. Wait for it to dry completely before you go on. (I dried mine over a heater for about an hour.)
Line up the outline screen over the fill. (See the gold peeking through the screen?) Tape everything down again and apply black ink.
The great thing about this project is once you have made the screen, you can use it over and over and over, on anything you want! It’s pretty quick and easy to apply the ink to the screen so it really is ideal for mass production.
About the Product
The Simply Screen kit was a bit of a bear at first, and I had some issues when I initially started playing with it. My designs just wouldn’t come out crisp at all. After reading some suggestions that simple designs seemed to work best, I tried a couple of different line drawings. My first design was a Santa hat drawn in a rustic fashion, hoping that if I aimed for imperfect lines I would get better results. It came out alright but it wasn’t what I had hoped for or expected. Honestly, even after I got some measure of success with the hat design, I was pretty frustrated.
I thought perhaps I was doing something wrong, so I persisted, learning from my previous trials and getting a little bit better results with each attempt. When I ran out of the screens that came with the kit, I dove into the refill pack that they sent as well.
Lo and behold! It wasn’t me after all, it was the screens! Using the screens from the refill pack, I got clear, crisp lines, and the problems I had been experiencing disappeared. I did a complete 180 on my attitude toward the kit. However, there are still a few things I did in my experiments that helped, things that aren’t in the kit’s instructions. If you do use this kit, here are some additional instructions I would recommend:
- Make sure that your image fits entirely inside the box laying flat. Trim the paper if needed.
- When you put the image and screen into the box to expose it, tape down the top edge of the design inside the box. (I used painter’s masking tape to avoid damaging the box or the paper.) Then use the squeegee to press the image firmly to the screen, dragging from top to bottom. Tape the bottom edge next, then the two sides.
- The directions tell you to scrub the emulsion off in the tray provided with the kit, which has a textured bottom. I found that when I scrubbed in the tray, it was difficult not to have the pattern of the texture show through. Instead I tried scrubbing against the flat bottom of my kitchen sink, and it worked fabulously!
- You will notice that there are two sides to the screen; the side with the emulsion and the side with the screen. When you are scrubbing the screen to reveal the design, flip it frequently. Scrub very gently when you are working on the emulsion side to avoid removing any areas that are supposed to stay; you can scrub considerably harder on the screen side.
There definitely is a learning curve with this kit, but it’s far cheaper than a Yudu or other screen printing kits I’ve looked at. As long as you don’t end up with a bad batch of screens, it’s a really nifty idea with lots of possibilities. If you are intrigued, you can pick one up for yourself at Hobby Lobby. Now that I have it figured out, I want to screen print on everything!
Want more ideas for what to do with this kit? Check out these other Simply Screen projects:
Disclosure: This post is part of a sponsored campaign on behalf of Plaid Crafts and Simply Screen. The screen printing supplies for this project were provided by Plaid Crafts. All opinions are 100% my own.





8 Comments
Grace - Stripes & Sequins
Love what you did – I made t-shirts with mine and had some of the same issues, but all in all, I think the project came out very well!
Bromeliad
Thanks for the tips.
So glad they allow for transfer of custom designs.
Amanda
Love it Rhonda, and lots of helpful tips! Hope this second attempt works, thought the first one came out better than I had expected :)
Roxanne Rowley
love the card!!
Carl
Rhonda – In your Attempt #1 & #2 it looks like your artwork might have lifted away from the screen while you were exposing it in the light box. This will allow light to seep in distorting any detail. A simple tip for best results is to use a piece of glass (like out of a picture frame) to hold your artwork down to the screen while you’re exposing it. Thanks for the review. Your projects were great!