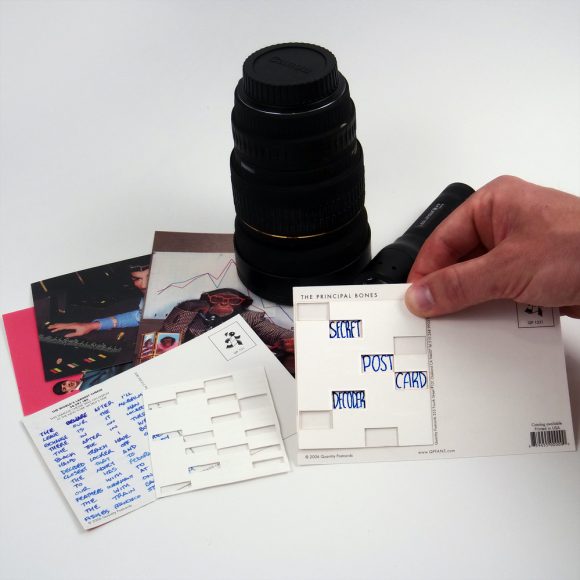
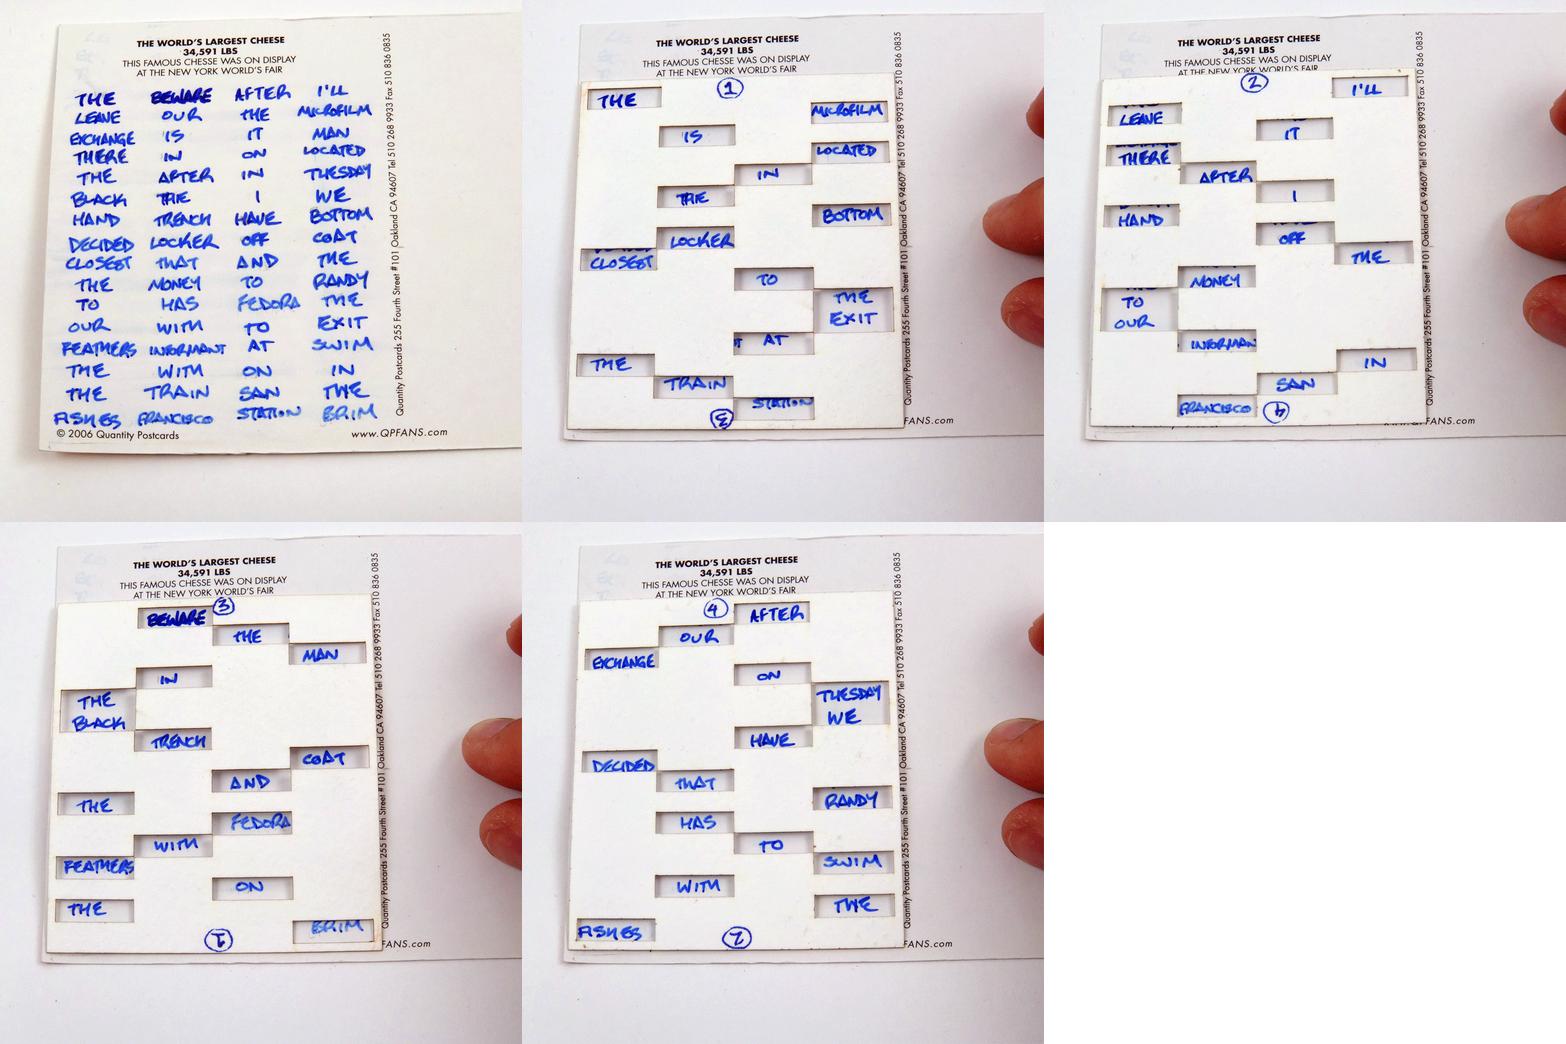
This postcard paper cipher is placed over your postcard and can be used to encode a message, then decode the message after it’s been sent. The cipher code can be sent either in a separate transmission or hidden somewhere on the package itself, allowing savvy codebreakers a clue on how to decipher your message. Though this cipher is not as sophisticated as some digital ones, it’s a fun, low-tech and effective!
Project estimate:
- Measuring tape, on hand
- Postcards, on hand or $1
- Card stock, on hand
 |
 |
This paper cipher works by filtering out (or omitting) a portion of the plaintext to reveal the secret message (ciphertext). It may sound complicated, but it’s easy once you see how it works. I chose to make my cipher sophisticated and use all four alignments of my card (top/bottom facing up, and top/bottom facing down) ? four ciphers will be created from one sheet of cardstock. You can create more or less ciphers depending on the complexity of the message you want to send.
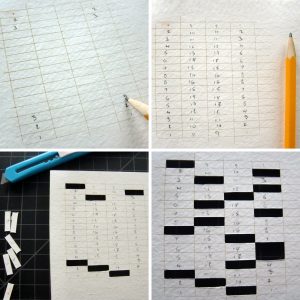
Start by measuring the width and height of the space you want to write your message. Transfer these measurements to your cardstock, creating a boundary box for your cipher to fit. Then, divide the width by four and draw vertical lines to separate the box into four columns (as we are using four ciphers to decode this message, which corresponds with the four alignments of our cardstock). Next draw horizontal lines about the height of your writing down the boundary box to create a grid, you’ll need an even number of rows. You should now have a grid of equally sized rectangles inside your boundary box. I’ve included a template for a grid that can be printed on your home printer (A4 / 8.5″x11″) that will fit the writable area of most standard post cards. Just “save as”, print, number and cut out your cipher.
 Next, label the rectangles with numbers. Starting by labeling the four corner boxes with the number 1, then move towards the centre of the sheet labeling with numbers. Eventually the numbers will converge, at this point move on to the next column and continue numbering towards the centre. Continue until your grid is completely filled in.
Now cut out some rectangles and create the cipher. Using your hobby knife, carefully cut out one rectangle of each number shown on the grid. Soon you’ll have revealed your super secret cipher.
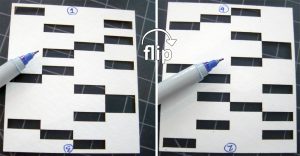
You can now label your decoder. I put a 1 on the top of one side, then flipped it over and placed a 2 on the top of the other side.
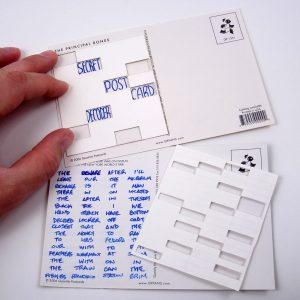 The decoder was rotated 180 degrees and the front and back were labeled again with 3 and 4. These numbers now represent the four ciphers you have on your cardstock. Starting with the 1 cipher, place the cardstock over the portion of your postcard you want to write on, then fill out your message in the cut-outs. When you reach the end of the cardstock, move on to cipher 2, align the cipher with the postcard and continue filling in the cut-out boxes. Repeat this process for ciphers 3 and 4.
After, you should have a block of plaintext nonsense. your encryption is now complete!
Send your postcard through the mail and it’ll be unreadable to all but those with the secret cipher (and brainy code breakers).
Maybe you can think of your own twist to make this even better. I’d love to see your results!
Have fun!




3 Comments
heather
What a fun project! I love it.
Amy C
This is awesome! I’ve been looking for a new cypher for a project I’m creating. Thanks so much for the idea!
Crazycatlady
Awesome! My son is going to LOVE this one!!!!