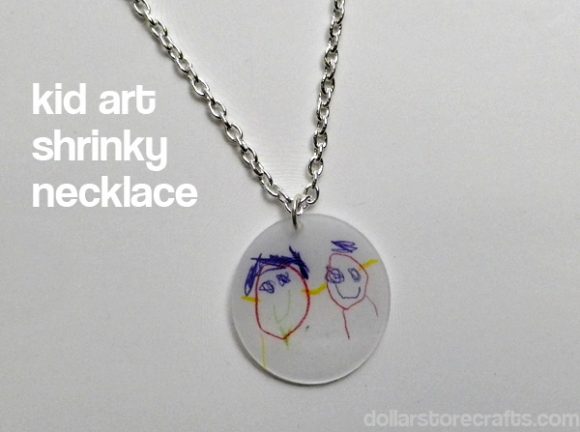
Anyone can give a generic Mother’s Day gift, but only a child can draw a special artwork that will become a keepsake that any mother or grandmother would love. I love making Shrinky Dink projects with my kids because everything is ten times cuter once it’s shrunk down. This year, I volunteered to help my son’s preschool class make special kid art pendants for the preschoolers to give to their moms as gifts for Mother’s Day. This photo here is the one my four year-old son drew – it’s me and him (and we’re holding hands). Awww!
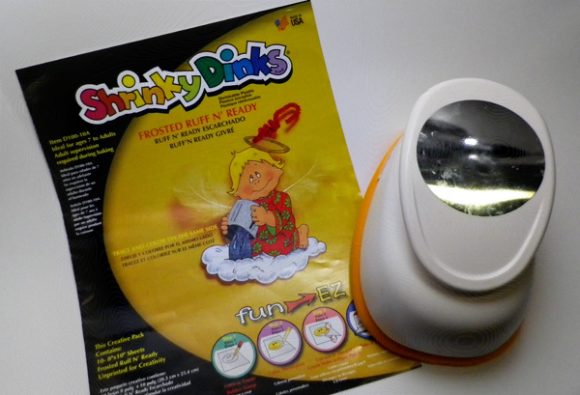
Project Materials:
- 1 sheet of Shrinky Dink Rough & Ready plastic, about 75 cents per sheet
- (optional) 3-1/2″ round punch, about $15 (don’t forget your 40% off coupon! I always load mine onto my phone & they scan my phone)
- Colored pencils, on hand
- A finished necklace chain, about $1
- One jump ring, on hand
- A standard round hole punch
- Your oven and a baking sheet, a piece of paper
- Needle-nosed pliers
Total: $1 and up
You can find everything you need for this project at Michaels craft store, but if you are on a budget you can cut some corners. Instead of the Shrinky Dink sheets, you can use #6 clear plastic containers (like the ones used for takeout). You can trace a small cereal bowl to make the circle, and then cut it out with scissors instead of using the large round punch.
Make The Shrinky Dink Art:

1. Punch or cut 3.5″ circles out of a sheet of Shrinky Dink Rough & Ready plastic. I was able to punch five circles from each 8×10″ sheet.
2. With a regular hole punch, punch a single hole near the edge of the circle (this will be the hole for the jump ring after you shrink the circle). Alternately, you can wait until the child has colored the circle to punch the small hole. I do it first because I know I will forget otherwise!
3. Let the child color on the rough side with colored pencils.
While working with the preschool class, I explained to each child what we were doing (“We’re coloring on this plastic, and later I will cook it in my oven and shrink it down. It will be a gift for your mom! We’re making it into a necklace for her!”), and gave some ideas of what they could draw, like a picture of the child with her mom, or flowers, etc. I didn’t push the children to draw anything specific, though. Preschoolers are interesting because depending on the age, they might just scribble or they might be able to draw figures and possibly even write their name or “mom.” It doesn’t really matter what they draw though – it will come out cute in the end!

4. Heat your oven to 325 F. Put a sheet of paper on your baking sheet, and shrink the discs according to package directions. It should take about two minutes. The shrinkies will curl up and wiggle around, and finally settle down to a flattened, shrunken state. They shrink to approximately a third of their original size, and nine times the thickness. The final pendant will be about an inch across.
5. Remove from the oven and allow to cool. If needed, flatten the pendant with a piece of paper and your oven mitt. (You can do this for the first 15 seconds they are out of the oven, and then they will harden.) Once they’ve cooled for about a minute, remove the discs from the paper.
Put the Necklace Together:
I like to buy 18″ readymade necklaces because they are so easy to use, and I don’t have to add any finishing features (like clasps, etc.) to them because they are already done! Just a time-saving step. I assembled the whole preschool class’s necklaces together in less than an hour.
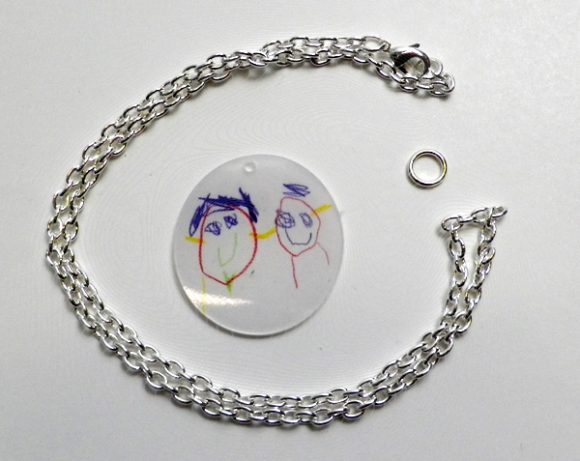
1. Gather the Shrinky pendant, the necklace, a jump ring, and a pair (or two) of needle-nosed pliers.

2. Open the jump ring. Don’t pull the sides straight apart from each other, swivel them side to side. (Thanks for that terminology, Mich L. in LA!) I use two pairs of needle-nosed pliers to do this job, but you might even be able to do it with your fingers, depending on how stiff your jump ring is.

3. Slide the chain into the open jump ring. Then swivel the jump ring closed.
Nitpicky Notes: I prefer the clasp mechanism to be on the right side of the necklace, so I make sure the chain is lined up correctly so that the front of the necklace faces the right way when the clasp is on the right. This is because I’m right-handed! Also, I always prefer lobster clasps because I find them easier to work than some of the other types of clasps.
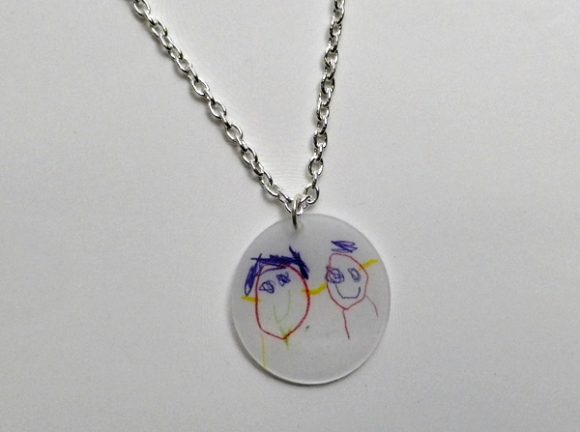
Such a happy necklace! We actually made necklaces like these for the boys’ teachers for Christmas, and they said they were the best gifts they got. I have even seen one teacher wearing her necklace at school, so I know she really liked it.
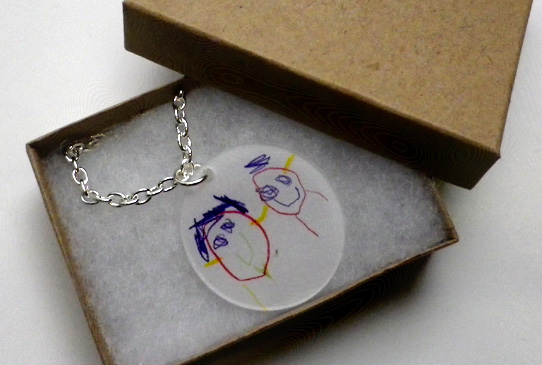
We’re packaging the necklaces in small jewelry boxes just to make them look really swanky. I’m going to go back early next week to let the kids decorate the boxes. Awww, I will be so surprised when I open this gift box up on Mother’s Day! Ha ha!
I love making jewelry! These are so pretty and simple, but I wanted to keep them really neutral so they would be more likely to fit with each preschool mother’s style.


14 Comments
Kristina
Oh my goodness! I can just see a proud momma showing this off now. Such an adorable idea!
Jenny
I love this idea!! Now I’m scheming whose kids I can make this with.
Meridith
Thank you for the awesome idea! I just got done making three bracelets for my daughter to give me, my mom, and my sister for Mother’s day! I’ve been using shrinky dink paper for a little while, but was looking for something interesting to use it for – this fit the ticket. Thank you – I will treasure my daughter’s drawing on this bracelet for years to come.
Danielle
These Ideas are awsome!!!!! I have 4 children and even tho we are busy threw the week on the weekends they get pretty bord. There are so many cheap ideas on here for my family and I!! My question is if you use the clear plastic containers instead of the shrinky dinks do I just follow the directions as I would for the Shrinky Dinks? If not what would I need to do? Thank you!!
heather
@Danielle, you should scratch up one side of the #6 containers (so you can use colored pencils with them), then you can bake them at 325 F for about 2-3 mins.
Maria
Thank you so much for the fantastic idea! we put our own little spin on it, but these are the best Mother’s Day gifts I’ve ever made! (And we used #6 plastic too!)
Marisa
Hi! Love these! My kids are teenagers now. Is it possible to use old artwork for this project? Thnx, Marisa
heather
@Marisa, I would trace their old artwork onto the shrinky dink – that should work just fine!
CL
I use Shrinky Dinks all the time in my craft class and just wanted to let you ladies know that ToysRUs sells a shrinky dink machine with a timer on it. It makes the process so much easier. Love the idea of using my kids old art projects for this project. Where did you find the boxes to package them in?
MYT CR8TiV
Very CR8TiV !! I like this project alot bcuz I can see myself making endless types of necklace and bracelet charms that I designed. I’m gonna have to try this sometime. Can you draw on them with markers like sharpie markers or is it best to just use colored pencil ?
Joyce
Love this idea! We are definitely going to do this for a grandmother who loves jewelery. Think it might be neat to do a charm bracelet, too. Give them a new one every year to add to it.
Thanks!