Today we’re welcoming Margot Potter from The Impatient Crafter, who is here to share with us a great Halloween project! Thanks for being with us today, Margot!
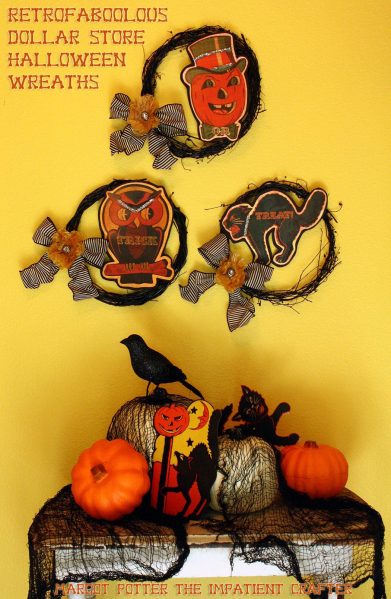
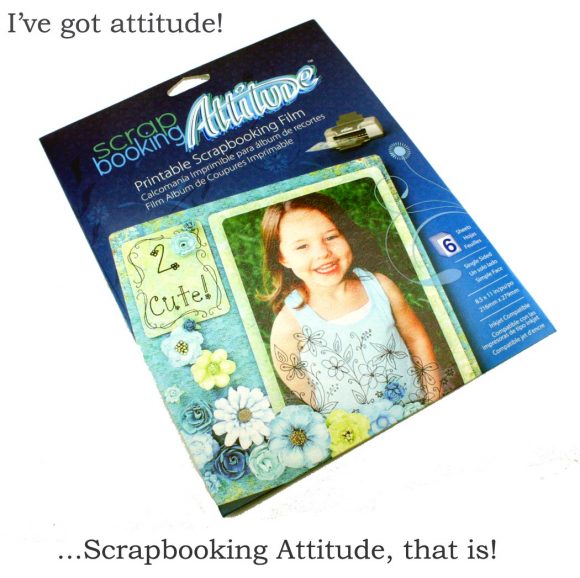
Halloween is one of our favorite holidays here at Casa de Potter. Alas, we miss the trick or treaters since we moved to the Smoky Mountains (the occasional black bear is the only treat seeker we get up here!) Still, it’s full on Operation Halloween Décor around here right now! Decorating with a whimsical, Folk Art Chic™ vintage flair is my M.O. Just a few dollar store items, some bits and pieces from your craft closet, a little paint, ink, glue, tinsel and wire and you’ve got something absolutely “retrofaboolous” in a flash! Using Scrapbooking Attitude Sheets makes it easy to customize your wreaths with any image you like!
Project estimate:
- Wreaths, $1 each
- Cupcake wrappers, on hand or $1
- Halloween ribbon, on hand or $1
- Buttons, on hand or $1
- Construction paper, on hand or $1
- Glue stick, on hand or $1
- Floral wire, on hand or $1
- Paint, papers, tinsel, wire, inks, stamp, tool and adhesives, on hand
- Scrapbooking Attitude Sheets, about $12
Total: about $12 and up
Here’s a detailed breakdown of all of the products used in this project.
Materials
- 3 Scrapbooking Attitude Sheets
- 3 11” Grape Vine Wreaths
- White Cupcake Wrappers
- Halloween Themed Ribbon
- 3 Matching Buttons
- 3 Faux Rhinestones
- Black Spray paint
- Black Construction Paper
- Patterned Coordinating Papers
- Wired Tinsel
- Floral or Craft Wire
- Distress Ink in Marmalade (or orange marker)
- Archival Ink in Black (or black marker or acrylic paint)
Handwriting Text Rubber Stamp - Glue Stick
- Aleene’s Quick Dry Tacky Glue
- Hot Glue Sticks
- Paper Towel
Tools
- Computer with Photo Editing Software (or try an online editor)
- Ink Jet Printer
- Scissors
- Hot Glue Gun
- Chain Nose Pliers
- Floral Wire Cutters
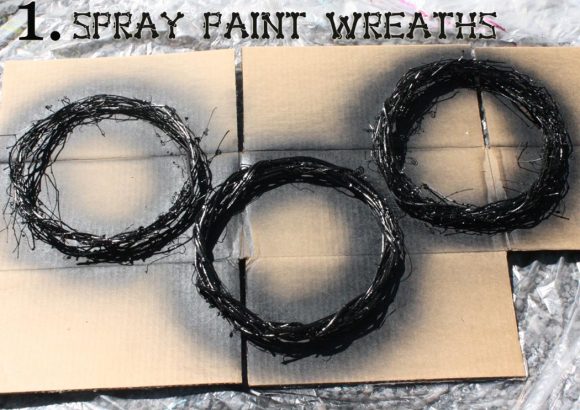
Take the wreaths outside, place them on cardboard, newspaper or sheet plastic and paint generously with black spray paint. Be sure to get into the nooks and crannies!
You need 9 cupcake wrappers in groups of three to form the flowers. Take three wrappers at a time and fold in half. Use scissors to cut them into a six petal flower, repeat two more times. Dab wrappers on orange ink pad or with an orange marker and spread ink with a paper towel. Stamp with black ink and a text stamp. Allow to dry. (When dry, crush the layers up a few times to give them a wrinkled, dimensional look.)
Make three same sized bows using wired ribbon. (Cut the wire to approximately 28-30”.) Flowers are stacked and stapled to centers of bow; buttons are glued in center of each flower along with a faux rhinestone to add a little sparkle.
Cut a 6”-7” segment of floral wire. Slide into back of bow, form a u shape and feed into wreath. Twist wire in back tightly with pliers, cut off excess with wire cutters and tuck under with pliers.
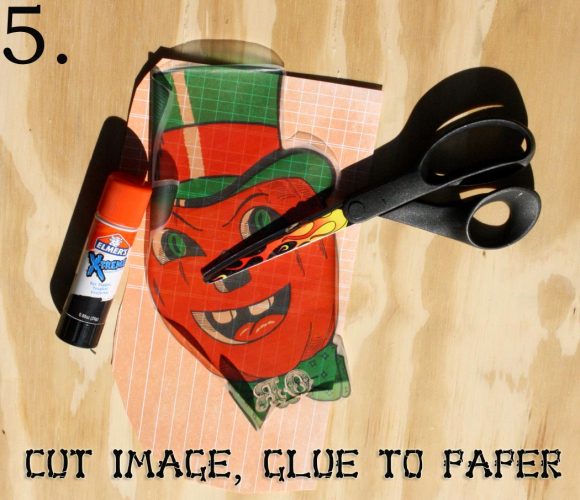
You need three vintage Halloween images printed on Scrapbooking Attitude sheets. Follow the easy instructions on the package to print. Dover Books has a wonderful library of permission free images you can use. You need to size the images to fit inside of your wreaths; mine are all about 9” long and 6” wide. I added text using Photo Editing software; the font is free from DaFont and is called Circus. (Place one word on each image to spell ‘Trick or Treat.’) Print the images on the sheets setting the printer to ‘mirror’ so the words print backwards. Images are cut out and adhered to orange patterned scrapbook paper; this adds some texture and helps bump up the color. Cut the paper to leave a ¼” border around the images. A good quality glue stick, generously and evenly applied to the back of the image works well, remember the back is the slick side upon which you printed!
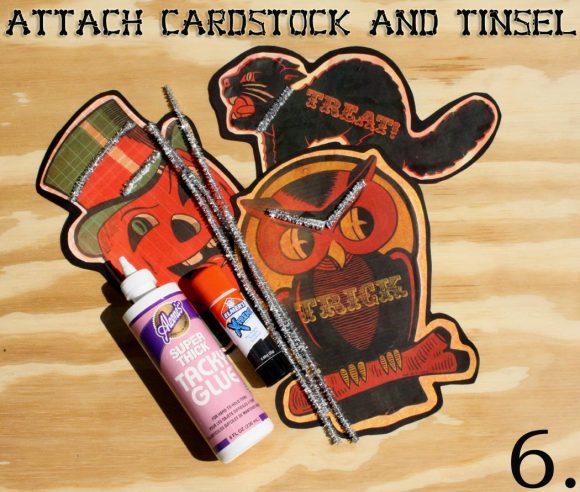
Glue the layered images to some black construction paper, cutting a ¼” border around them. Use Tacky Glue to attach wired tinsel accents to images.
Attach edges of images to wreath using hot glue. Move quickly and avoid glue strings.
Visit our sponsor Scrapbooking Attitude:
- Scrapbooking Attitude Website
- Scrapbooking Attitude on Facebook
- Scrapbooking Attitude on Twitter
- Scrapbooking Attitude on YouTube
Scrapbooking Attitude Projects & Inspiration






8 Comments
Christine Hansen
Oh – how coolio are these??? Loving the flowers and bows – those are my favorite element of the project – and the Scrapbooking Attitude sheets sound like a LOT of fun to play with! Thanks for the great tutorial!
carolyn - homework
Love your project. I would never of thought to make those fun printouts with this product!
Chris Jeffers
This is totally fabulous! After searching for about 10 minutes on the Dover site, I can’t find those exact images. Would you pretty please post the link(s)?Thanks in advance!
Janssen
That is DARLING! I love that retro vibe.
Monika
LOVE this idea! I might have to try to make the flowers with coffee filters. I have about 1000 that need to be put to use! LOL!
Candice
Hi. These are adorable. I love the vintage vibe. Where can I find the cut images that you used. I’ve searched the dover site and online and can’t find a collection. Any help would be appreciated.
heather
Hi everyone! You can find similar images from Dover or Graphics Fairy, but these specific images aren’t available.
http://graphicsfairy.blogspot.com/2012/09/vintage-halloween-clip-art-pumpkin-head.html
http://graphicsfairy.blogspot.com/2012/09/vintage-halloween-image-cute-pumpkin.html
buy at dover: http://store.doverpublications.com/0486998681.html